Set Up Your Site
Get your Batch52 site up and running in just a few minutes. This guide walks you through the essential first steps so customers can start finding — and ordering from — your bakery online.
Get your Batch52 site up and running in just a few minutes. This guide walks you through the essential first steps so customers can start finding — and ordering from — your bakery online.
Overview
When you first sign in to Batch52, your dashboard will guide you through a few quick setup tasks. Think of it like setting up your booth at a farmers market — you need a sign, some products on the table, and a way for people to pay. Let's get everything in place.
Steps
1. Sign in to your dashboard
Head to batch52.com/sign-in and log in with the email and password you used when you created your account. Once you're in, you'll land on your Dashboard — your home base for managing everything.
You'll notice helpful setup banners at the top of your dashboard. These walk you through the essentials and disappear once you've completed each step.
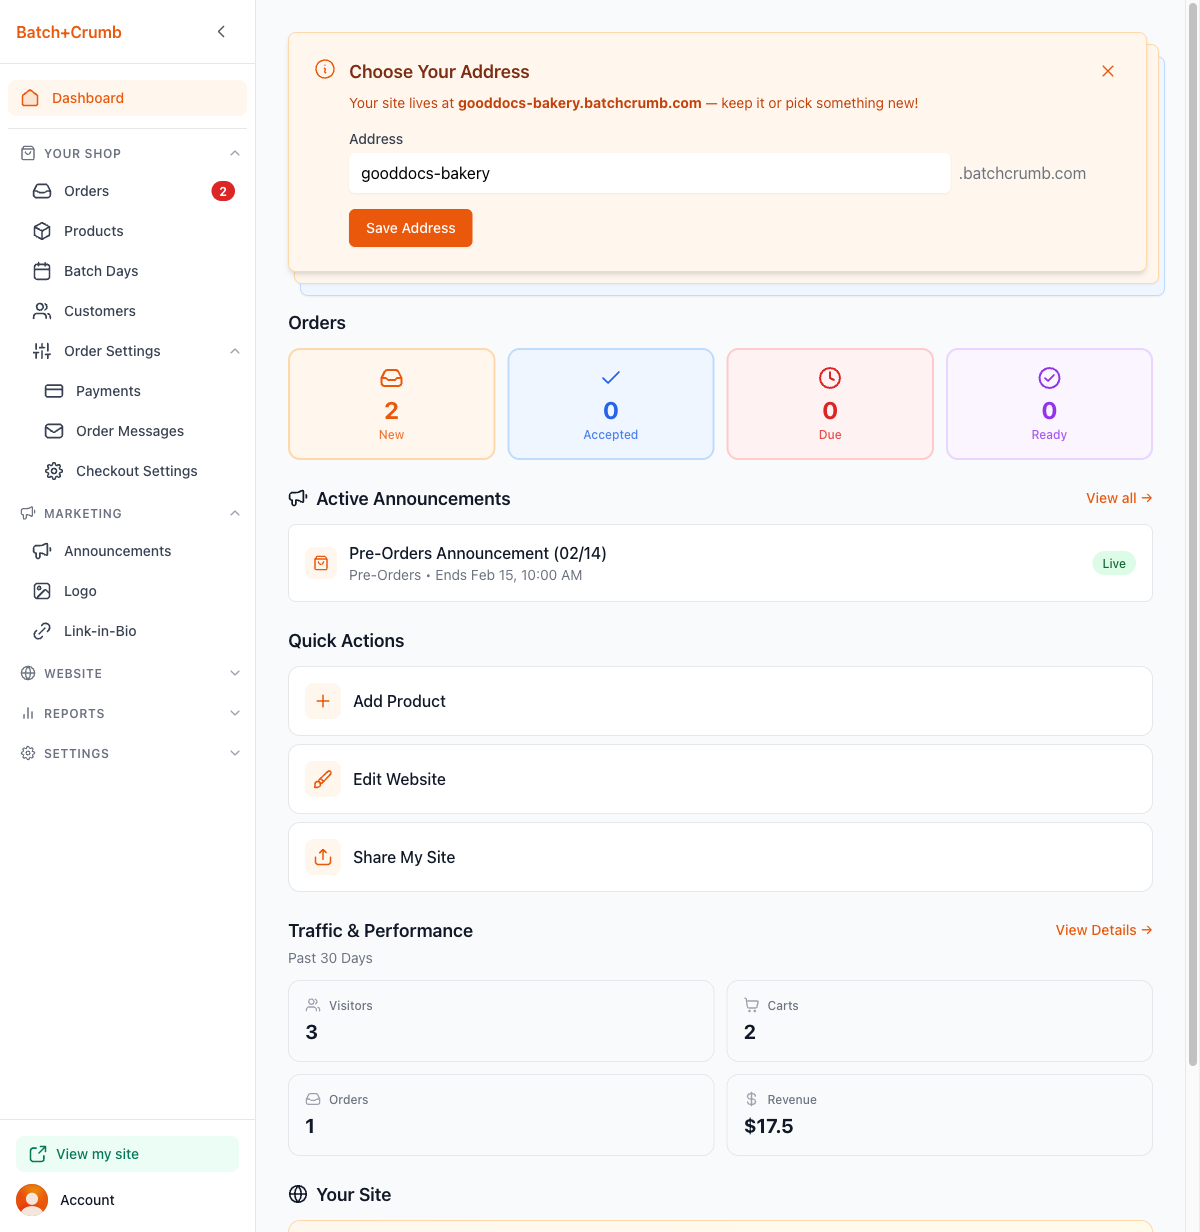
2. Choose your site address
The first banner invites you to Choose Your Address — this is the web address customers will use to find your site. It looks like your-bakery-name.batch52.com.
You can keep the one that was auto-generated, or type in something new (like your business name with dashes between words). Click Save Address when you're happy with it.
3. Fill in your business information
Head to Settings > Business Information in the sidebar (or click the setup banner if you see one).
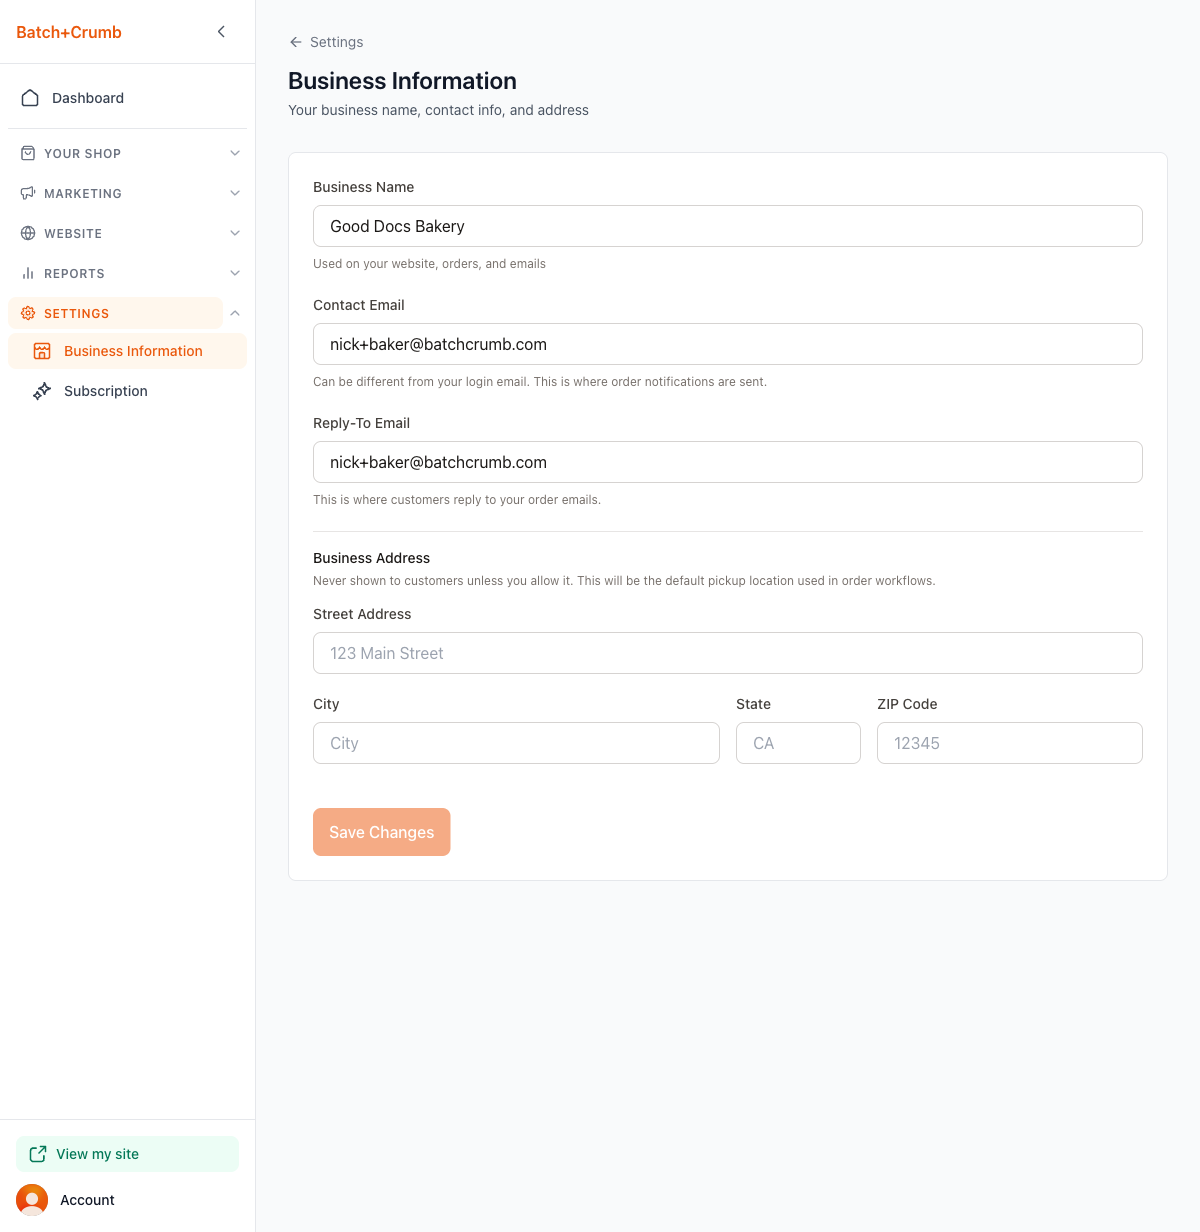
Fill in these details:
- Business Name — This shows up on your website, in order emails, and everywhere your brand appears.
- Contact Email — Where you'll receive order notifications and customer messages. This can be different from your login email.
- Reply-To Email — When customers reply to your order emails, their response goes here.
- Business Address — Your street address, city, state, and ZIP. Don't worry — this is never shown to customers unless you choose to display it. It's used as your default pickup location in order workflows.
Click Save Changes when you're done.
4. Upload your logo
Go to Marketing > Logo in the sidebar. You'll see a placeholder with your initials. Click Upload Logo and choose an image file from your computer.
![]()
Your logo appears across your website, in order confirmation emails, and on your link-in-bio page — so pick something that represents your brand well.
5. Customize your website look
Click Website > Website Editor in the sidebar (or use the Edit Website quick action on your dashboard). This opens a live preview of your site with a customization panel on the left.
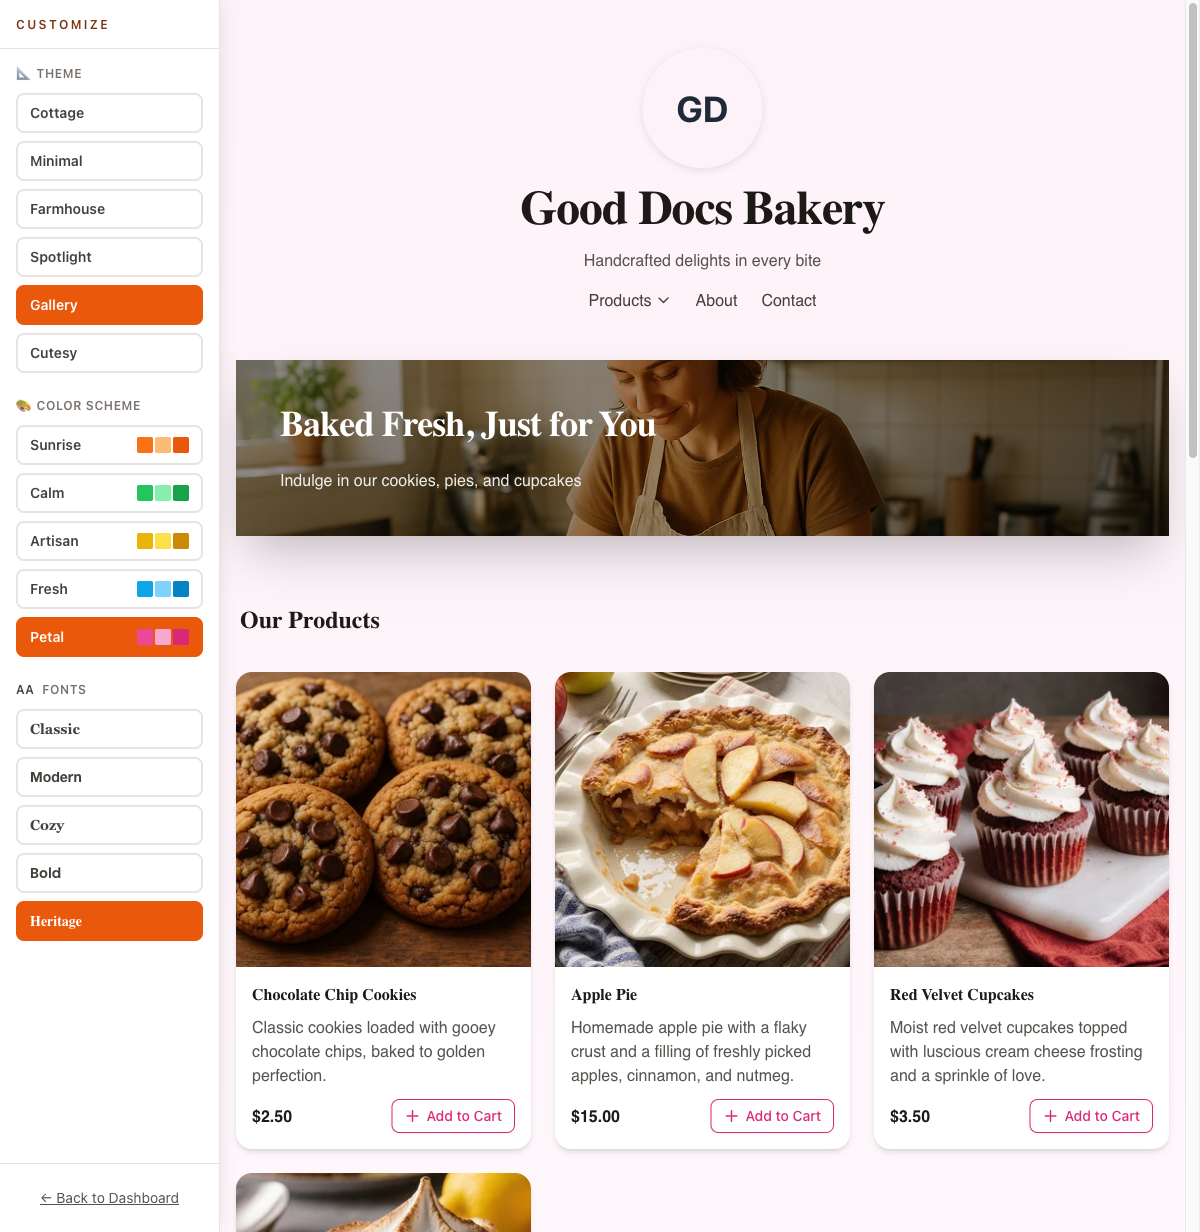
You can choose from:
- Theme — Pick a layout style: Cottage, Minimal, Farmhouse, Spotlight, Gallery, or Cutesy.
- Color Scheme — Set your site's color palette: Sunrise, Calm, Artisan, Fresh, or Petal.
- Fonts — Choose the typography vibe: Classic, Modern, Cozy, Bold, or Heritage.
Click directly on any text on the preview (like your headline or business description) to edit it right there. Changes save automatically as you go.
6. Add your first product
Go to Your Shop > Products in the sidebar and click the + Add Product button. Fill in your product name, a short description, a price, and upload a photo. Choose whether customers can Add to Cart (for direct ordering) or Contact for Info (for custom/inquiry-based items).
For more details on adding products, see Add a Product.
7. Set up a payment method
Head to Your Shop > Order Settings > Payments in the sidebar. Click + Add Method to tell customers how they can pay you — options like Venmo, Cash App, Zelle, cash at pickup, and more.
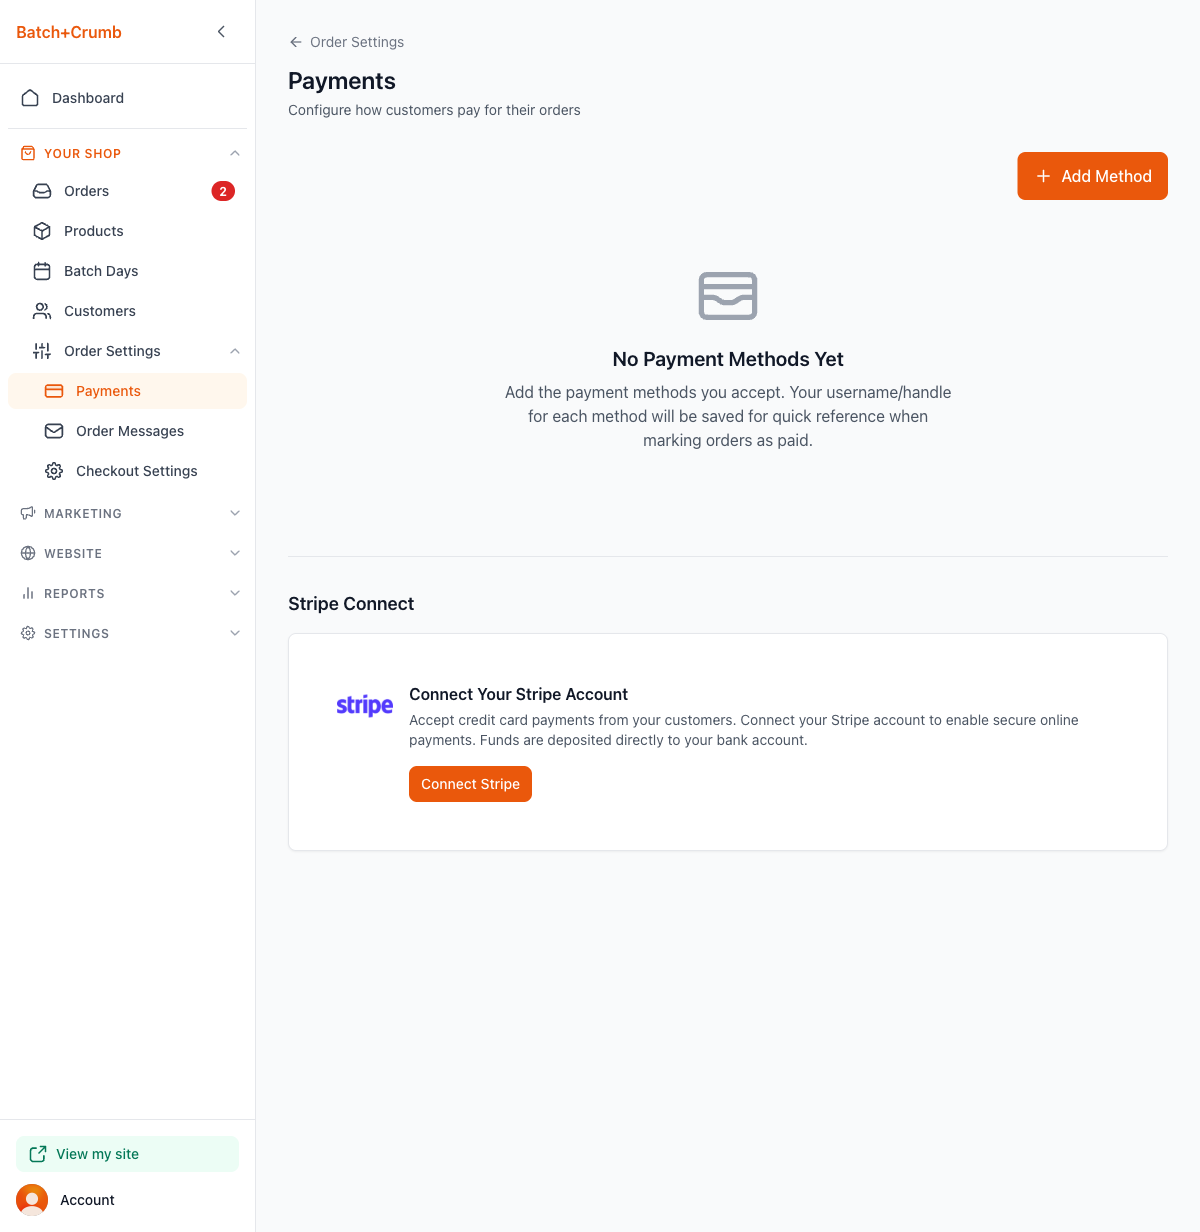
This is important so customers know what to expect when they place an order.
8. Preview and share your site
Once you've completed these steps, click View my site at the bottom of the sidebar (or the View Site button in the "Your Site" section on your dashboard) to see what customers will see.
When you're ready to share, use the Share My Site button on your dashboard or the Share Link button — it copies your site URL to the clipboard so you can paste it into Instagram, Facebook, text messages, or anywhere else.
Tips
- You don't need to finish everything in one sitting. Your progress saves as you go, and you can always come back to tweak things later.
- The setup banners on your dashboard are a handy checklist — dismiss them as you complete each step.
- If you're not sure about your site address, pick something simple and memorable. You can always change it later under Website > Domain & URL.
- Adding a logo and choosing a color scheme makes a big difference — even a simple logo helps customers recognize your brand.