Manage Your Link-in-Bio Page
Create a Linktree-style page with all your important links — perfect for sharing in your Instagram, TikTok, or other social media bios.
Create a Linktree-style page with all your important links — perfect for sharing in your Instagram, TikTok, or other social media bios.
Overview
Your Link-in-Bio page gives you one simple URL to share everywhere. Instead of choosing between your website, Instagram, or Etsy shop when someone asks "where can I find you?", you can share a single link that leads to all of them. It's especially handy for social media bios where you're limited to just one link.
Steps
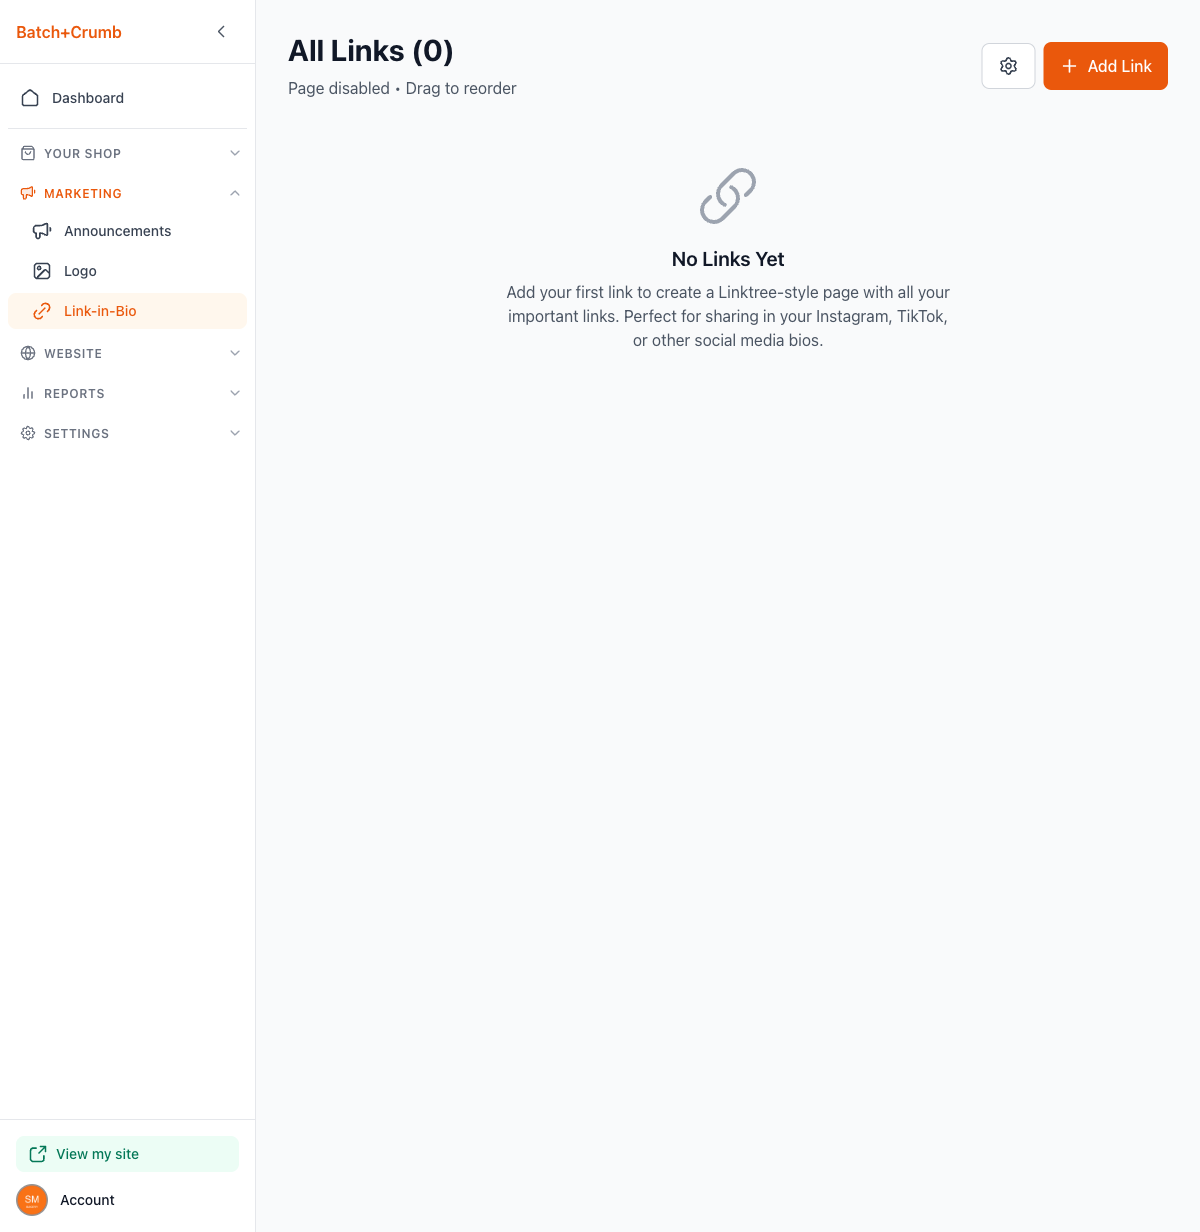
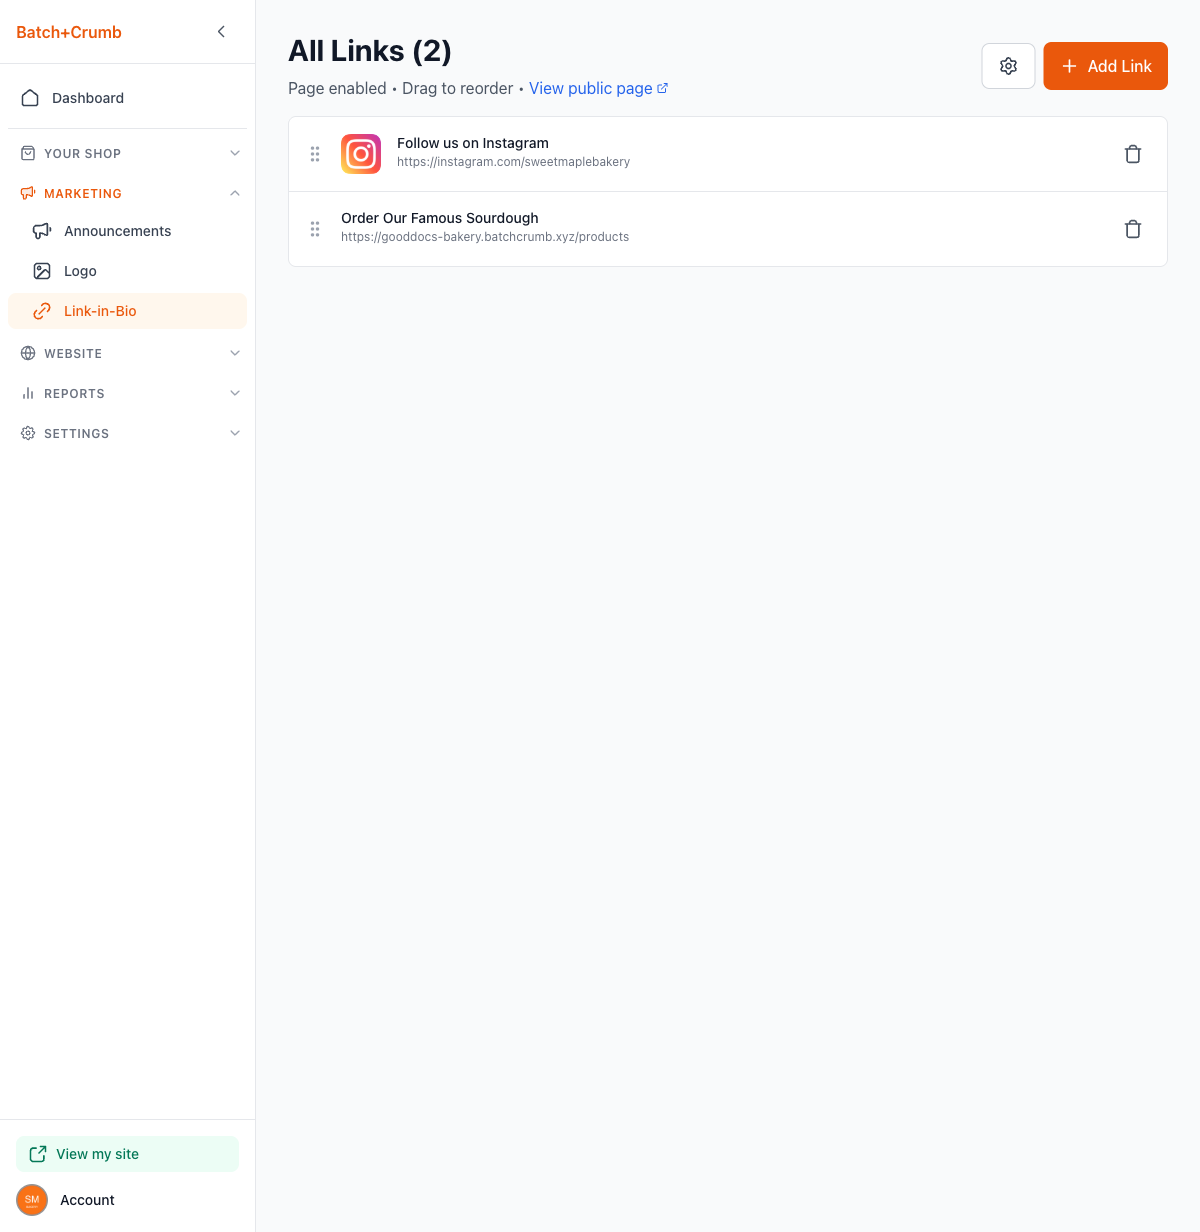
1. Go to the Link-in-Bio page
Direct link: Open this page
From your admin sidebar, click Marketing, then click Link-in-Bio.
2. Enable your Links Page
Before anyone can see your links page, you need to turn it on.
- Click the settings gear icon (top right, next to the + Add Link button)
- Toggle Enable Links Page to on
- Optionally, set a custom Page Title (defaults to "Our Business Links")
- Choose whether to Show in Site Navigation — when enabled, a "Links" button appears in your site's navigation menu
- Click Save Settings
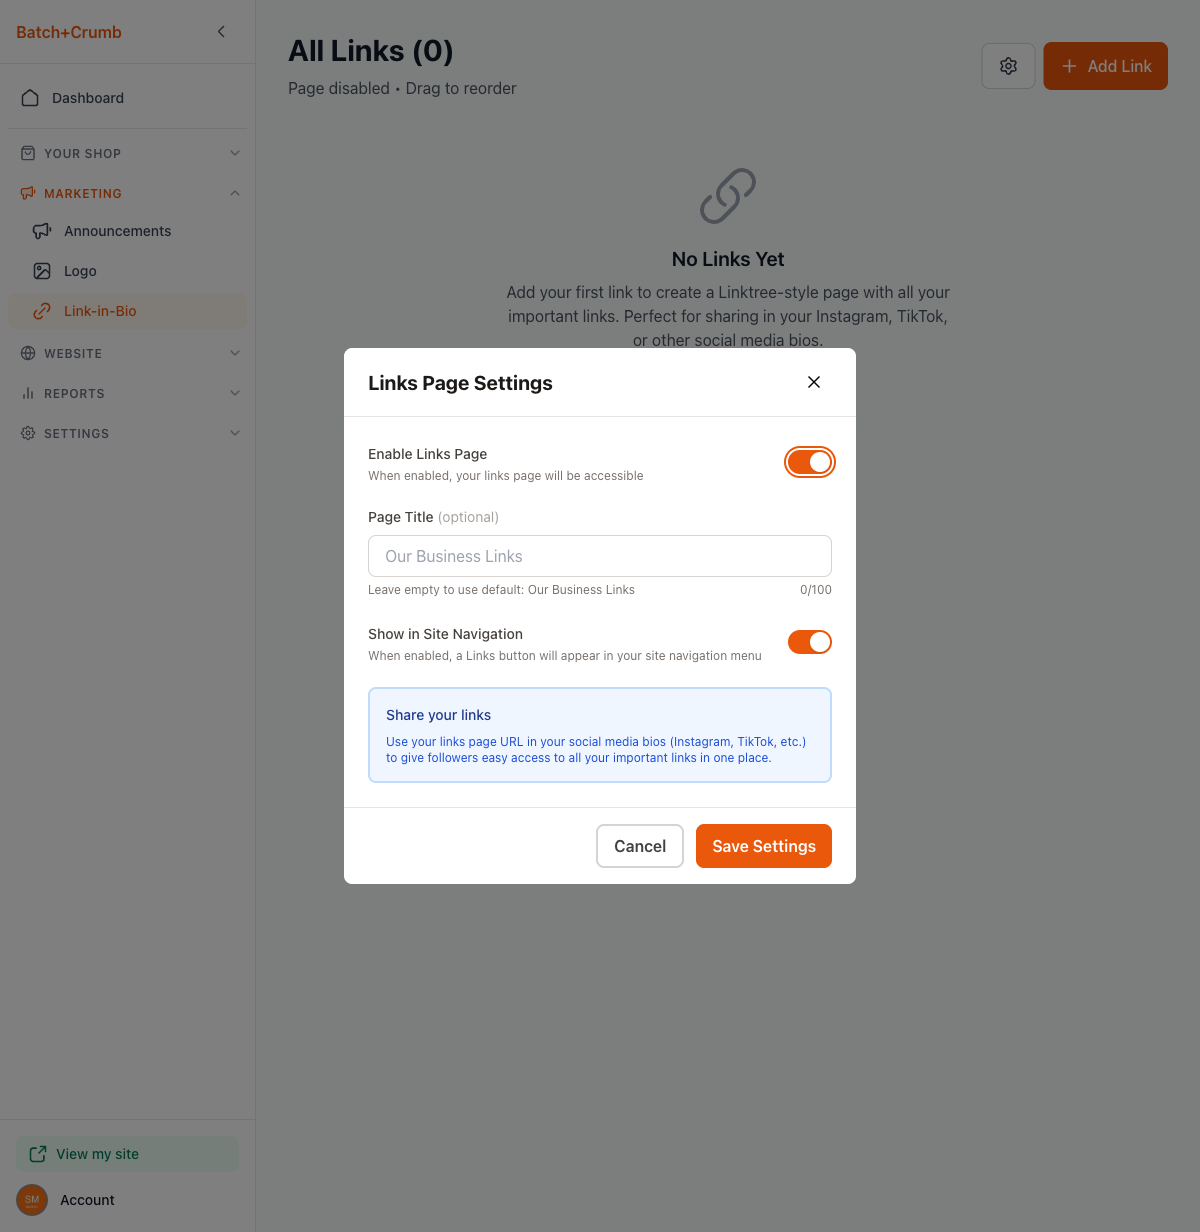
Once enabled, you'll see a View public page link in the subtitle area so you can preview what visitors see.
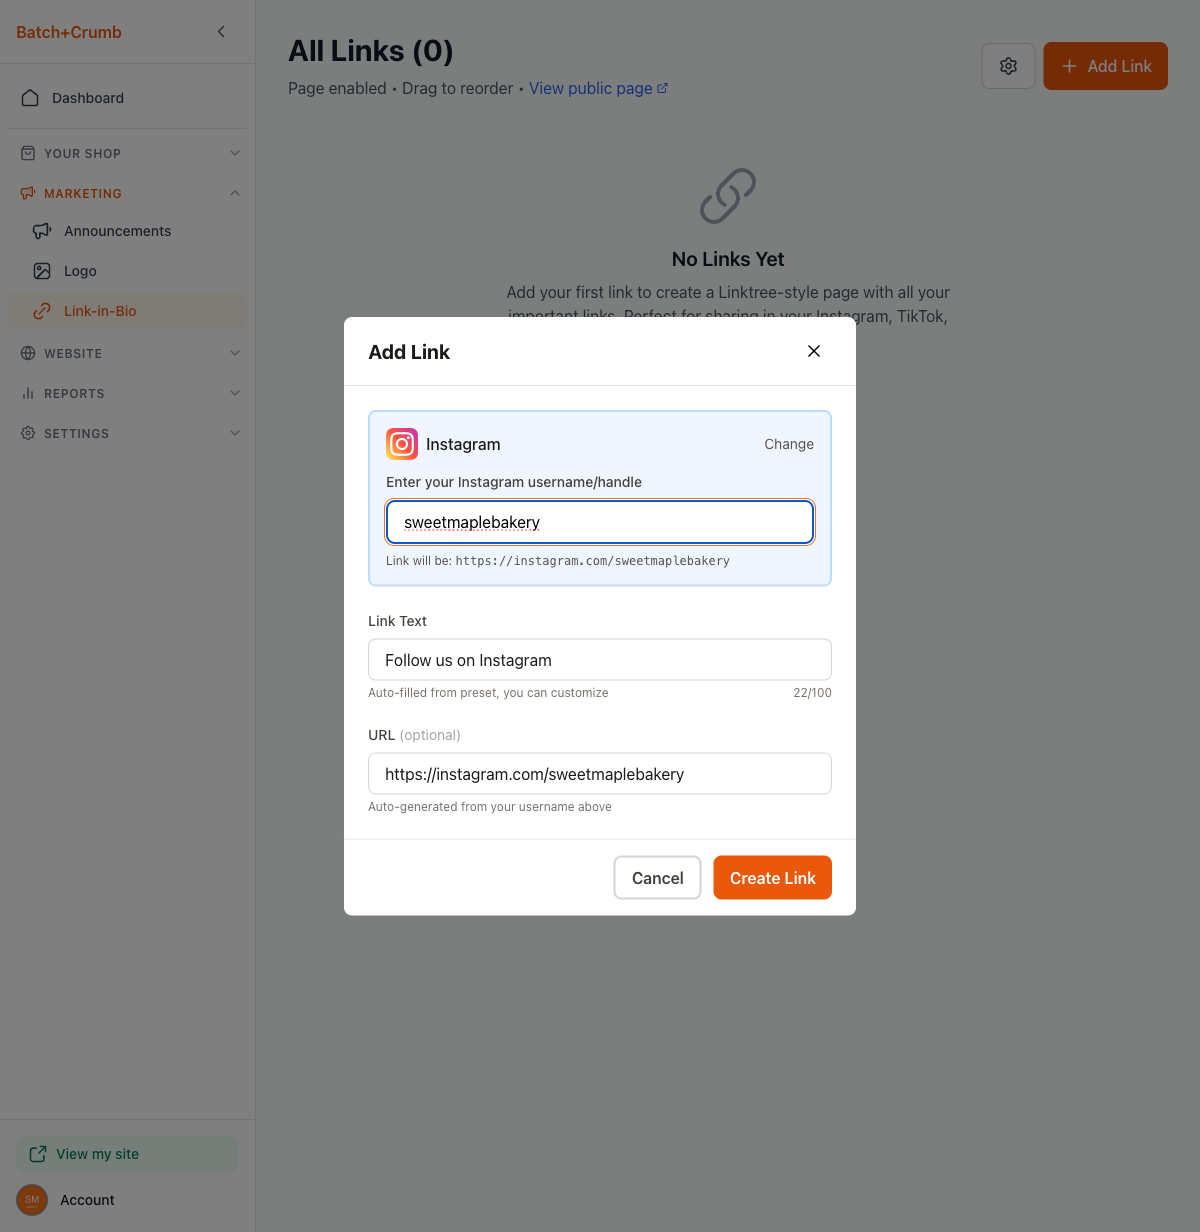
3. Add a social media link (quick add)
The fastest way to add social links is with the Quick Add buttons.
- Click + Add Link
- Under Quick Add Social Link, click the platform you want (Instagram, Facebook, TikTok, Twitter/X, YouTube, Pinterest, Etsy, WhatsApp, Telegram, Venmo, or Cash App)
- Enter your username or handle — the URL is generated automatically
- The Link Text is pre-filled (e.g., "Follow us on Instagram") but you can customize it
- Click Create Link
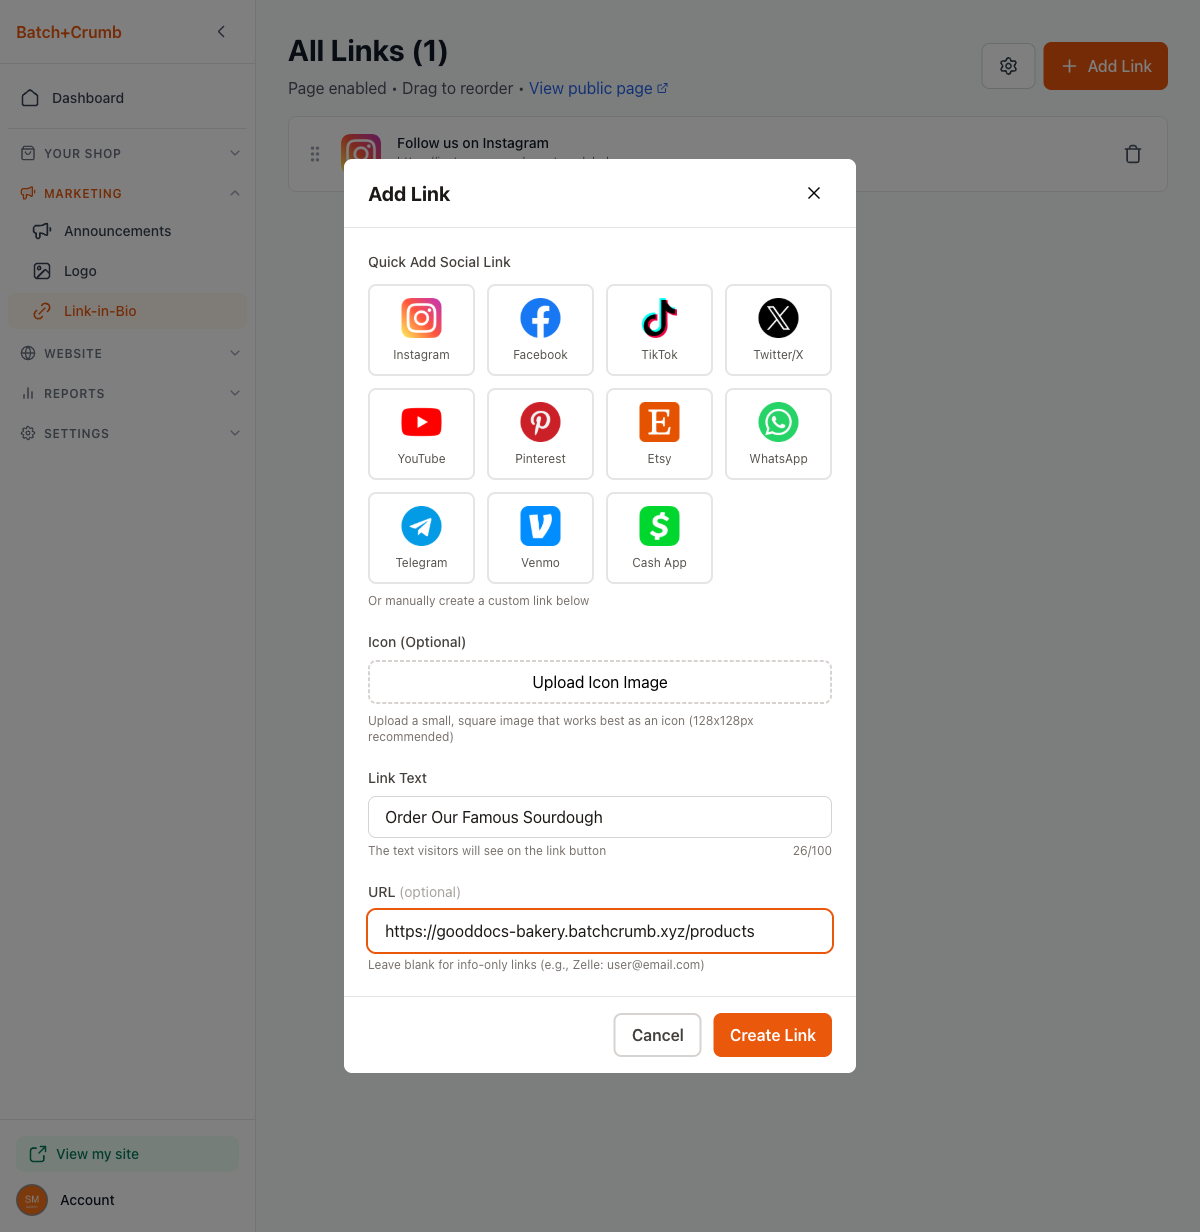
4. Add a custom link
For links that aren't social media — like your product page, an order form, or a Zelle payment address — create a custom link.
- Click + Add Link
- Scroll past the Quick Add Social Link section
- Optionally upload an Icon image (128x128px recommended)
- Enter your Link Text — this is what visitors see on the button (e.g., "Order Our Famous Sourdough")
- Enter the URL — or leave it blank for info-only links (e.g., "Zelle: mybakery@email.com")
- Click Create Link
5. Manage your links
Once you have links added, they appear in a list on the Link-in-Bio page. From here you can:
- Reorder links by dragging the handle (six dots) on the left side of each link
- Edit a link by clicking on it
- Delete a link by clicking the trash icon on the right
6. Share your links page
Your links page lives at a URL like yourbusiness.batch52.com/links. Copy this URL and paste it into:
- Your Instagram bio
- Your TikTok bio
- Your Facebook page
- Anywhere else you want to share all your links in one place
Tips
- Use the Quick Add buttons for social media — they automatically format the URL so you don't have to remember the exact link format
- You can leave the URL blank on a custom link to create an info-only entry, like "Zelle: mybakery@email.com" — great for sharing payment info without linking anywhere
- Put your most important links at the top by dragging them into position
- Keep your Page Title short and friendly — it's the first thing visitors see
- If you turn off Show in Site Navigation, your links page still works at its URL — it just won't show up in your site's menu