Update Order Status
Move orders through each stage — from new to accepted to ready to completed — and notify your customers along the way.
Move orders through each stage — from new to accepted to ready to completed — and notify your customers along the way.
Overview
As you work through your orders, you'll want to update their status so you (and your customers) know where things stand. Batch52 gives you two ways to do this: quick-action buttons that guide you through the natural flow, or a manual Change Status option when you need to jump to a specific status. Each status change can optionally send your customer an email or text message to keep them in the loop.
Steps
1. Open the order you want to update
Direct link: Open this page
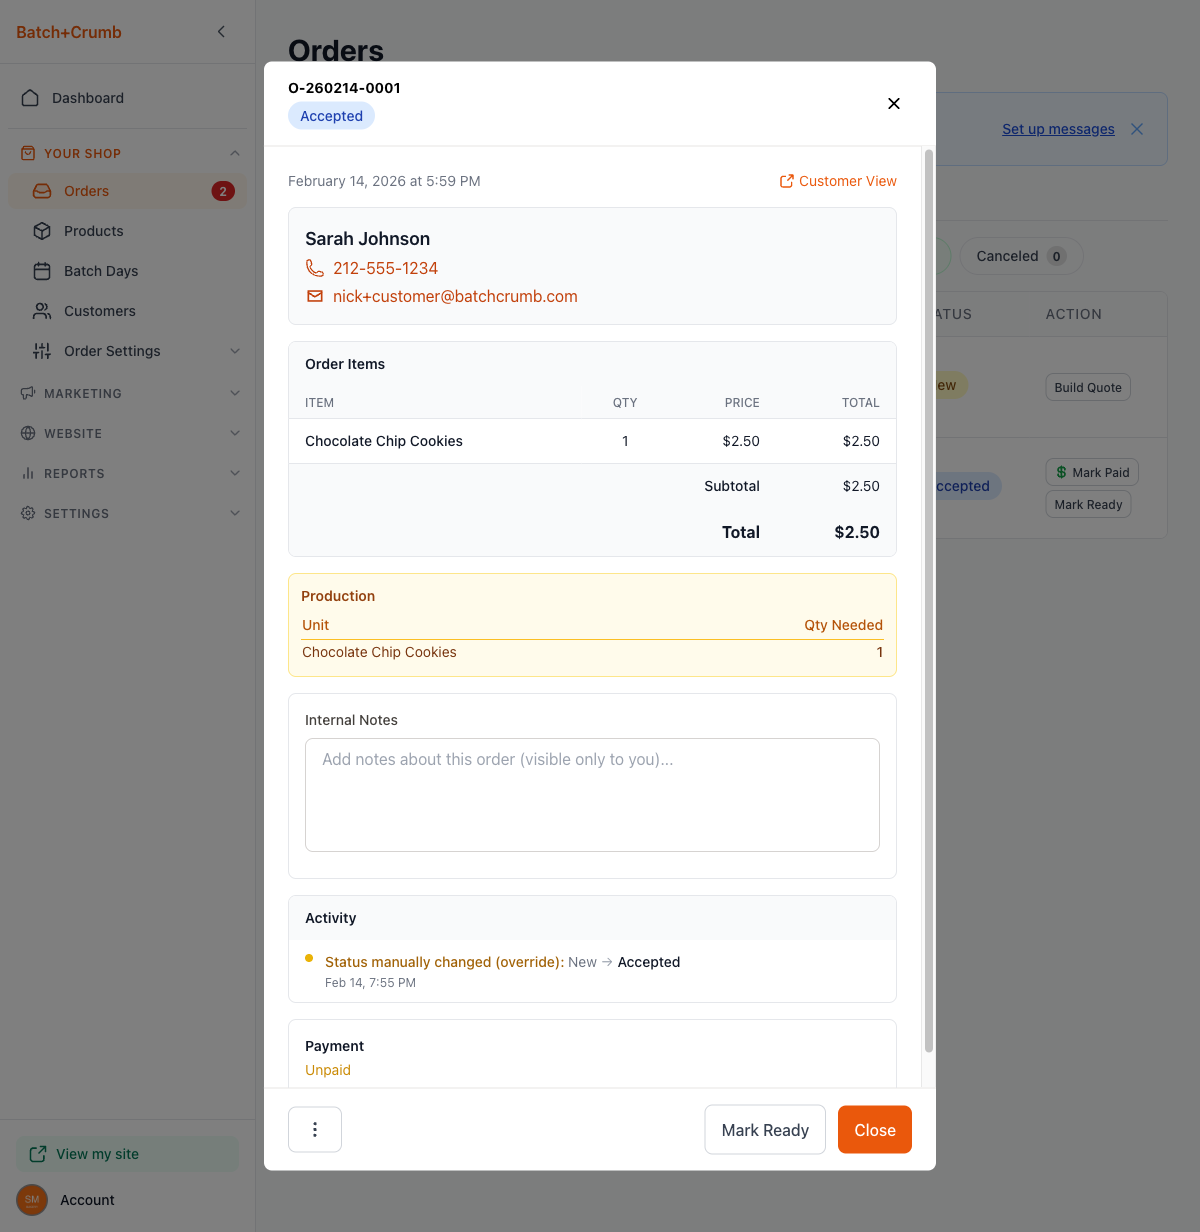
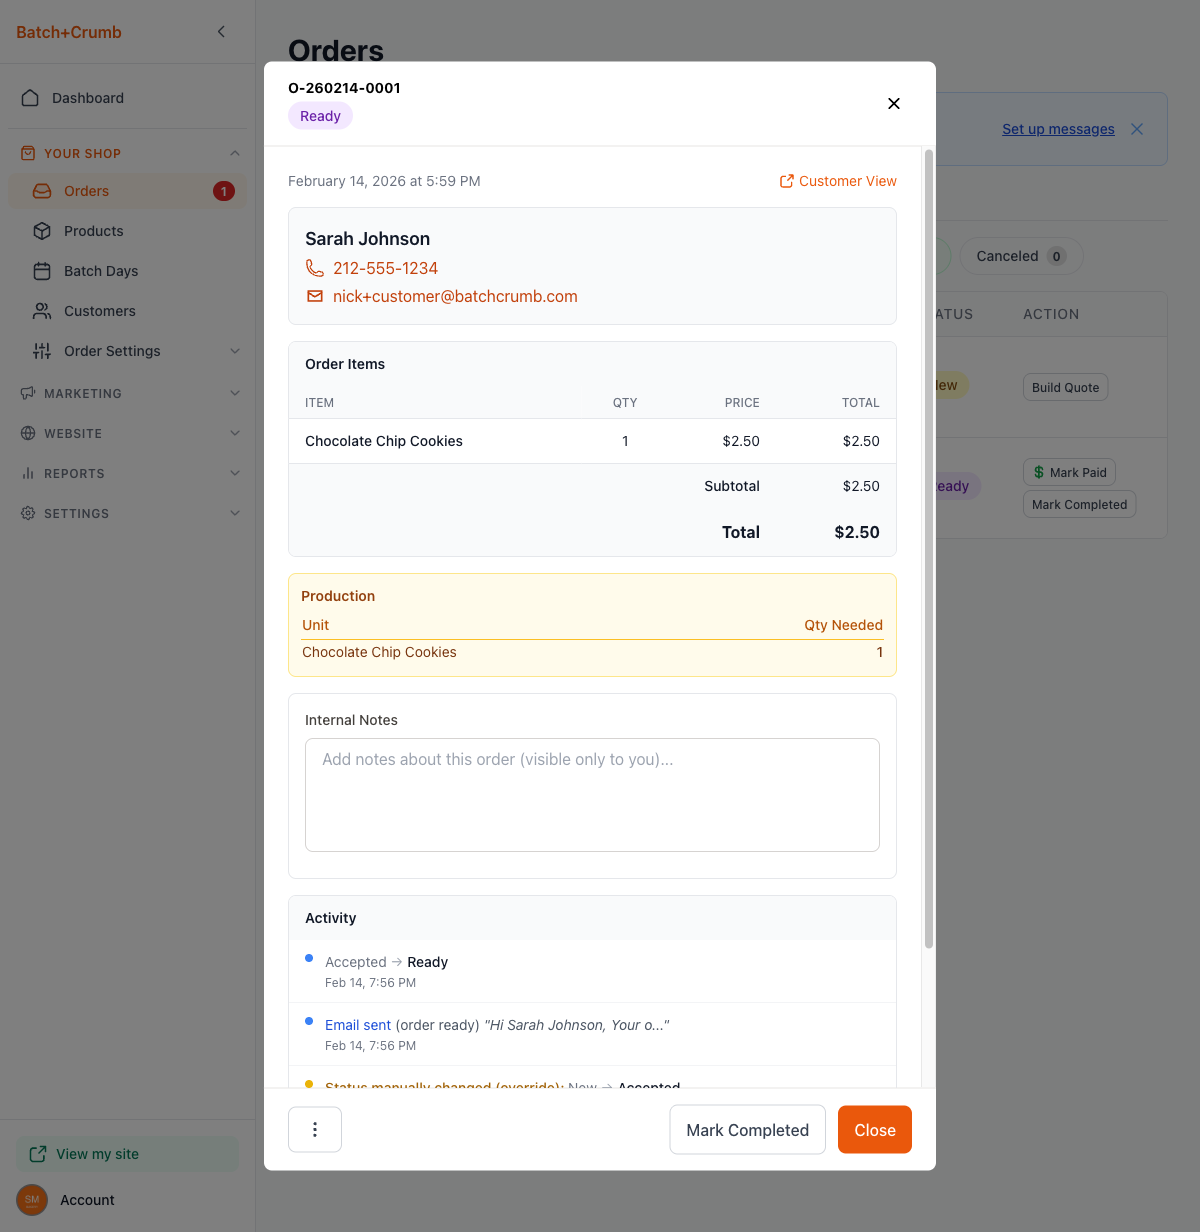
From the Orders page, click on any order row to open the order detail view. You'll see the current status badge at the top (for example, New).
2. Use the quick-action button to advance the status
At the bottom of the order detail view, you'll see a button for the next logical step in the order's journey. The button changes depending on the current status:
- New → shows Send Invoice (to request payment)
- Accepted → shows Mark Ready
- Ready → shows Mark Completed
These buttons walk you through the most common flow without needing to think about which status comes next.
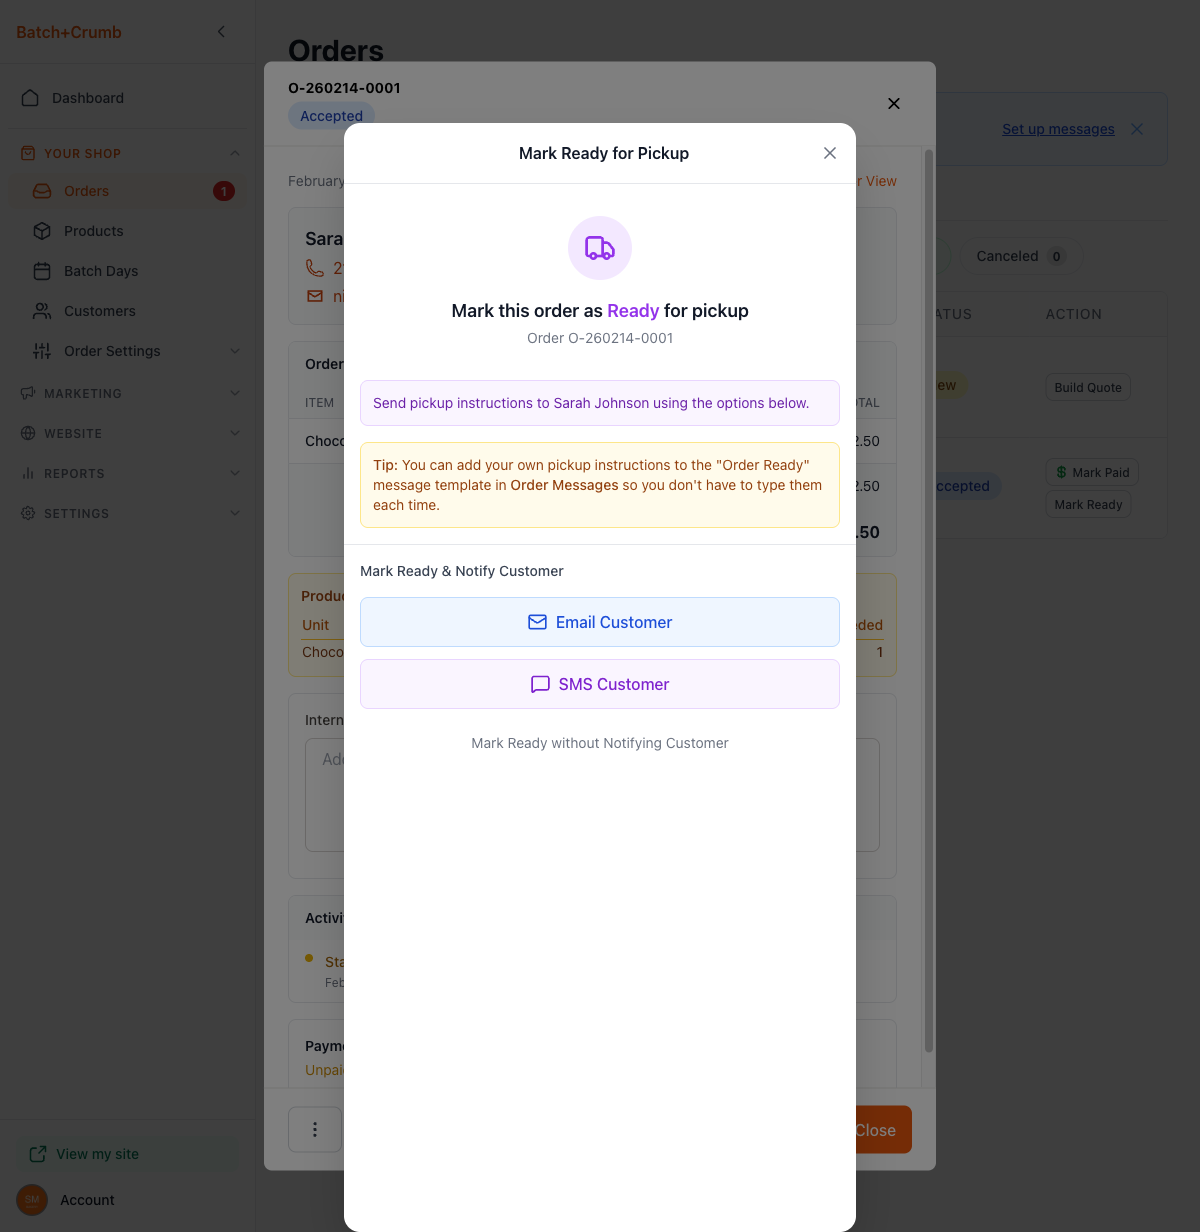
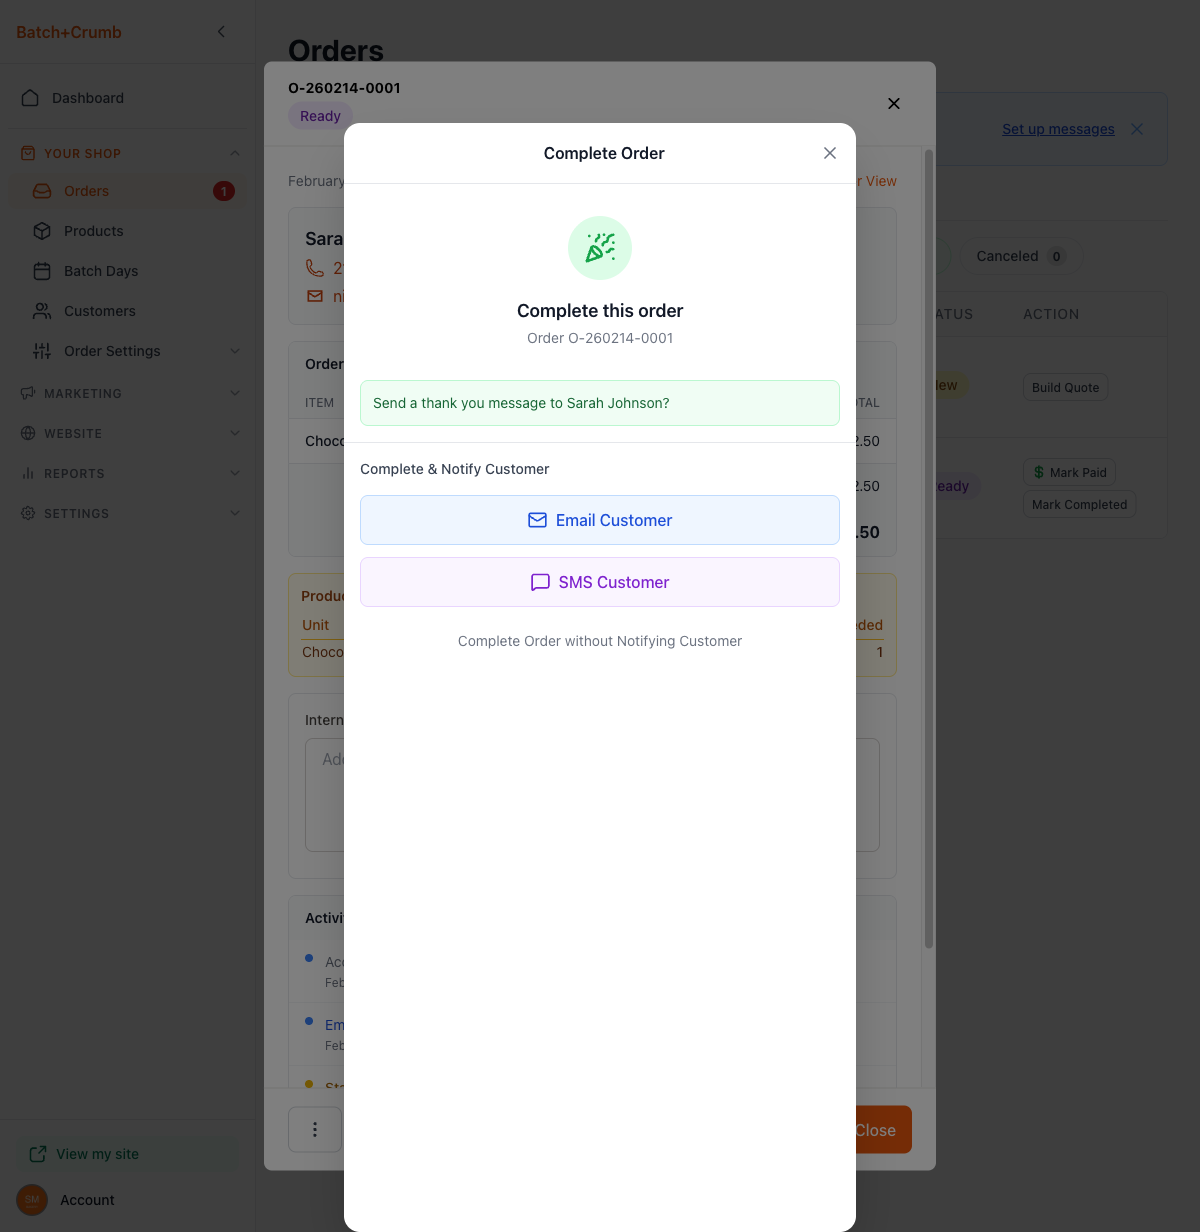
3. Choose whether to notify your customer
When you click Mark Ready or Mark Completed, a dialog pops up asking if you'd like to notify your customer. You have three options:
- Email Customer — Opens an email composer with a pre-written message you can review and edit before sending.
- SMS Customer — Send a text message instead.
- Mark Ready without Notifying Customer (or Complete Order without Notifying Customer) — Update the status silently.
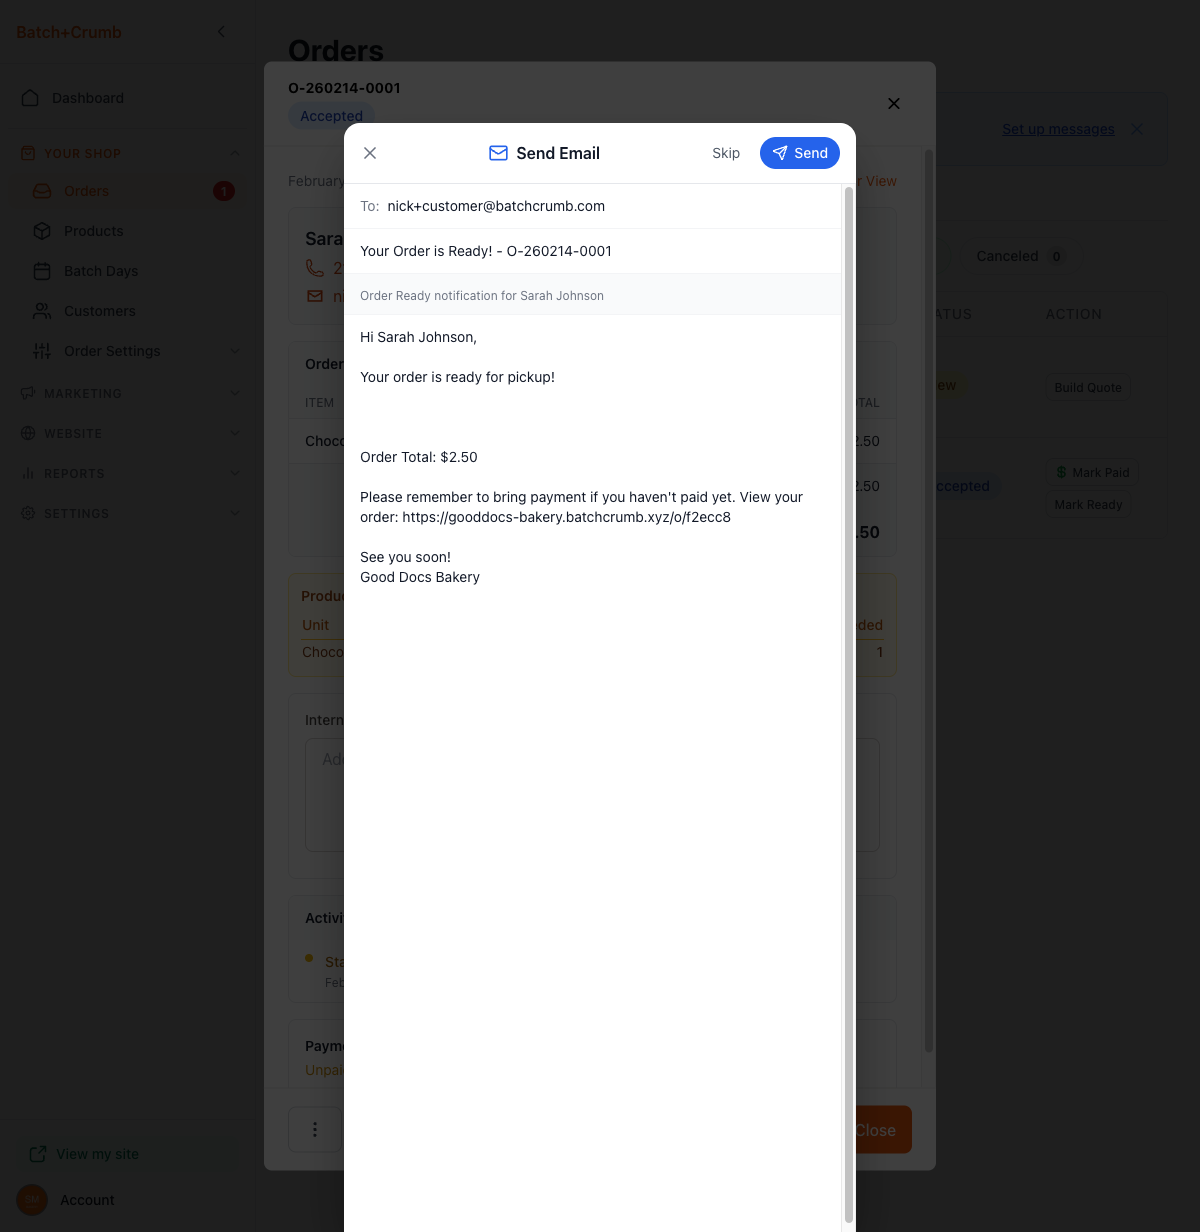
4. Review and send the notification email
If you choose Email Customer, you'll see a pre-filled email with the customer's name, order total, and a link where they can view their order details. You can edit the subject line and message body before sending.
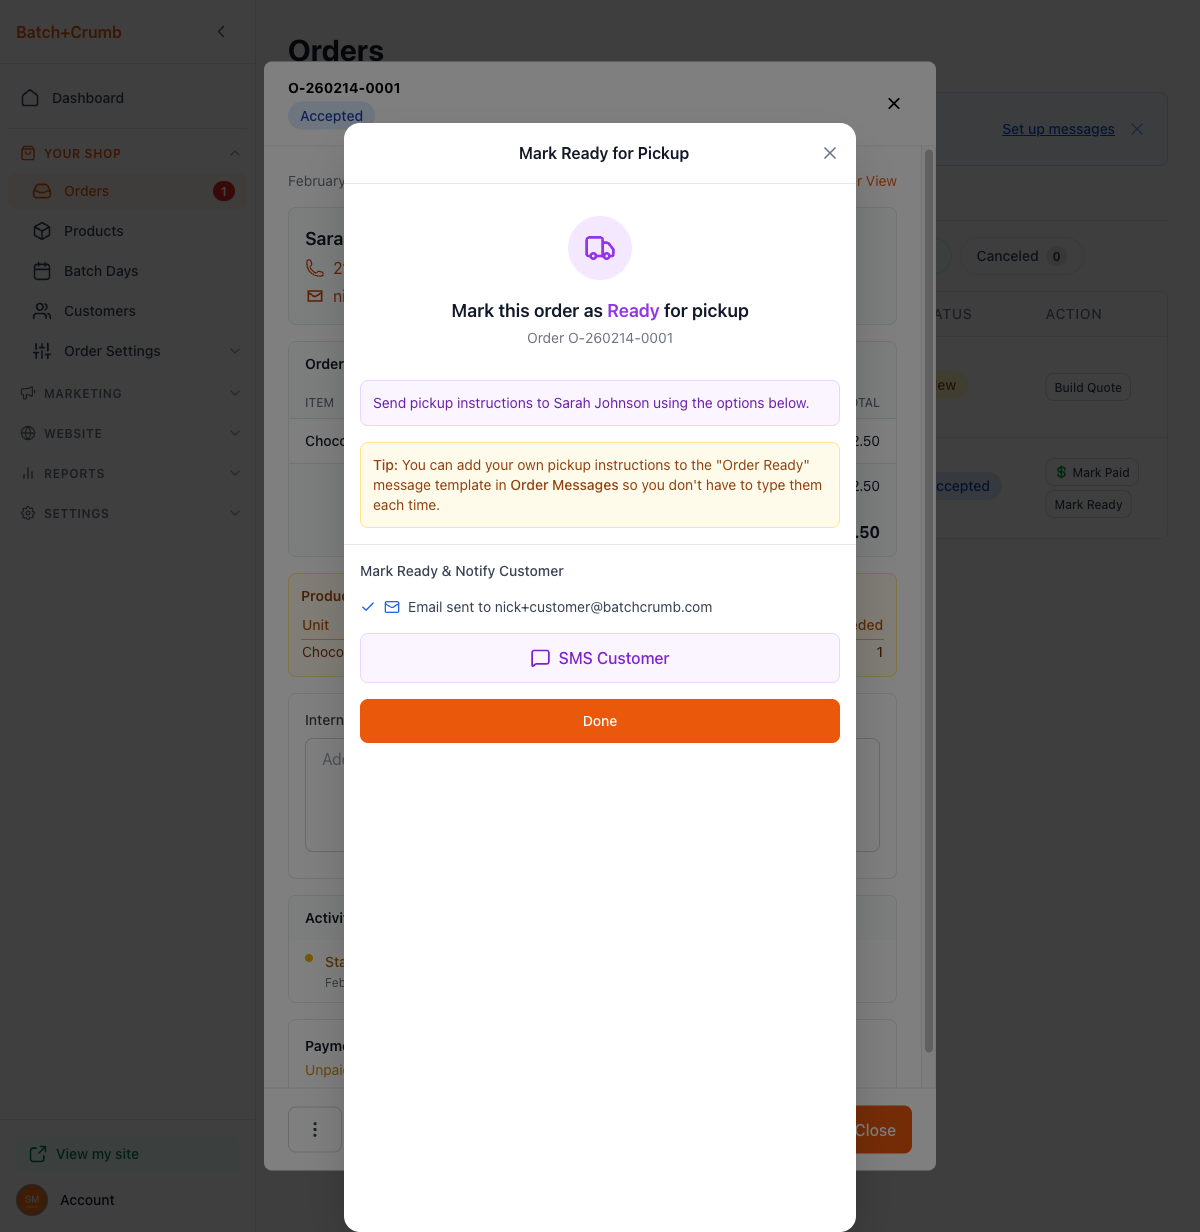
After sending, you'll see a confirmation with a checkmark showing the email was delivered. You can still send an SMS too, or click Done to finish.
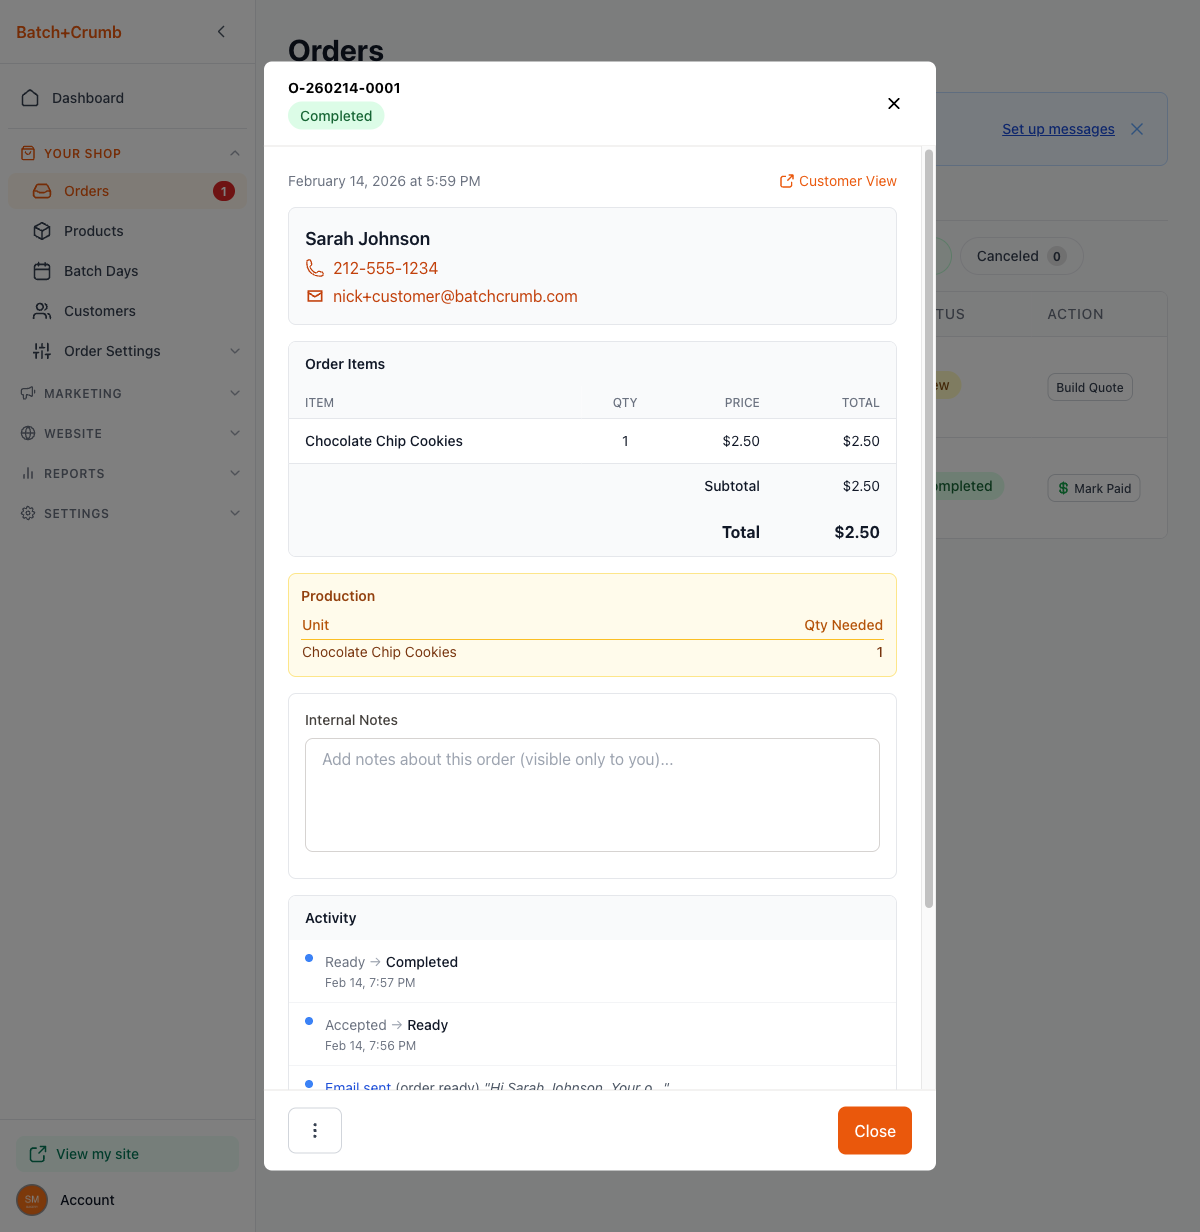
5. See the updated status and activity log
Once you finish, the order detail view updates to show the new status badge and the Activity section at the bottom logs every change — including status transitions and any emails or texts you sent.
6. Complete the order
When the customer picks up their order, click Mark Completed. You'll see the same notification options — send a thank you email, a text, or just mark it done quietly.
7. Change status manually (if needed)
If you need to jump to a specific status — say, to correct a mistake or skip a step — open the order, click the Actions menu (⋮), and choose Change Status. You'll see all six statuses as buttons. Pick the one you want, and the order moves there immediately.
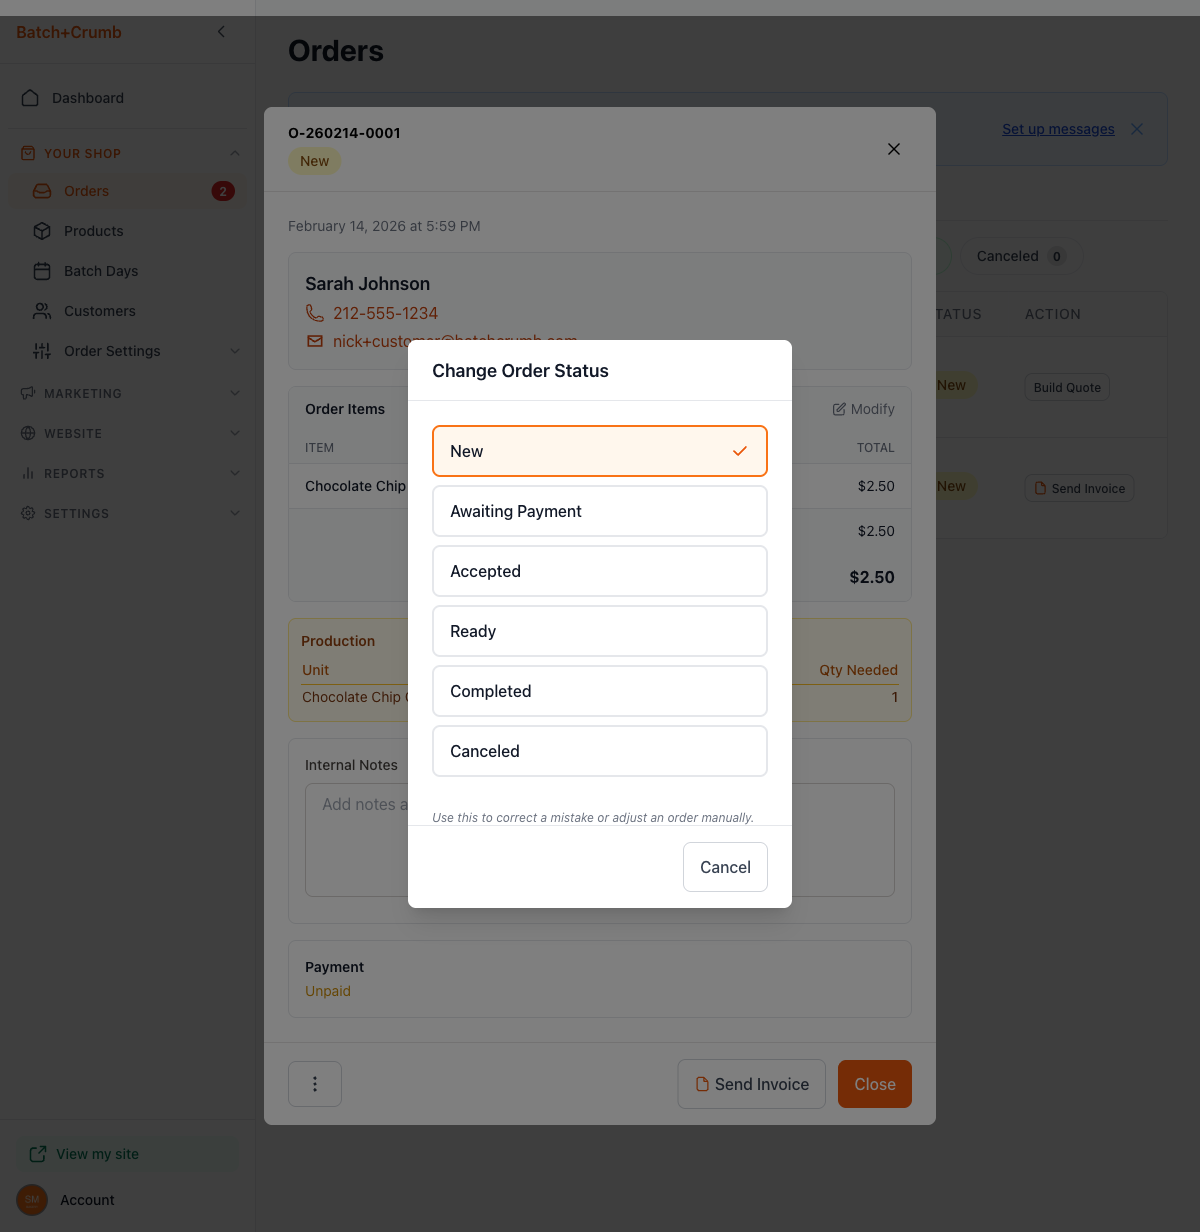
This is labeled as a manual override and won't prompt you to notify the customer, so use the quick-action buttons for your normal workflow.
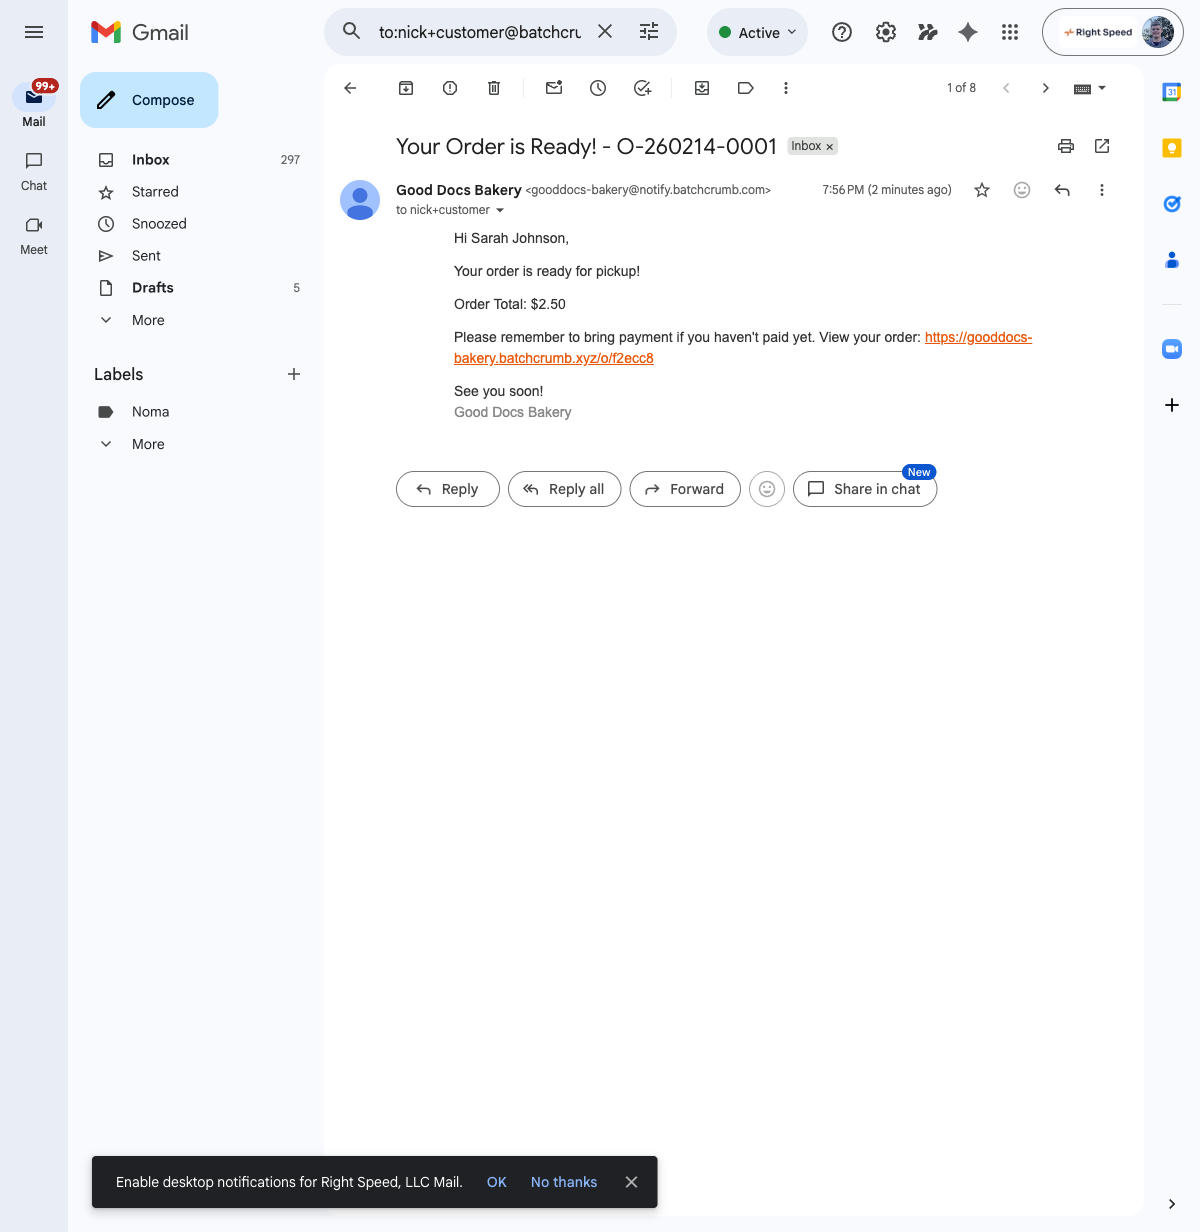
What your customer sees
When you send a status notification email, your customer receives a message from your bakery name with the order details and a link to view their order online.
Tips
- Use the quick-action buttons (Mark Ready, Mark Completed) for your everyday workflow. They guide you through each step and prompt you to notify your customer.
- The Change Status option in the actions menu is best for fixing mistakes — like if you accidentally marked an order as Completed too soon.
- You can customize what the notification emails say by going to Order Settings → Order Messages. Set up your pickup instructions once, and they'll be included every time you mark an order as ready.
- The Activity log at the bottom of each order keeps a record of every status change and message sent — handy if you need to check when something happened.
- Quick-action buttons in the order list (like Mark Paid and Mark Ready) let you take action without opening the order detail view, which is a real time-saver on busy days.