View and Manage Orders
See all your incoming orders in one place, filter by status, and take action on each one.
See all your incoming orders in one place, filter by status, and take action on each one.
Overview
When a customer places an order through your shop, it shows up on the Orders page. This is your home base for staying on top of what needs to be baked, what's ready for pickup, and who still needs to pay. You can filter orders by status, view full order details, and take actions like sending invoices or updating statuses — all from one screen.
Steps
1. Go to your Orders page
Direct link: Open this page
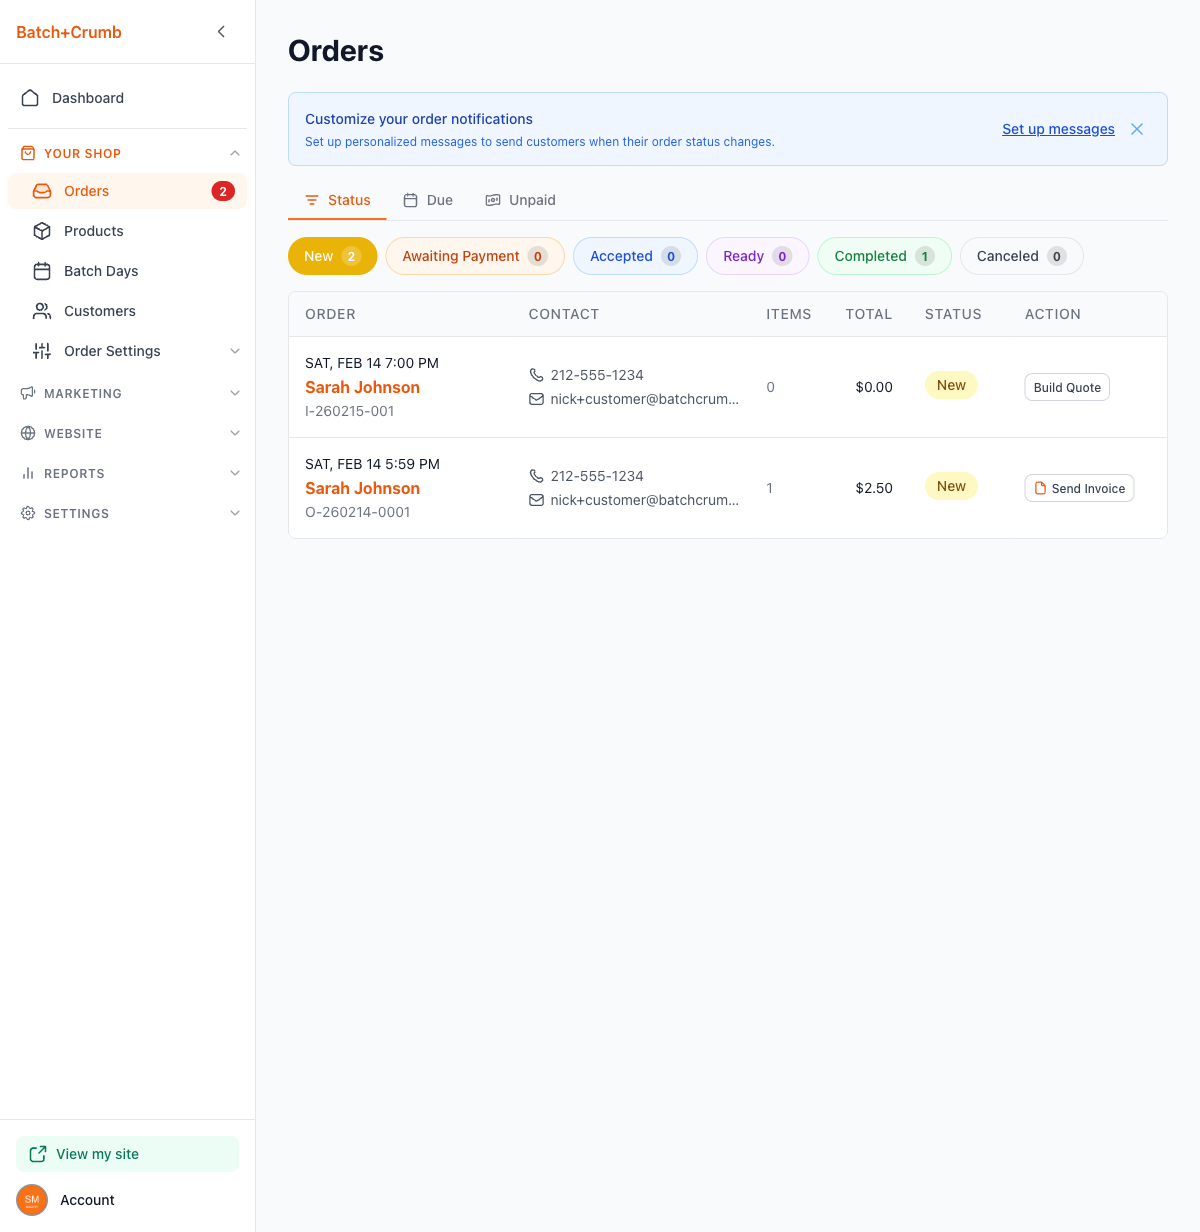
From the left sidebar, click Orders under Your Shop. You'll land on the Status tab, which is the default view.
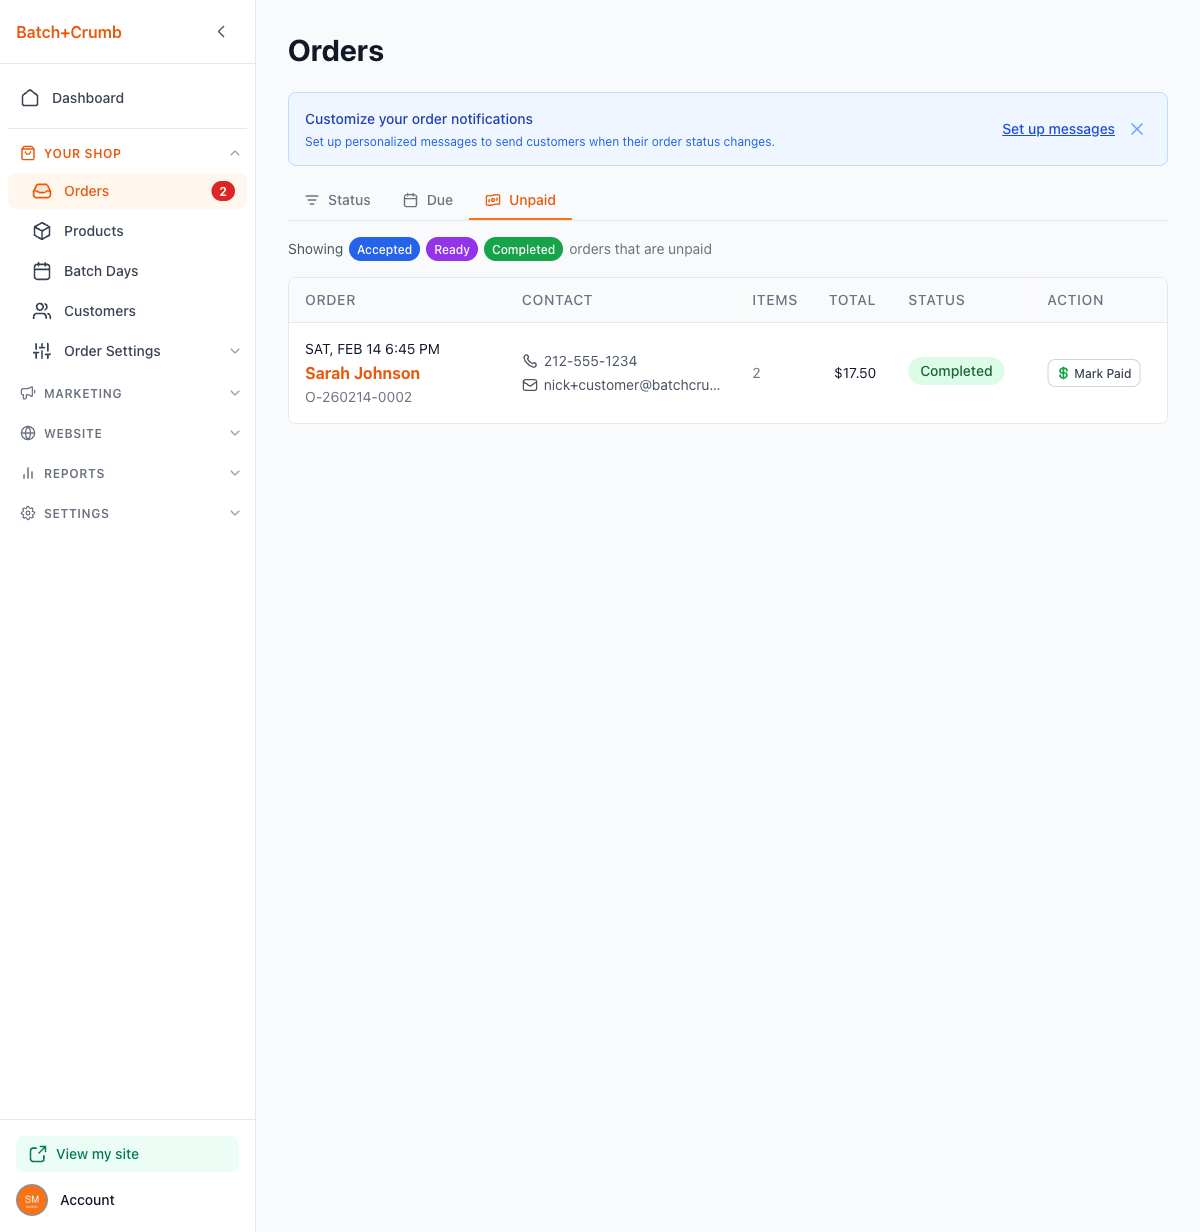
2. Understand the three view tabs
At the top of the page, you'll see three tabs that give you different ways to look at your orders:
- Status — The default view. Shows all orders grouped by their current status (New, Awaiting Payment, Accepted, Ready, Completed, or Canceled). This is where you'll spend most of your time.
- Due — Shows orders grouped by their due date. Helpful if you use due dates to plan your baking schedule. If you haven't set up due dates yet, this tab will show you how to get started.
- Unpaid — Shows only Accepted, Ready, and Completed orders that haven't been marked as paid yet. A quick way to see who still owes you.
3. Filter by status
On the Status tab, you'll see colored buttons for each order status:
- New (orange) — Orders that just came in and need your attention
- Awaiting Payment (gold) — Orders waiting for the customer to pay
- Accepted (blue) — Orders you've confirmed and are working on
- Ready (purple) — Orders that are baked and ready for pickup
- Completed (green) — Orders that are done and picked up
- Canceled (gray) — Orders that were canceled
Each button shows a count so you can see at a glance how many orders are in each stage. Click any button to filter the list to just that status.
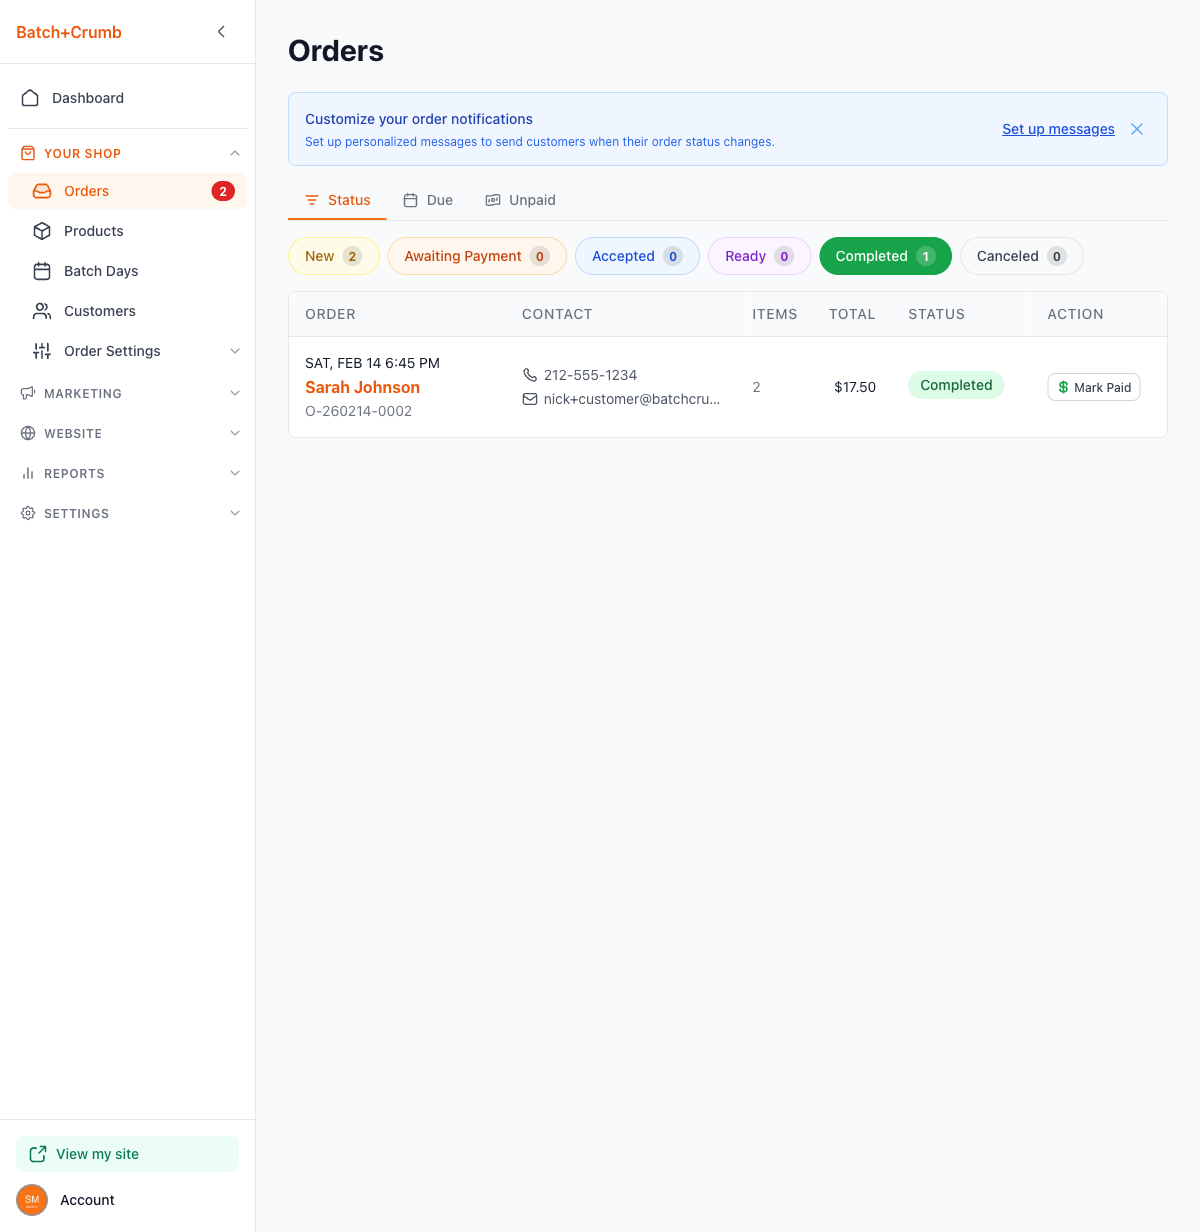
4. Read the order list
Each row in the order list shows you:
- Order — The date, customer name, and order ID. Regular orders start with "O-" and inquiries start with "I-".
- Contact — The customer's phone number and email, so you can reach out quickly.
- Items — How many items are in the order.
- Total — The order total.
- Status — A colored badge showing the current status.
- Action — A quick-action button that changes based on the order type and status (like Send Invoice or Mark Paid).
5. Open an order to see the details
Click anywhere on an order row to open the order detail view. Here you'll see everything about the order:
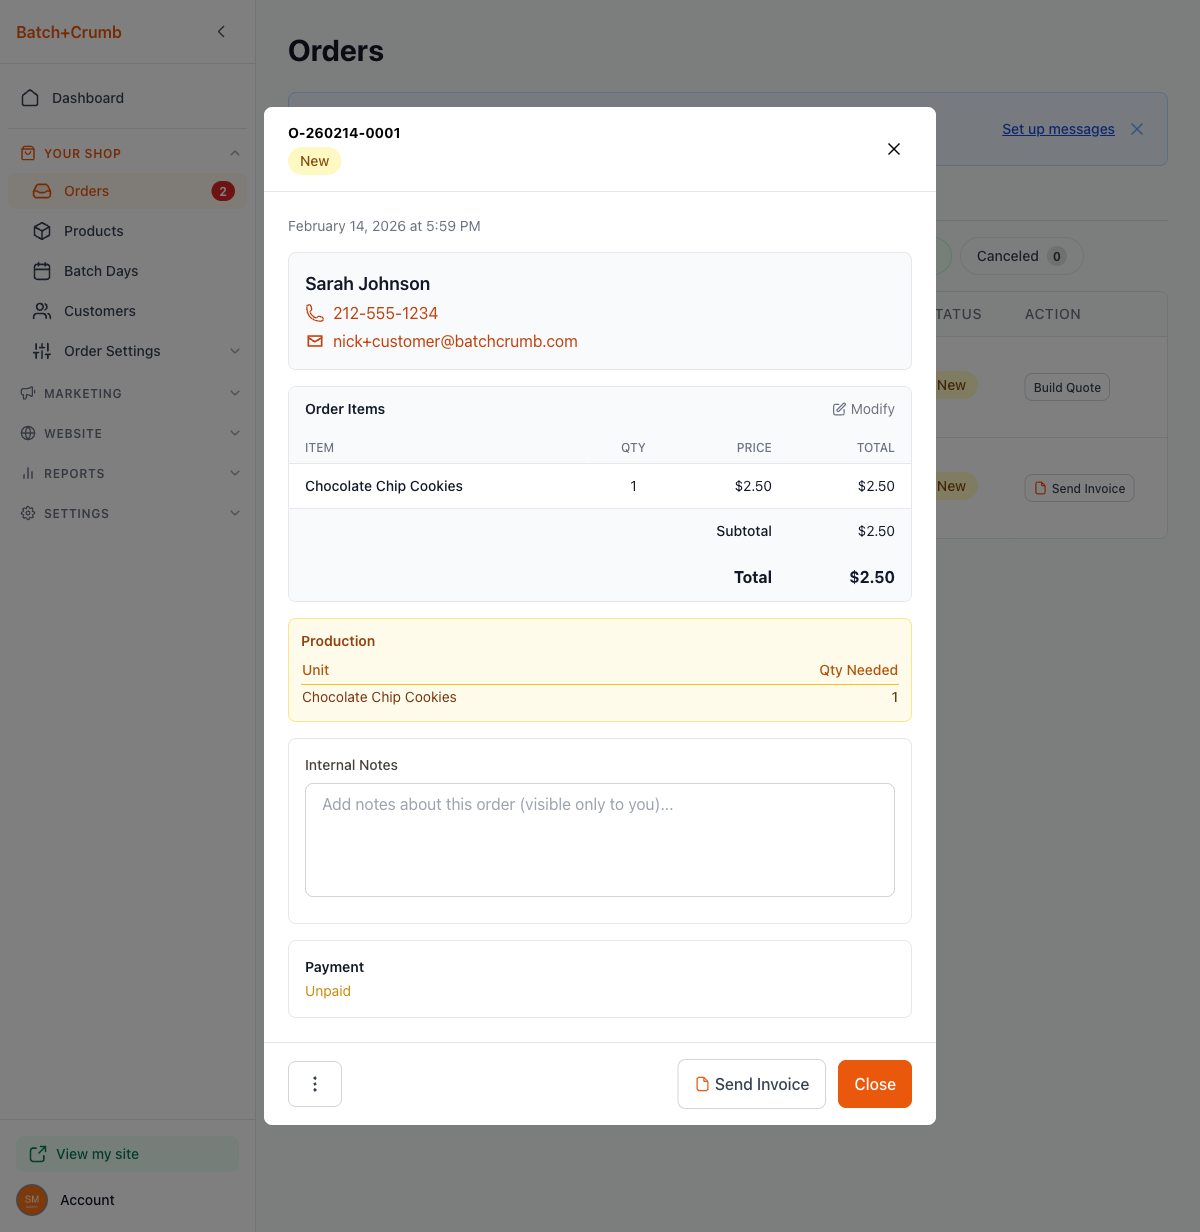
- Order ID and status — At the top, with a colored status badge.
- Date — When the order was placed.
- Customer info — Name, phone (clickable to call), and email (clickable to send a message).
- Order Items — A table showing each item, quantity, price, and total. Click Modify to edit the order.
- Production — A highlighted section showing what you need to bake, with unit quantities. Handy for planning your baking day.
- Internal Notes — A private text area where you can jot down notes about the order. Only you can see these — they're never shown to customers.
- Payment — Shows whether the order is paid or unpaid.
6. Take action on an order
At the bottom of the order detail view, you'll find action buttons:
- Send Invoice — Send the customer an invoice for the order.
- Close — Close the detail view and go back to the order list.
- Actions menu (⋮) — Click the three-dot menu for more options.
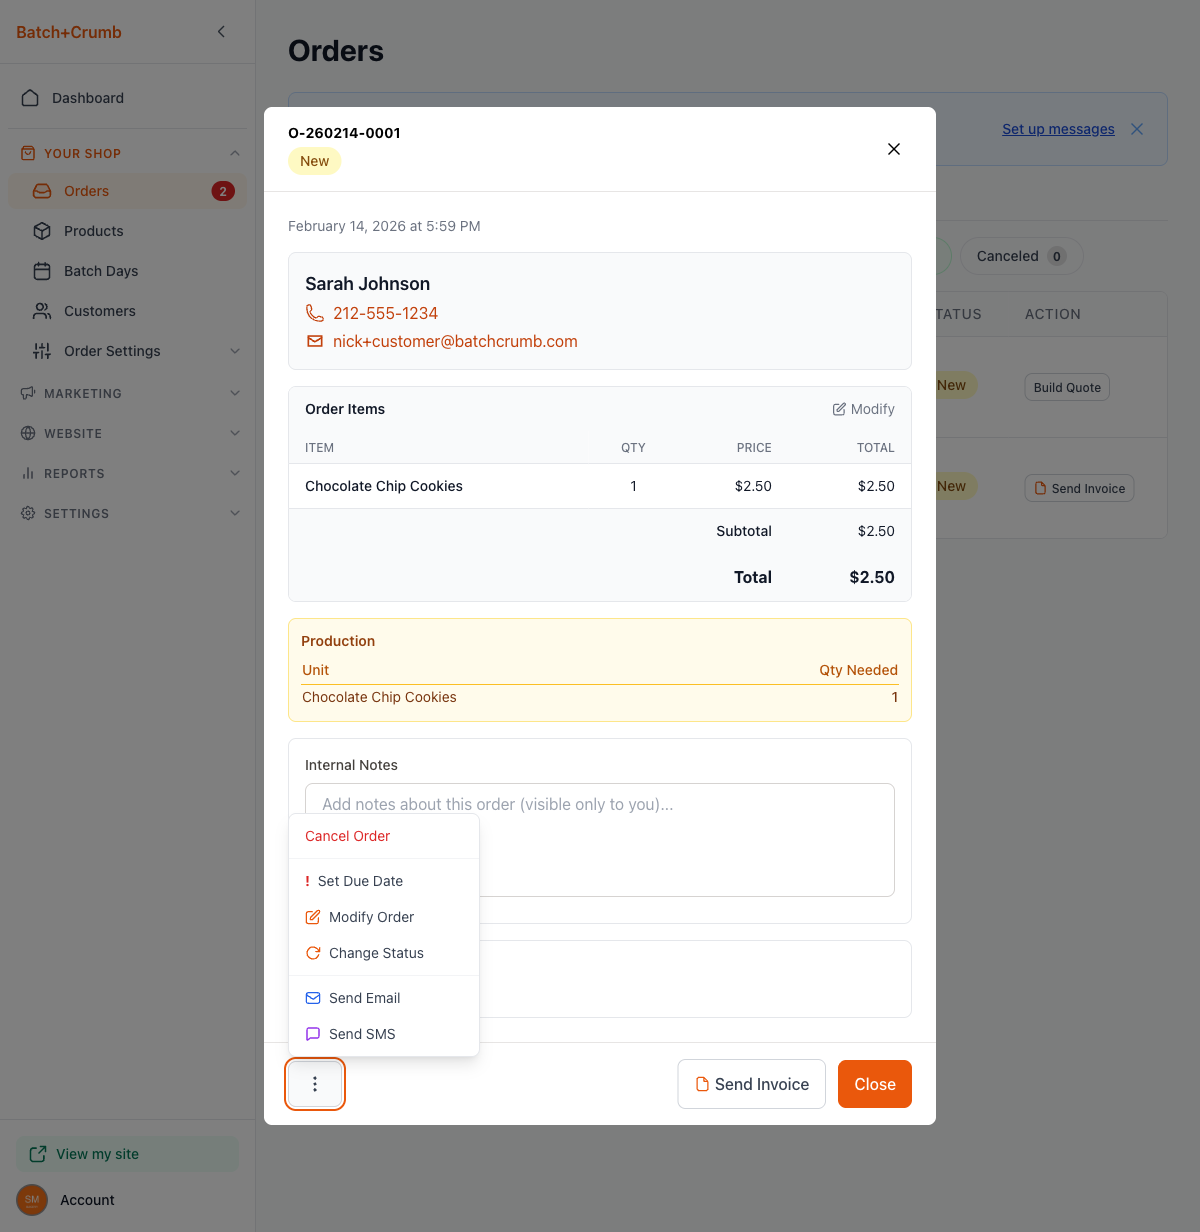
The actions menu gives you:
- Cancel Order — Cancel this order (shown in red).
- Set Due Date — Add or change when this order is needed.
- Modify Order — Edit the items, quantities, add custom items, or apply adjustments like discounts.
- Change Status — Manually move the order to a different status.
- Send Email — Send the customer an email about their order.
- Send SMS — Send the customer a text message.
Tips
- Check your Orders page regularly — especially the New filter — so you don't miss any incoming orders.
- The Unpaid tab is your best friend at the end of a busy market day. It shows you exactly who still needs to pay.
- Use Internal Notes to keep track of special requests or reminders like "customer will pick up at 2pm" or "add extra packaging."
- The quick-action button in the order list (like Send Invoice or Mark Paid) saves you from having to open each order individually.
- Inquiry orders (IDs starting with "I-") come from customers who clicked Contact for Info on a product. These show a Build Quote button so you can put together a custom quote.