Configure Due Dates
Control whether customers pick a "date needed" when placing an order, and set lead time rules so you never get a last-minute request you can't fill.
Control whether customers pick a "date needed" when placing an order, and set lead time rules so you never get a last-minute request you can't fill.
Overview
Some orders need to be ready by a specific date — a birthday cake for Saturday, cookies for a school bake sale next Friday. The due date setting adds a date picker to your checkout (or inquiry form) so customers can tell you exactly when they need their order. You can also set lead time rules to make sure nobody books something for tomorrow when you need at least three days.
Steps
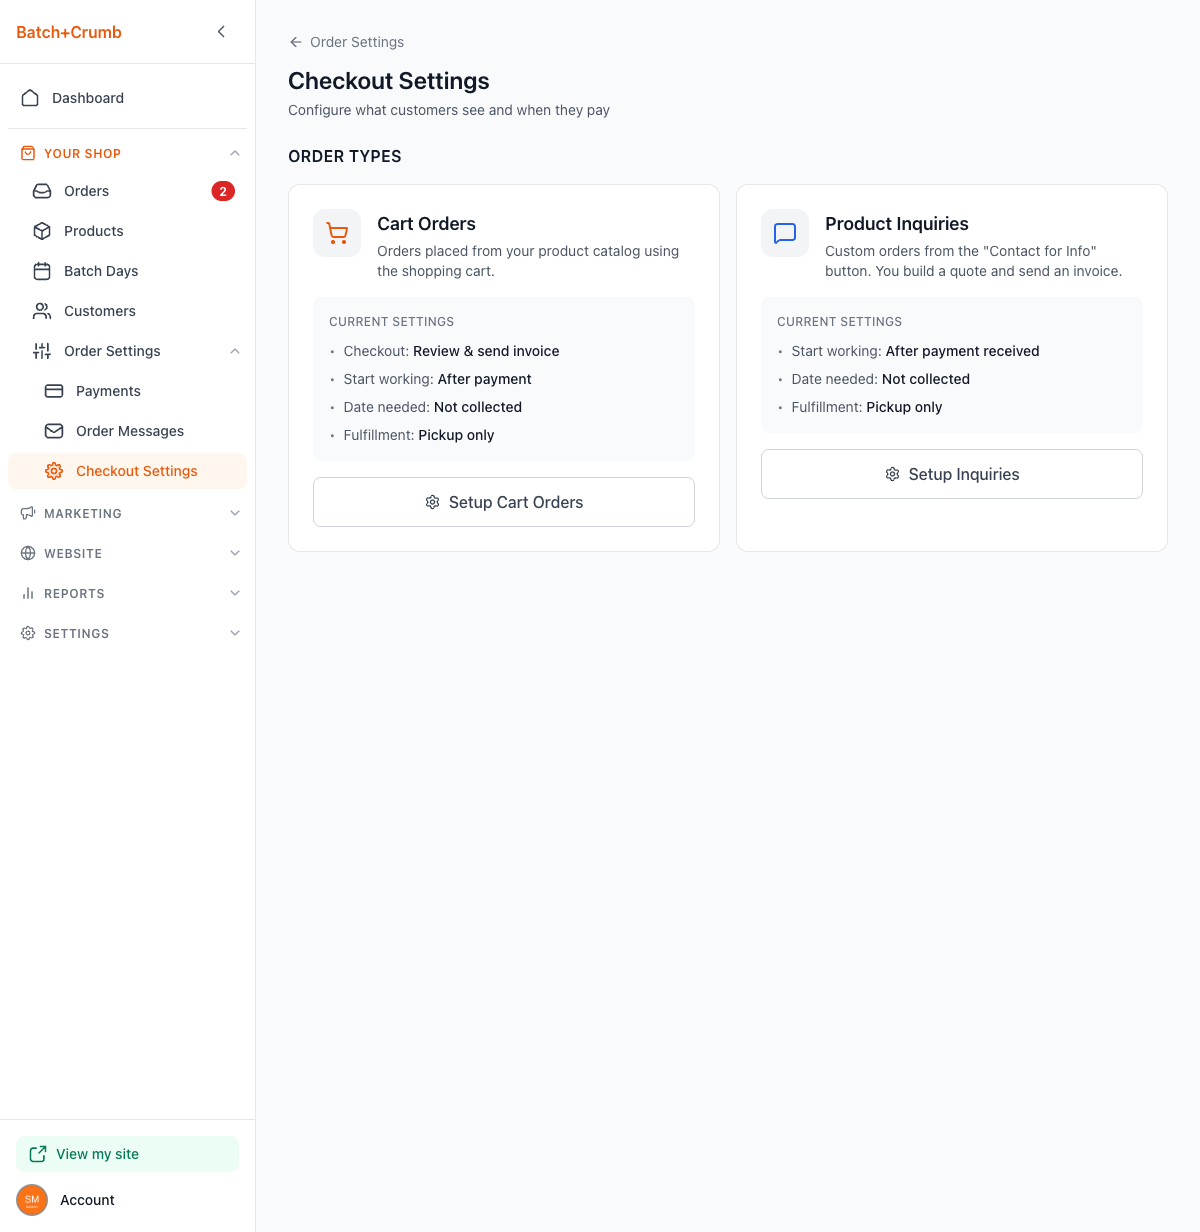
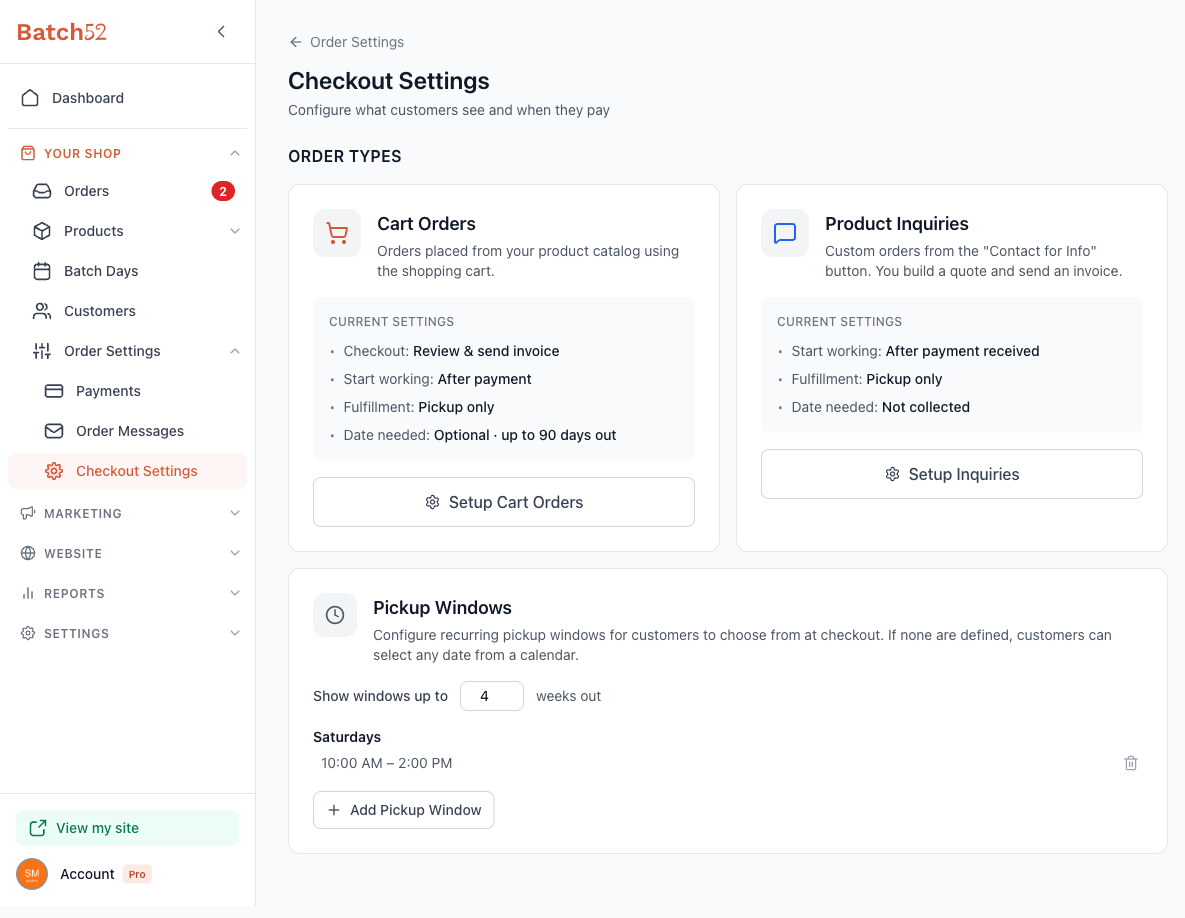
1. Go to Checkout Settings
Direct link: Open this page
From the left sidebar, click Order Settings under Your Shop, then click Checkout Settings. You'll see two cards — one for Cart Orders and one for Product Inquiries. Each shows its current "Date needed" setting at a glance.
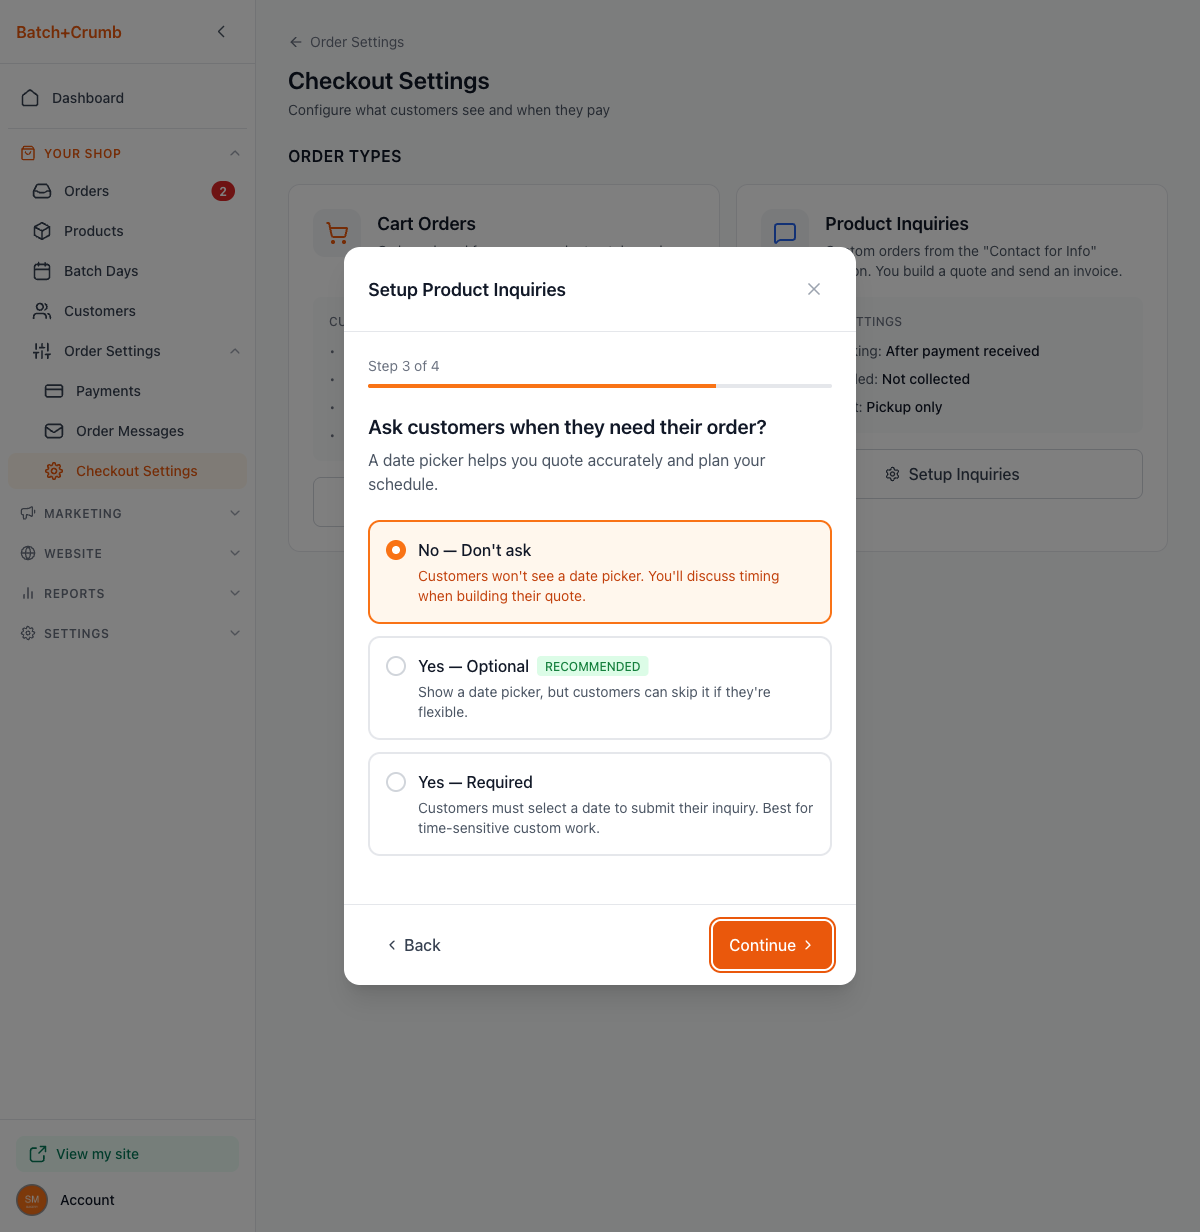
2. Open the setup wizard
Click Setup Cart Orders (or Setup Inquiries for custom orders). This opens a step-by-step wizard. The due date setting is Step 3 — click Continue to move past Steps 1 and 2.
3. Choose your due date setting
On Step 3, you'll see the question: "Ask customers when they need their order?" You have three options:
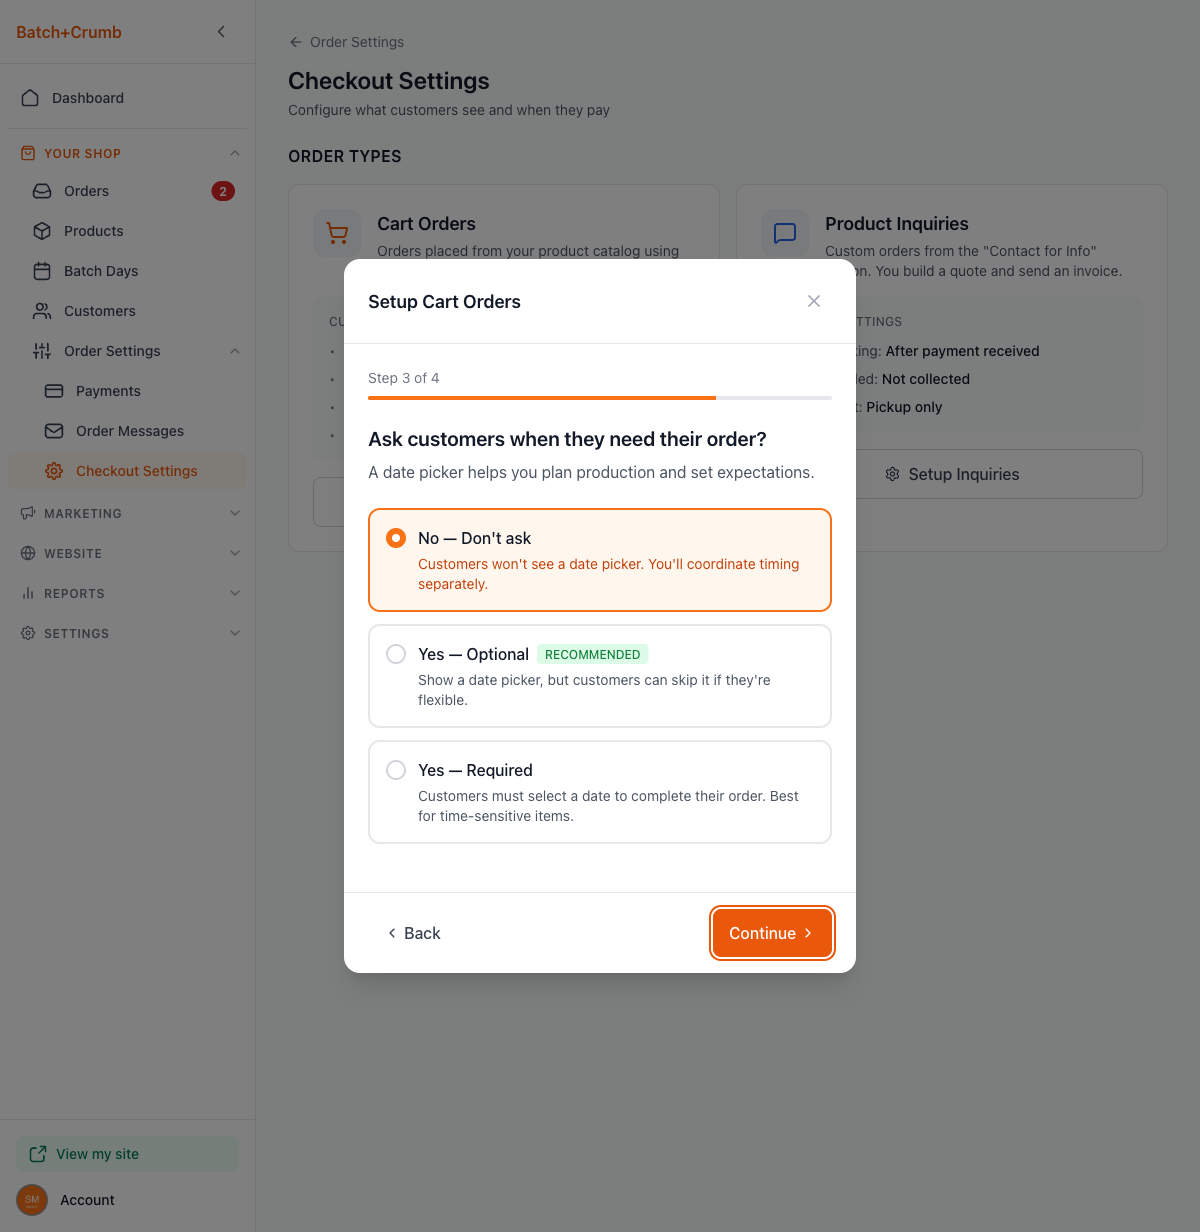
- No — Don't ask — Customers won't see a date picker at all. Choose this if you handle timing through messages or if your items don't need a specific pickup date.
- Yes — Optional (Recommended) — A date picker appears at checkout, but customers can skip it if they're flexible. This is the best choice for most bakers — you'll get a date when it matters, without forcing customers who are easy-going to pick one.
- Yes — Required — Customers must select a date to complete their order. Best for time-sensitive items like decorated cakes or event catering where you absolutely need to know the date upfront.
4. Set your lead time
When you choose either Yes — Optional or Yes — Required, a Lead Time section appears below with two fields:
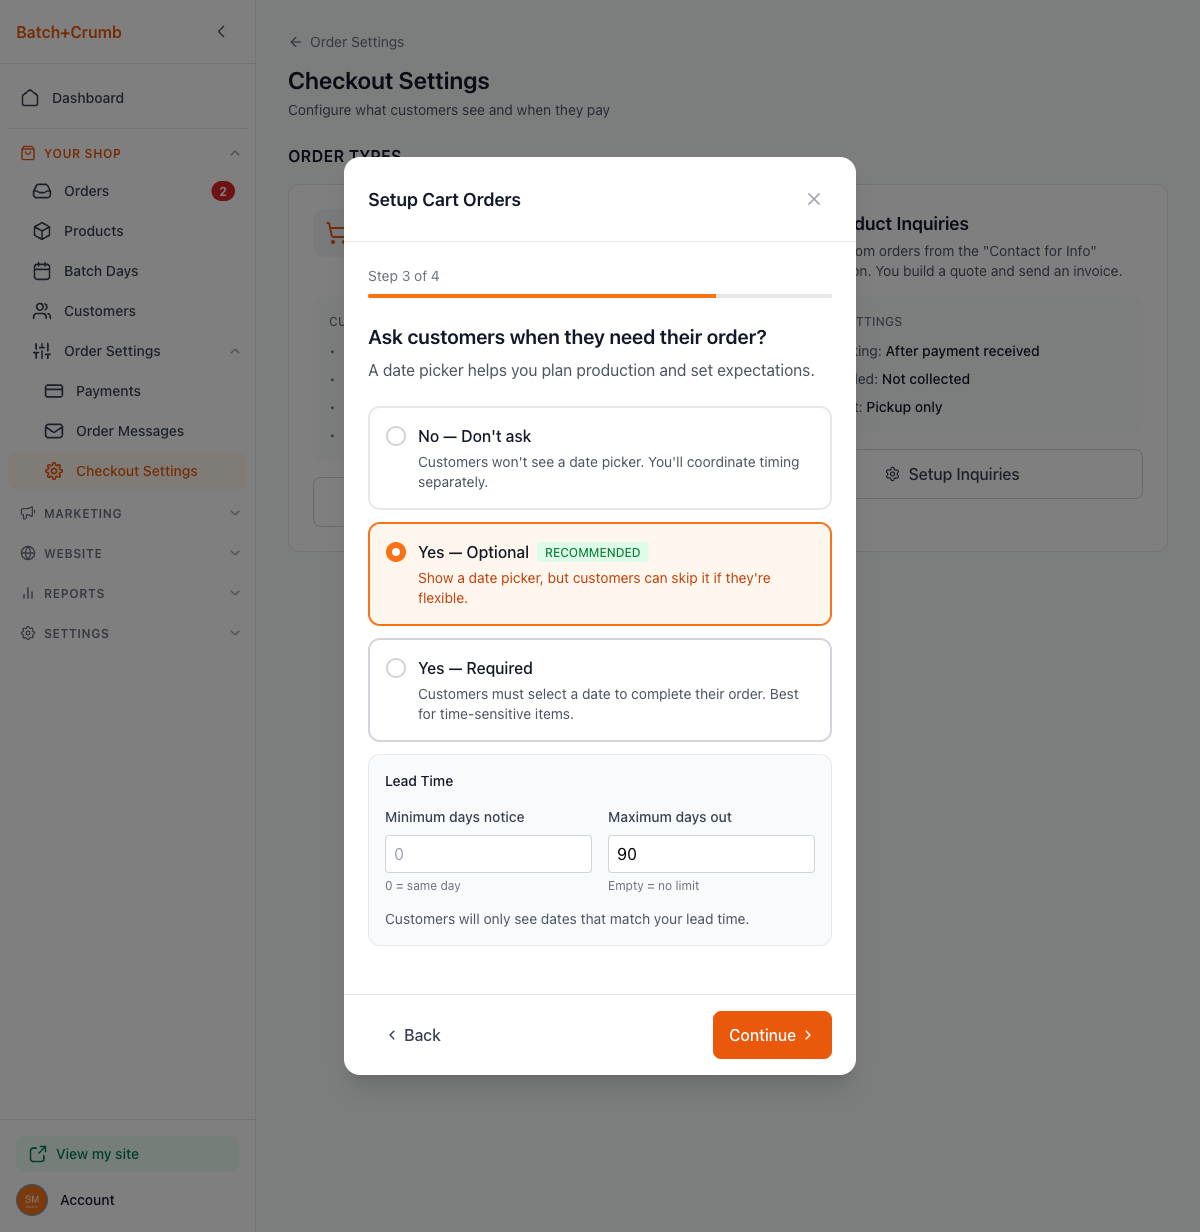
- Minimum days notice — How many days ahead customers need to order. Set this to
0for same-day orders,1for next-day,3if you need a few days to prep, etc. Customers won't be able to pick any date sooner than this. - Maximum days out — How far into the future customers can book. The default is
90days. Leave it empty for no limit. This keeps people from booking orders six months out if that doesn't work for your business.
The date picker customers see at checkout will only show dates that fall within your lead time window.
5. Set up pickup windows (optional)
Once "Date Needed" is enabled (either optional or required) for Cart Orders or Product Inquiries, a Pickup Windows section appears at the bottom of the Checkout Settings page. Pickup windows let you define recurring time slots when customers can pick up their orders — like "Saturdays 10am–2pm." If you don't add any pickup windows, customers simply choose a date from a calendar.
To add a pickup window, click Add Pickup Window. A modal opens where you can:
- Select one or more days — toggle the day buttons (Sun through Sat) for when you're available for pickups.
- Set a Start Time and End Time — choose from the dropdowns, which offer 30-minute increments from 5:00 AM to 10:00 PM.
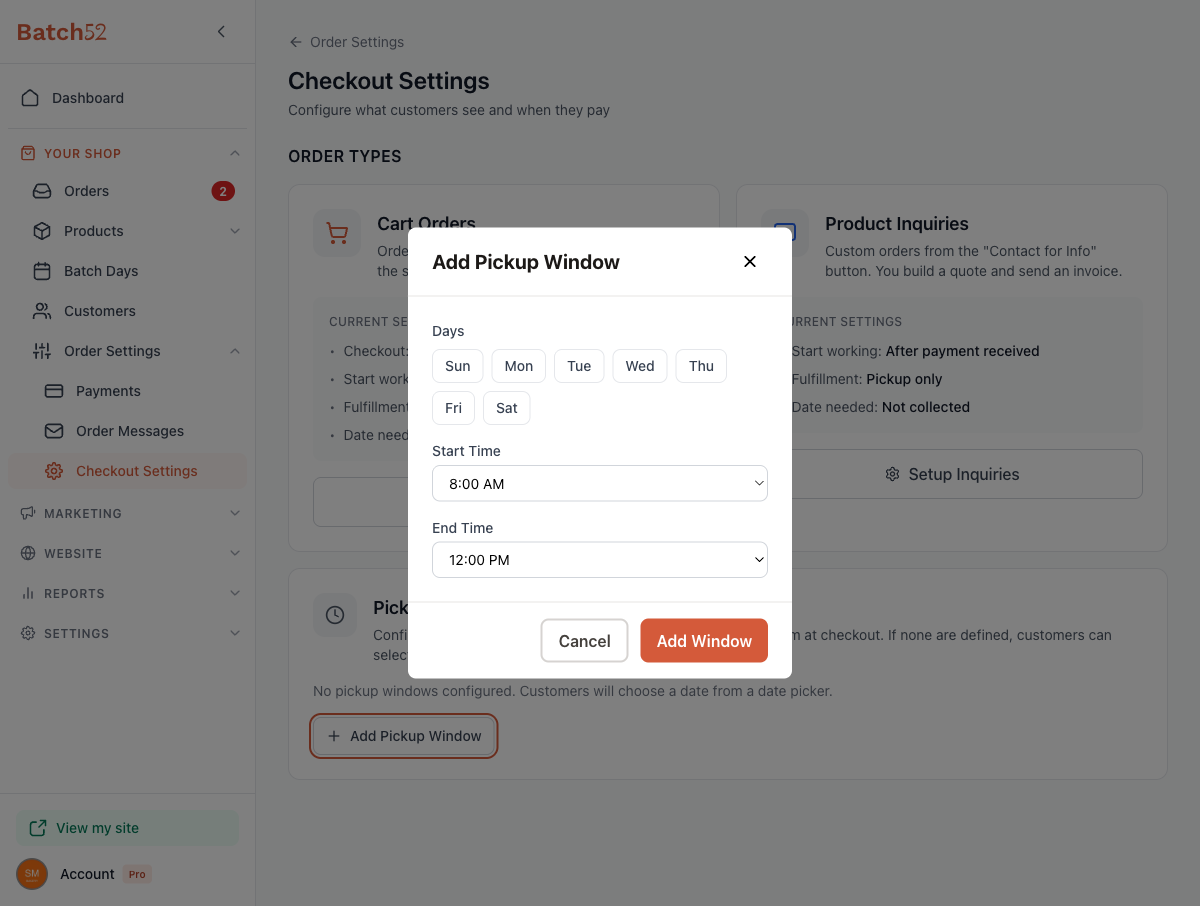
Click Add Window to save. Your windows appear grouped by day, each with a delete icon (trash can) if you need to remove one. You can add as many windows as you need — for example, Saturdays 10am–2pm and Wednesdays 4pm–6pm.
You'll also see a "Show windows up to [N] weeks out" setting (default is 4 weeks). This controls how far into the future customers can see available pickup slots at checkout.
6. Finish the wizard
Click Continue to move to Step 4 (fulfillment settings), then click Save Settings to apply your changes.
7. Set due dates for product inquiries too
If you also handle product inquiries (custom orders from the "Contact for Info" button), go back to the Checkout Settings page and click Setup Inquiries. Step 3 works the same way — you can choose whether to ask for a date and set your lead time.
8. View orders by due date
Once customers start selecting dates, you can view orders grouped by when they're needed. On the Orders page, click the Due tab to see all orders sorted by their due date. This makes it easy to plan your baking schedule for the week.
Tips
- "Yes — Optional" is the sweet spot for most bakers. Customers who need their order by a certain date will tell you, and flexible customers won't feel forced to guess.
- Set your minimum days notice to match your actual prep time. If a custom cake takes 3 days, set it to
3so nobody can order one for tomorrow. - You can set different due date rules for cart orders and product inquiries. For example, you might not need a date for simple cookie orders (cart) but always want one for custom cake requests (inquiries).
- Your current "Date needed" setting is always visible on the Checkout Settings page — no need to open the wizard just to check.
- If you change the setting from "Required" to "Don't ask," existing orders that already have due dates won't be affected.
- Pickup windows are a great way to keep your schedule predictable. Instead of customers picking any random date, they'll only see the days and times you've set up — perfect if you only do pickups on weekends.