Customize Order Messages
Personalize the emails and texts your customers receive when their order moves through each stage.
Personalize the emails and texts your customers receive when their order moves through each stage.
Overview
Every time you accept an order, mark it ready, or complete it, Batch52 can send your customer an email or SMS letting them know. The Order Messages page lets you customize what those messages say — so they sound like you, not a generic robot. You can tweak the subject lines, body text, and SMS wording for each stage of the order process.
Steps
1. Go to Order Messages
Direct link: Open this page
From the left sidebar, click Order Settings under Your Shop, then click Order Messages. You'll see a list of six message templates, one for each stage of an order.
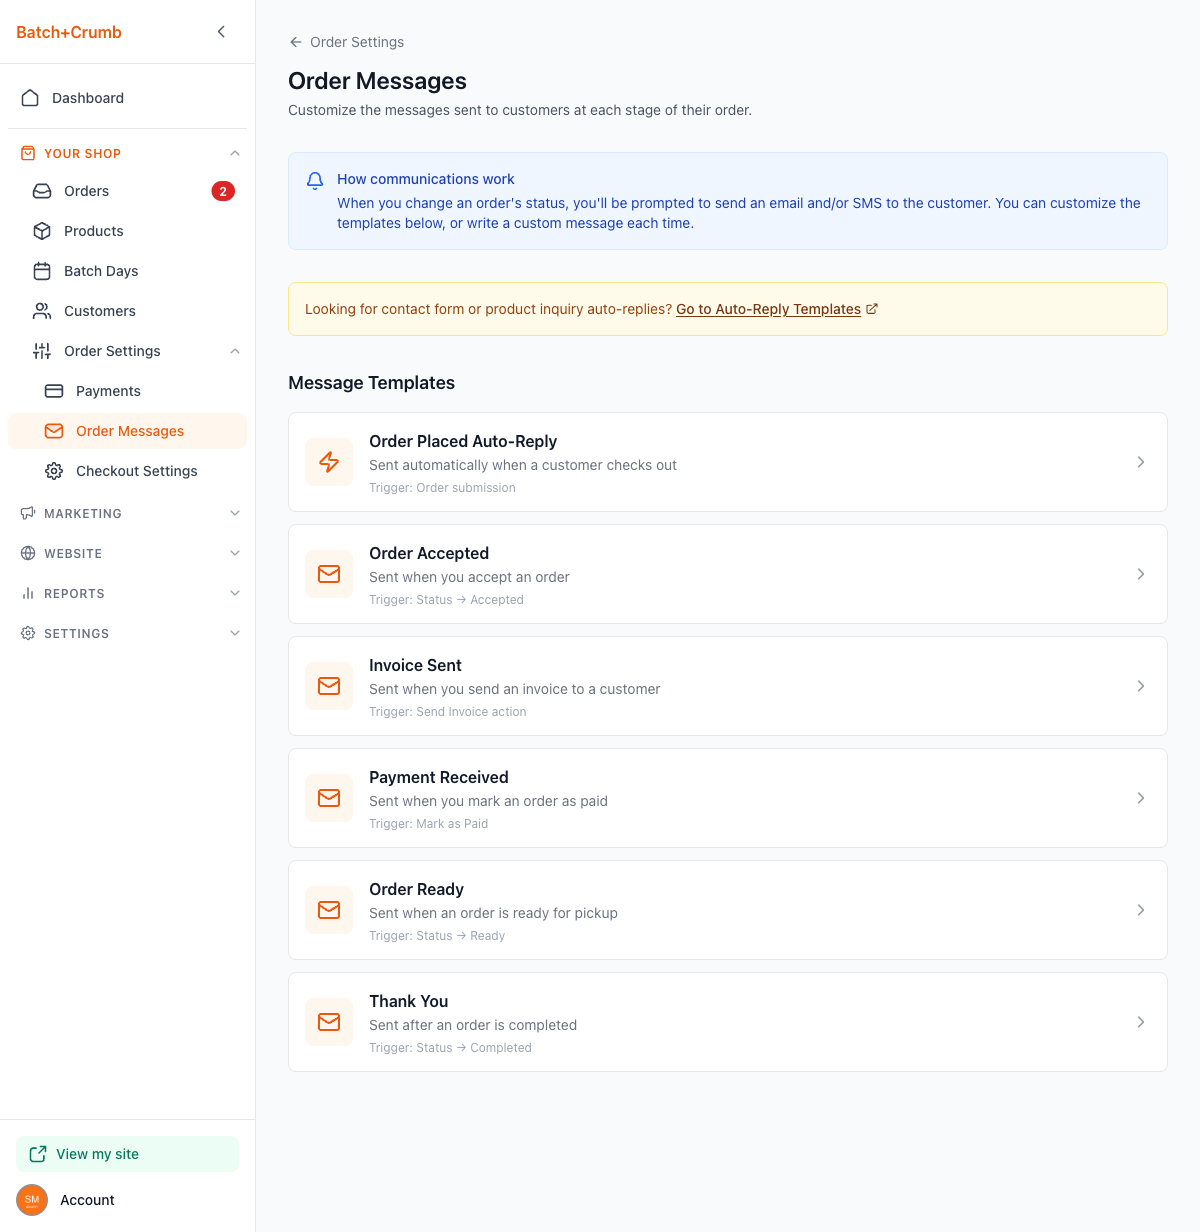
At the top, there's a helpful note explaining how communications work: when you change an order's status, you'll be prompted to send an email and/or SMS to the customer using these templates.
2. Understand the six templates
Each template corresponds to a specific moment in the order lifecycle:
| Template | When it's sent | How it's triggered |
|---|---|---|
| Order Placed Auto-Reply | Right after a customer places an order | Automatically — no action needed from you |
| Order Accepted | When you accept a new order | You change the status to Accepted |
| Invoice Sent | When you send an invoice | You use the Send Invoice action |
| Payment Received | When you record a payment | You mark the order as Paid |
| Order Ready | When the order is ready for pickup | You change the status to Ready |
| Thank You | After the order is complete | You change the status to Completed |
3. Edit an email template
Click any template to open its editor. You'll see fields for Email Subject and Email Body.
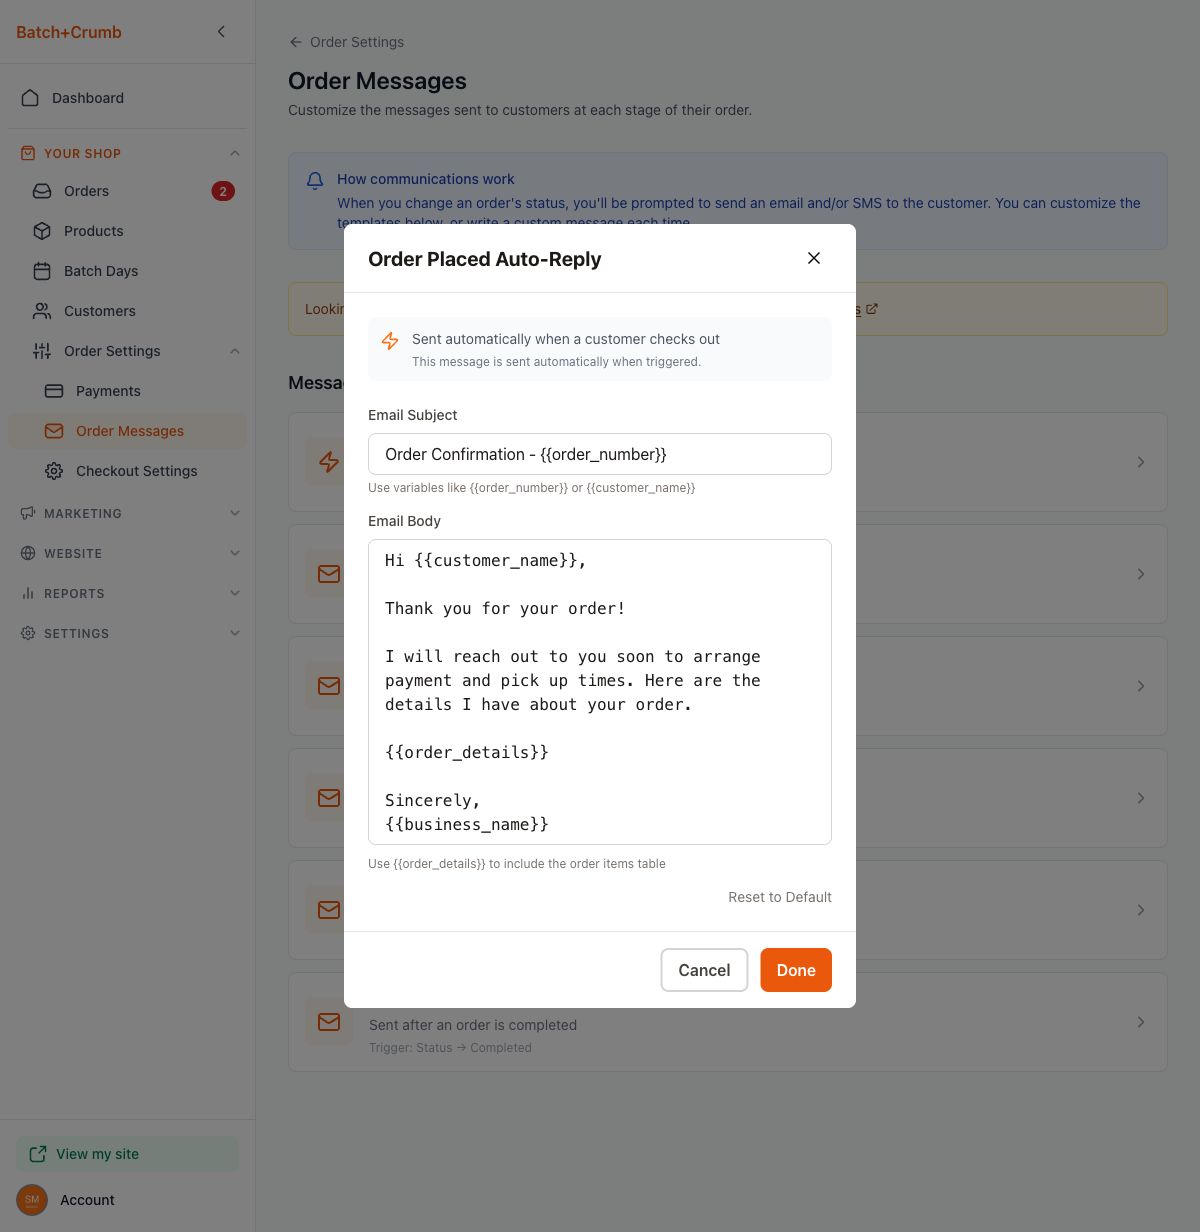
Type your message using plain text. To include customer-specific details, use these template variables — they'll be replaced with real info when the email is sent:
| Variable | What it becomes |
|---|---|
{{customer_name}} | The customer's name |
{{order_number}} | The order number |
{{order_details}} | A table of everything they ordered |
{{business_name}} | Your business name |
{{pickup_window}} | The pickup time window |
{{total}} | The order total |
{{order_details_link}} | A link to view order details online |
Click Done when you're happy with your changes, or Cancel to discard them.
4. Edit an SMS template
For every template except Order Placed Auto-Reply, you'll see Email and SMS tabs at the top of the editor. Click SMS to customize the text message version.

The SMS editor shows a single SMS Message field with a character counter. You can use the same template variables as in emails. Keep your message under 160 characters to avoid it being split into multiple texts.
How SMS works: When you change an order's status, you'll see an option to send an SMS. This opens your phone's messaging app with the message pre-filled and ready to send — you just hit send.
5. Reset a template to default
If you've made changes and want to start over, click Reset to Default at the bottom of the editor. This restores the original template text that came with your account.
Tips
- The Order Placed Auto-Reply is the only fully automatic message — it sends itself the moment a customer checks out. All other messages are sent when you take an action (like accepting an order), and you'll always get a chance to review or customize the message before it goes out.
- Use
{{customer_name}}in your greeting to make messages feel personal. A "Hi Sarah!" is much warmer than a generic "Hi there!" - Keep SMS messages short and sweet. Stick to the essentials — name, status, and a link to view details. Save the longer, friendlier version for email.
- You can use
{{order_details_link}}in SMS messages so customers can tap through to see their full order without you having to cram everything into a text. - Looking for auto-replies to contact forms or product inquiries? Those are in a different spot — click the Go to Auto-Reply Templates link at the top of the Order Messages page.