Set Payment Timing
Choose when you start working on an order — before or after the customer pays.
Choose when you start working on an order — before or after the customer pays.
Overview
When a customer places an order, you'll review it and send them an invoice. But should you start baking right away, or wait until they've actually paid? That's what payment timing controls. This setting applies separately to both cart orders and product inquiries, so you can handle each one differently if you'd like.
Steps
1. Go to Checkout Settings
Direct link: Open this page
From the left sidebar, click Order Settings under Your Shop, then click Checkout Settings. You'll see two cards — one for Cart Orders and one for Product Inquiries. Each shows its current settings at a glance.
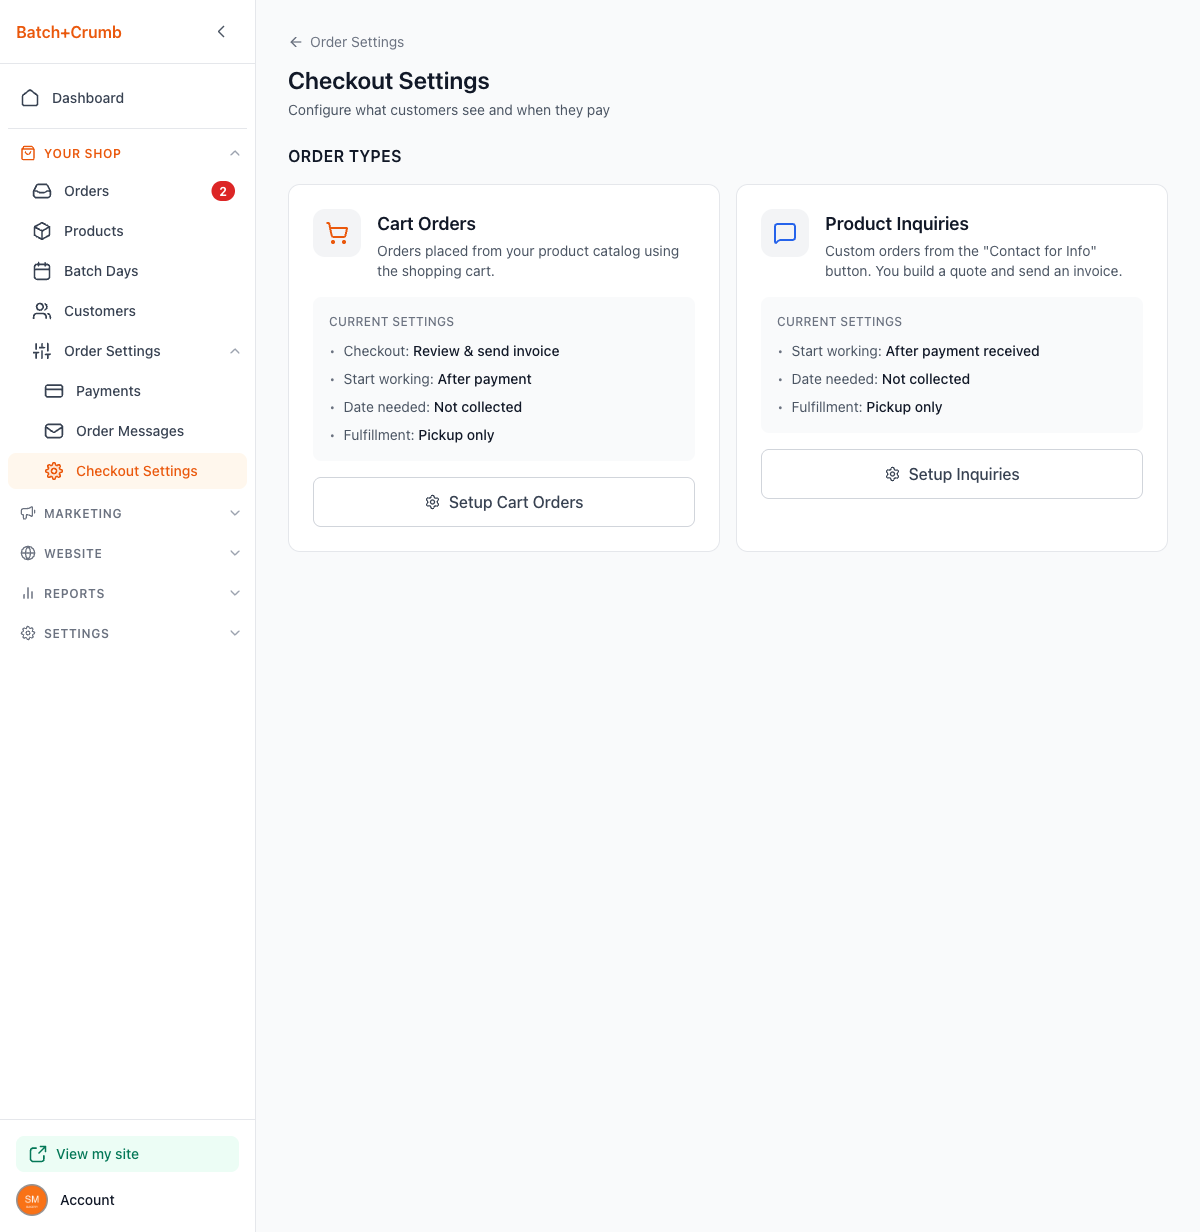
2. Open the setup wizard
Click Setup Cart Orders or Setup Inquiries depending on which order type you want to configure. This opens a step-by-step wizard. Payment timing is Step 2 — click Continue to get past Step 1.
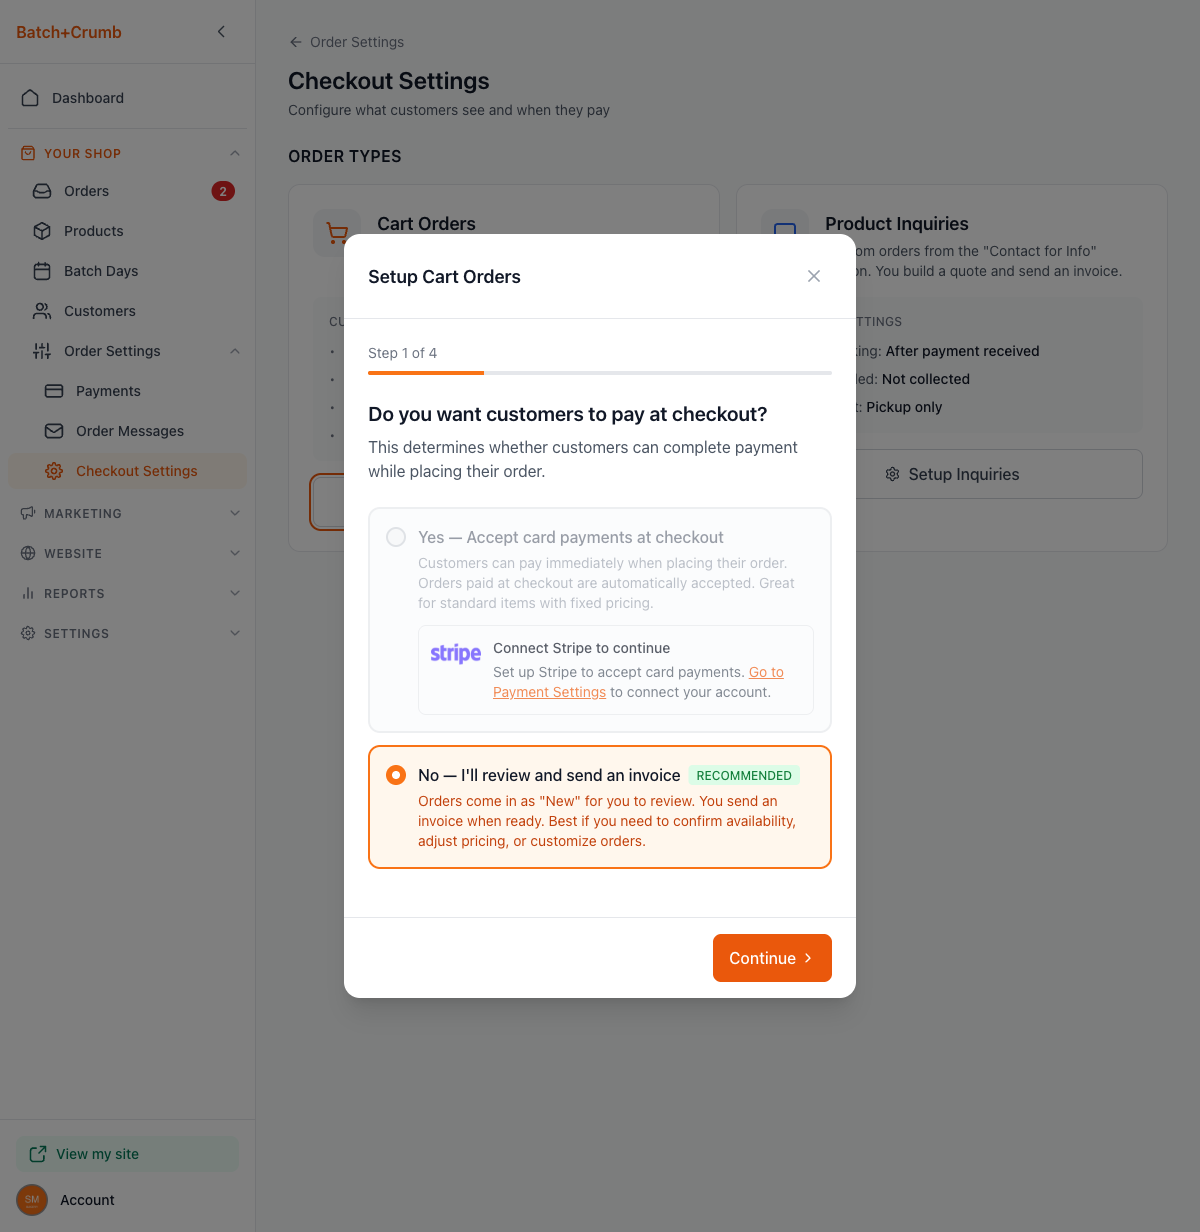
3. Choose your payment timing
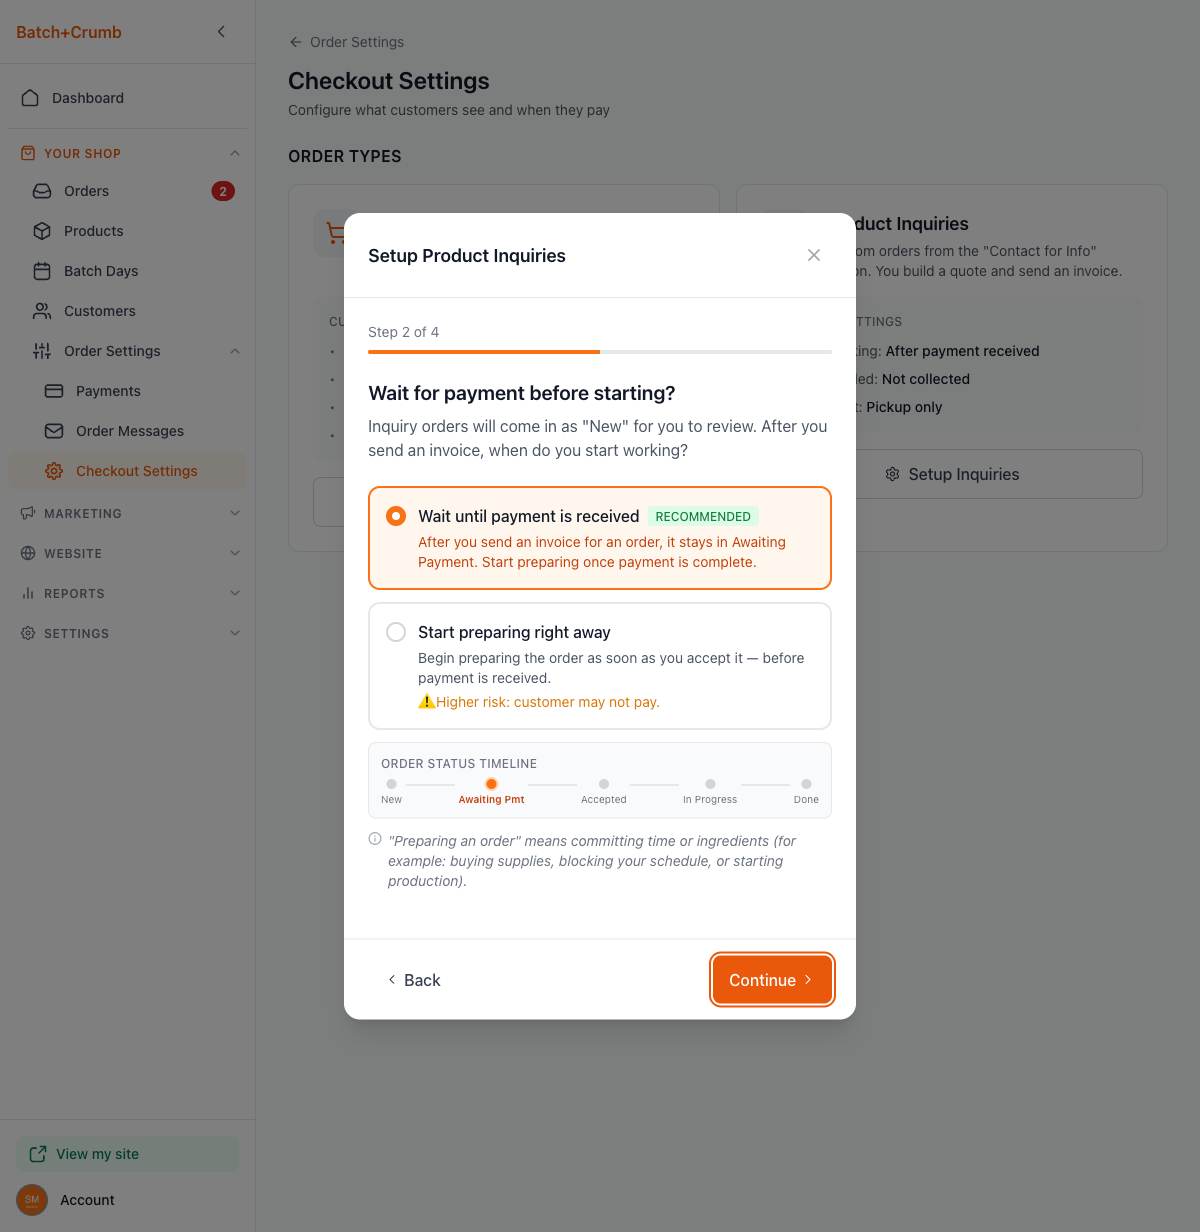
On Step 2, you'll see the question: "Wait for payment before starting?" You have two options:
- Wait for payment first (Recommended) — After you send an invoice, the order sits in "Awaiting Payment" until the customer pays. You don't start working until the money comes in. This is the safest option for most bakers.
- Start as soon as I send the invoice — The order is accepted right away when you send the invoice, and you can start working immediately. This is faster, but there's a risk the customer might not pay.
Below the options, you'll see an Order Status Timeline showing how orders flow: New → Awaiting Payment → Accepted → In Progress → Done.
There's also a helpful note at the bottom explaining that "preparing an order" means committing time or ingredients — like buying supplies, blocking your schedule, or starting production.
4. Continue through the remaining steps
After choosing your payment timing, click Continue to move through the rest of the wizard (date needed and fulfillment settings). Click Save Settings on the final step to apply your changes.
5. Set timing for product inquiries too
If you also handle product inquiries (custom orders from the "Contact for Info" button), click Setup Inquiries back on the Checkout Settings page. The payment timing step works the same way.
Tips
- Most bakers should choose "Wait for payment first." It protects you from doing work before getting paid — especially important for custom or large orders.
- You can set different timing for cart orders and product inquiries. For example, you might start right away on small cart orders but wait for payment on big custom cake requests.
- If you change your mind later, just come back to Checkout Settings and run through the wizard again. Your other settings (like date needed and fulfillment) will stay the same.
- Your current payment timing is always visible on the Checkout Settings page under "Start working" — so you can check it at a glance without opening the wizard.
- Stripe is also required for Buy Now products. If you offer any products with a "Buy Now" button (direct card payment without a cart), you'll need an active Stripe connection. See Buy Now Checkout for how customers experience that flow.