Configure Payment Methods
Set up the ways your customers can pay you — like Venmo, Cash App, cash, or check.
Set up the ways your customers can pay you — like Venmo, Cash App, cash, or check.
Overview
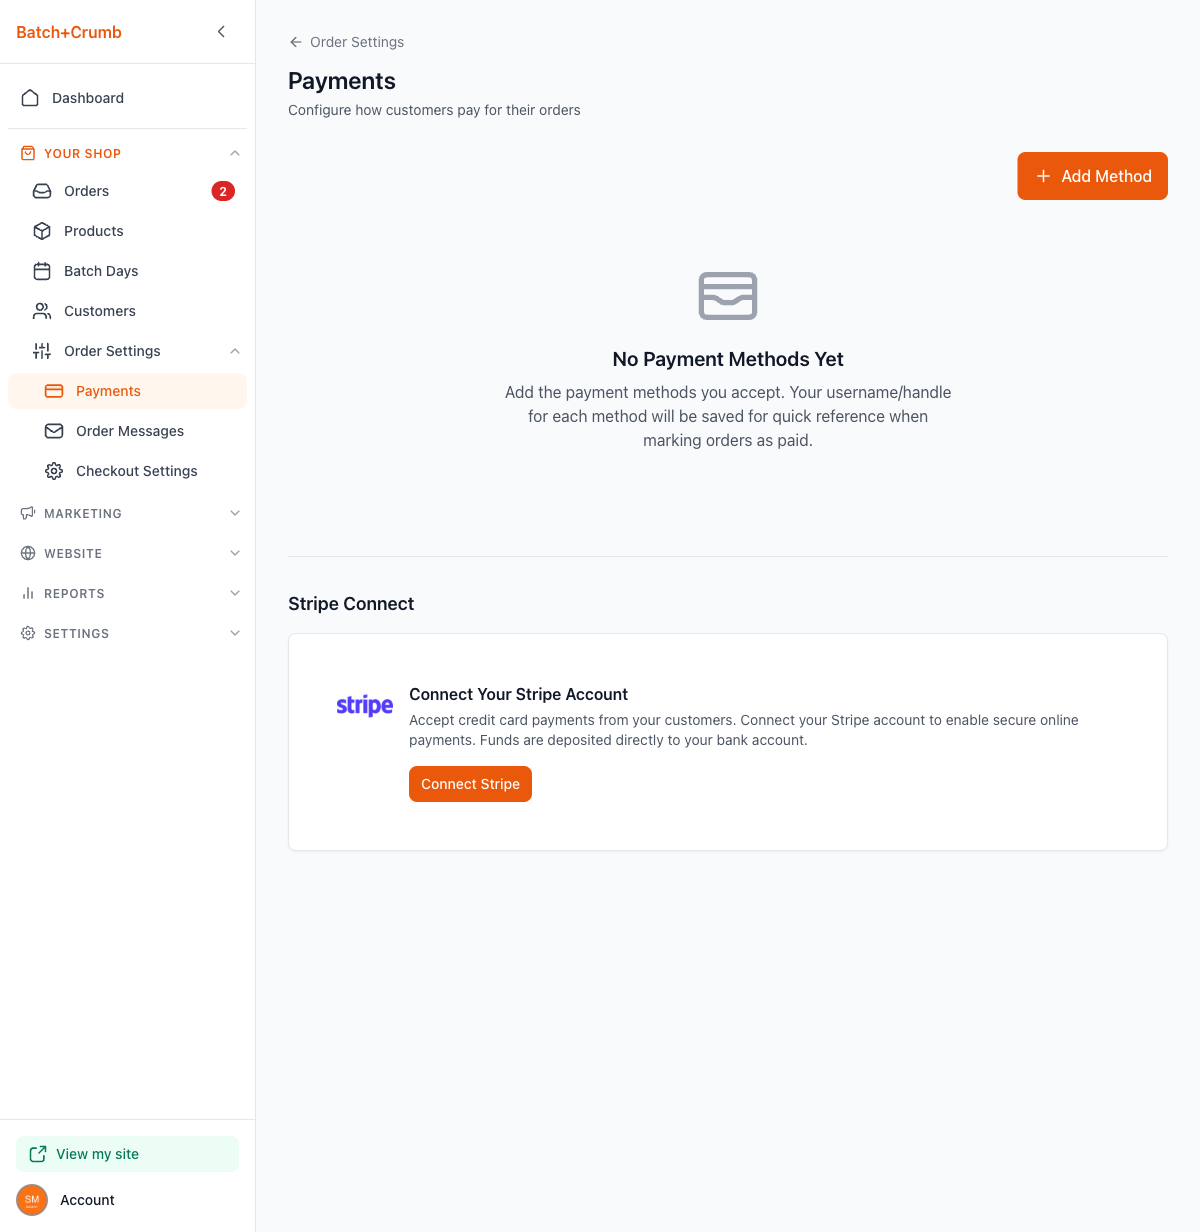
Before your customers can place orders, they'll need to know how to pay you. The Payments page is where you tell Batch52 which payment methods you accept. These show up on your invoices so customers know exactly how to send you money. You can add as many methods as you'd like.
Steps
1. Go to the Payments page
Direct link: Open this page
From the left sidebar, click Order Settings under Your Shop, then click Payments. You can also get here from the Order Settings landing page by clicking the Payments card.
2. Add a payment method
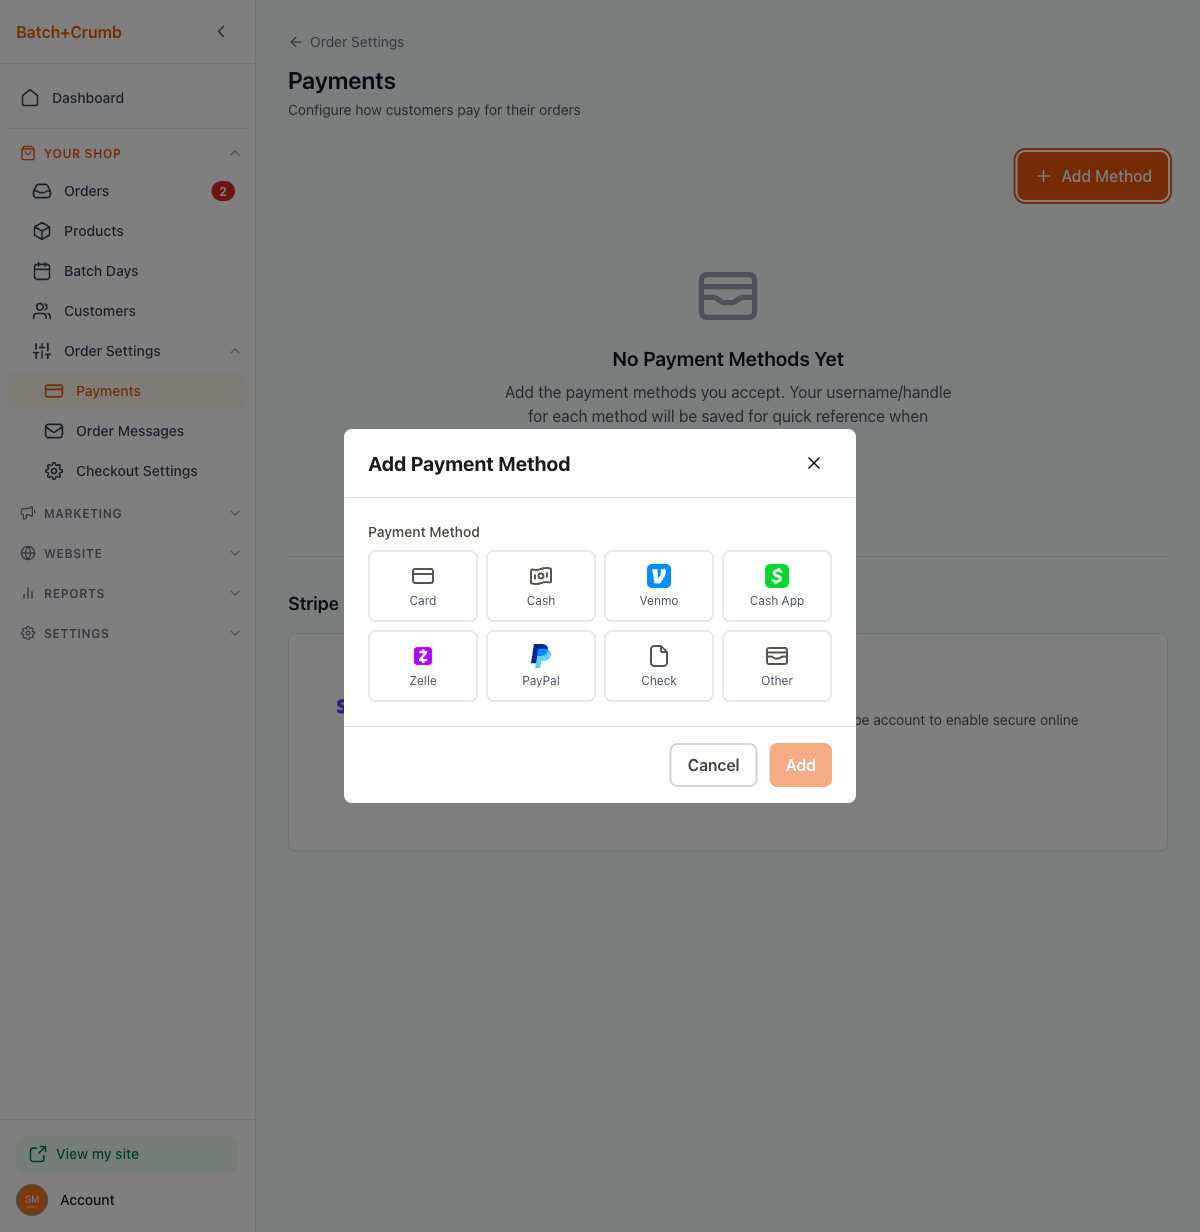
Click the + Add Method button in the top right corner. A modal will appear with eight payment method options to choose from:
- Card — For customers paying by credit or debit card at pickup
- Cash — For customers paying with cash
- Venmo — Enter your Venmo username so customers can find you
- Cash App — Enter your Cash App handle
- Zelle — Enter your Zelle username
- PayPal — Enter your PayPal username
- Check — For customers paying by check
- Other — For any payment method not listed (like Square or Apple Pay)
3. Fill in the details (if needed)
What you see next depends on which method you pick:
- Card, Cash, and Check don't need any extra info — just select one and click Add.
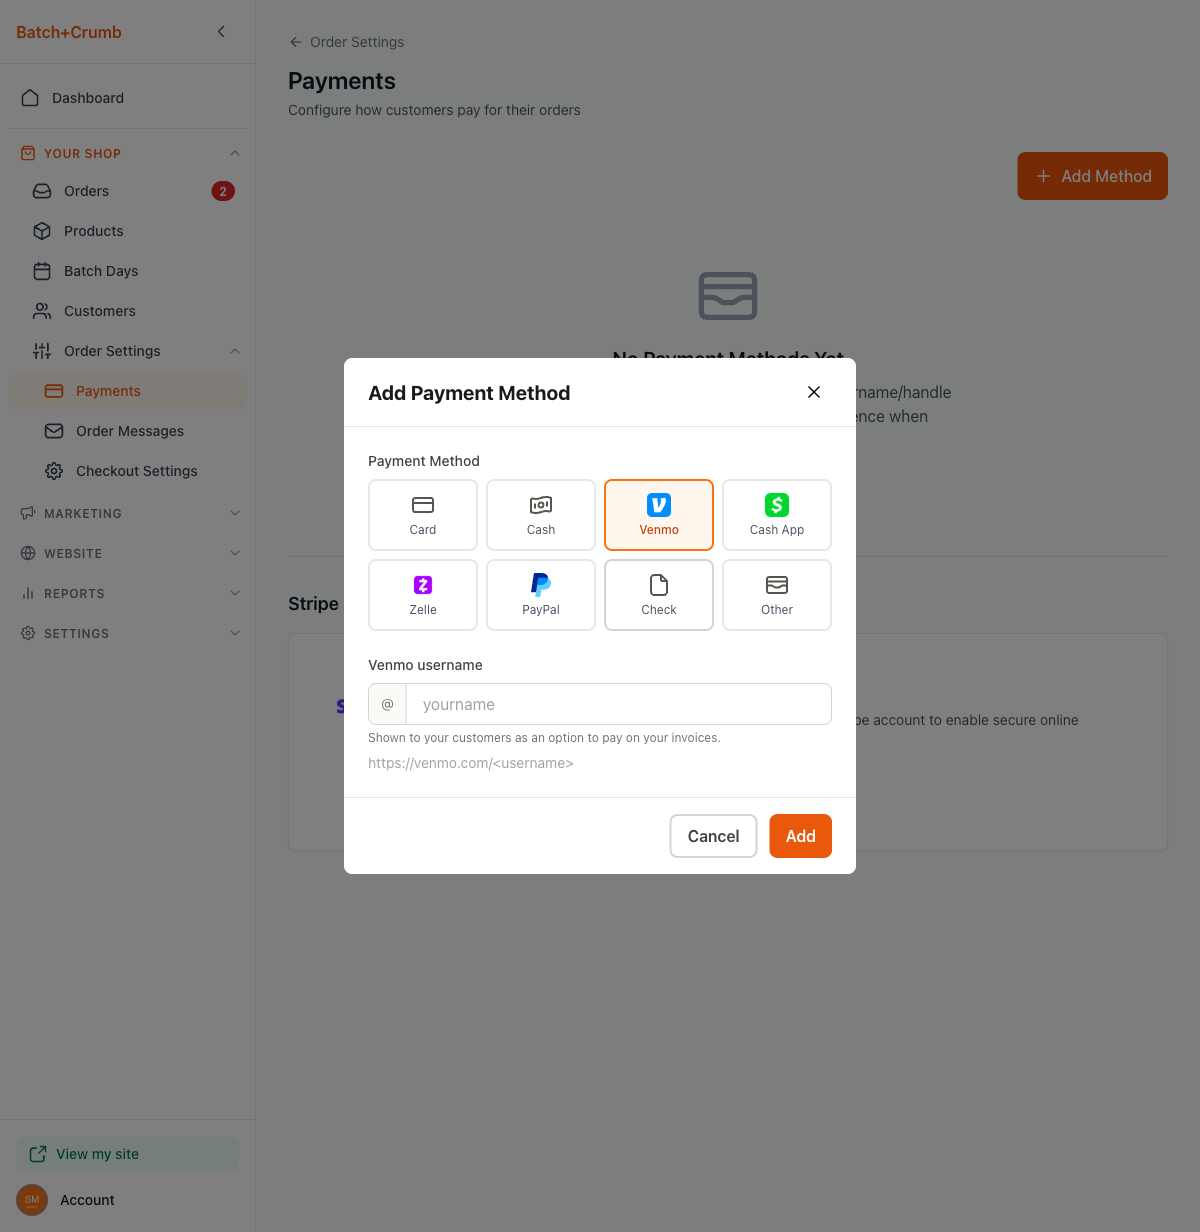
- Venmo, Cash App, Zelle, and PayPal ask for your username or handle. This gets shown to customers on your invoices so they know where to send payment. You'll also see a preview link (like
https://venmo.com/@YourName).
- Other lets you enter a custom name (up to 50 characters) and optional details. Use this for payment apps like Square, Apple Pay, or anything else not in the standard list.
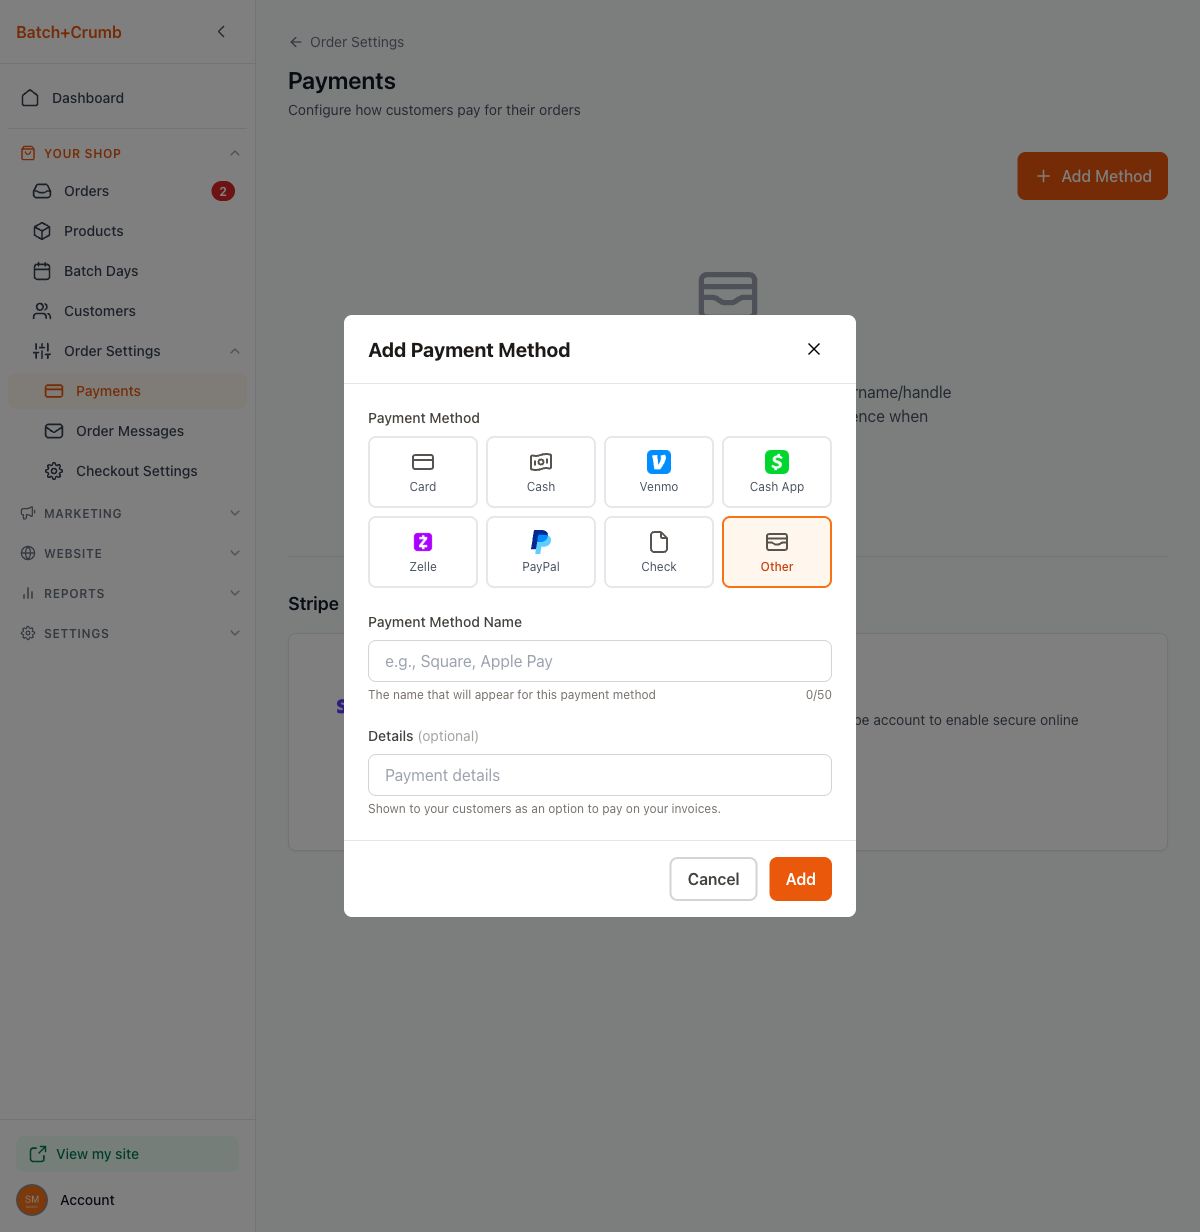
Click Add when you're done. You'll see a confirmation message and the method will appear in your list.
4. Manage your payment methods
Once you've added methods, they show up as a list on the Payments page. Each one shows the method name and your username (if applicable).
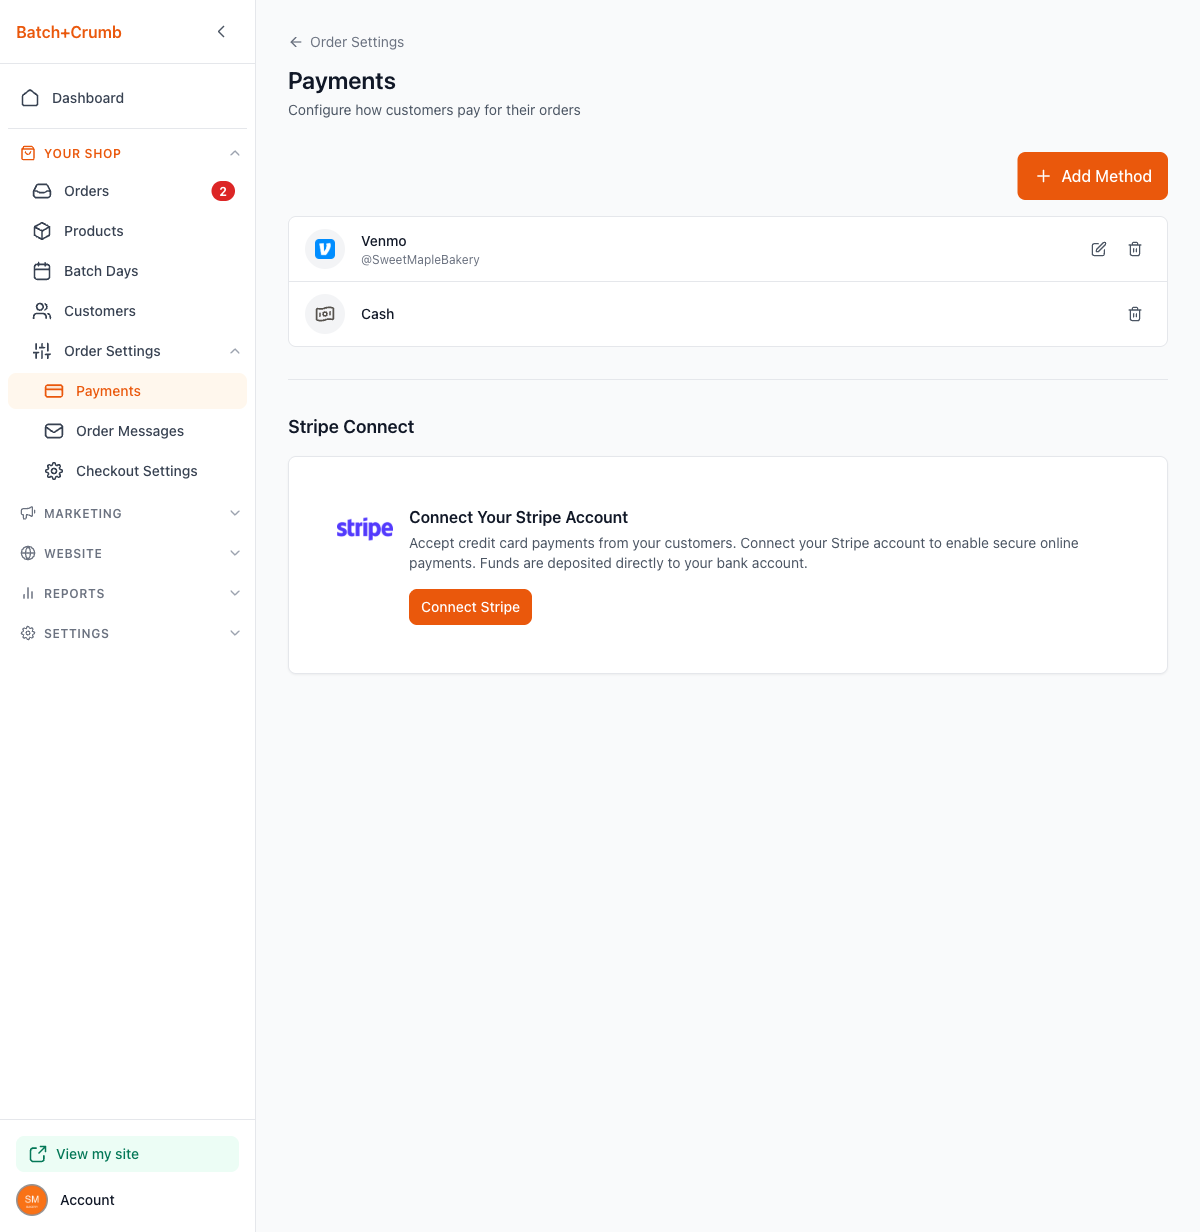
From here you can:
- Edit a method by clicking the pencil icon (for methods with usernames like Venmo or Cash App)
- Delete a method by clicking the trash icon — you'll be asked to confirm before it's removed
5. Connect Stripe for online payments (Pro)
Below your payment methods list, you'll see a Stripe Connect section. Connecting Stripe lets you accept credit card payments directly through your site at checkout — customers pay online and funds go straight to your bank account.
Click Connect Stripe to start the setup process. Once connected, you can enable online card payments in your Checkout Settings.
Tips
- Most cottage food bakers start with just Cash and Venmo — you can always add more later.
- Your payment method usernames are shown on invoices, so double-check that they're correct.
- You can only add each built-in method once (for example, you can't add two Venmo entries), but you can add multiple Other methods.
- Stripe Connect is a Pro feature that lets customers pay with a credit card right at checkout, instead of paying you separately.