Product Add-Ons
Offer optional extras — like toppings, sides, or gift wrapping — that customers can add to their order right from the product page.
Offer optional extras — like toppings, sides, or gift wrapping — that customers can add to their order right from the product page.
Overview
Add-ons let you create groups of optional extras (think "Toppings," "Extras," or "Gift Options") that customers can check off when ordering. You build each group once, then attach it to as many products as you like. When a customer selects add-ons, the price updates in real time so there are no surprises at checkout.
Steps
1. Go to the Add-Ons page
Direct link: /site/admin/products/add-ons
From your admin sidebar, click Products to expand the menu, then click Add-Ons.
If you haven't created any groups yet, you'll see an empty state with a prompt to get started.

2. Create an add-on group
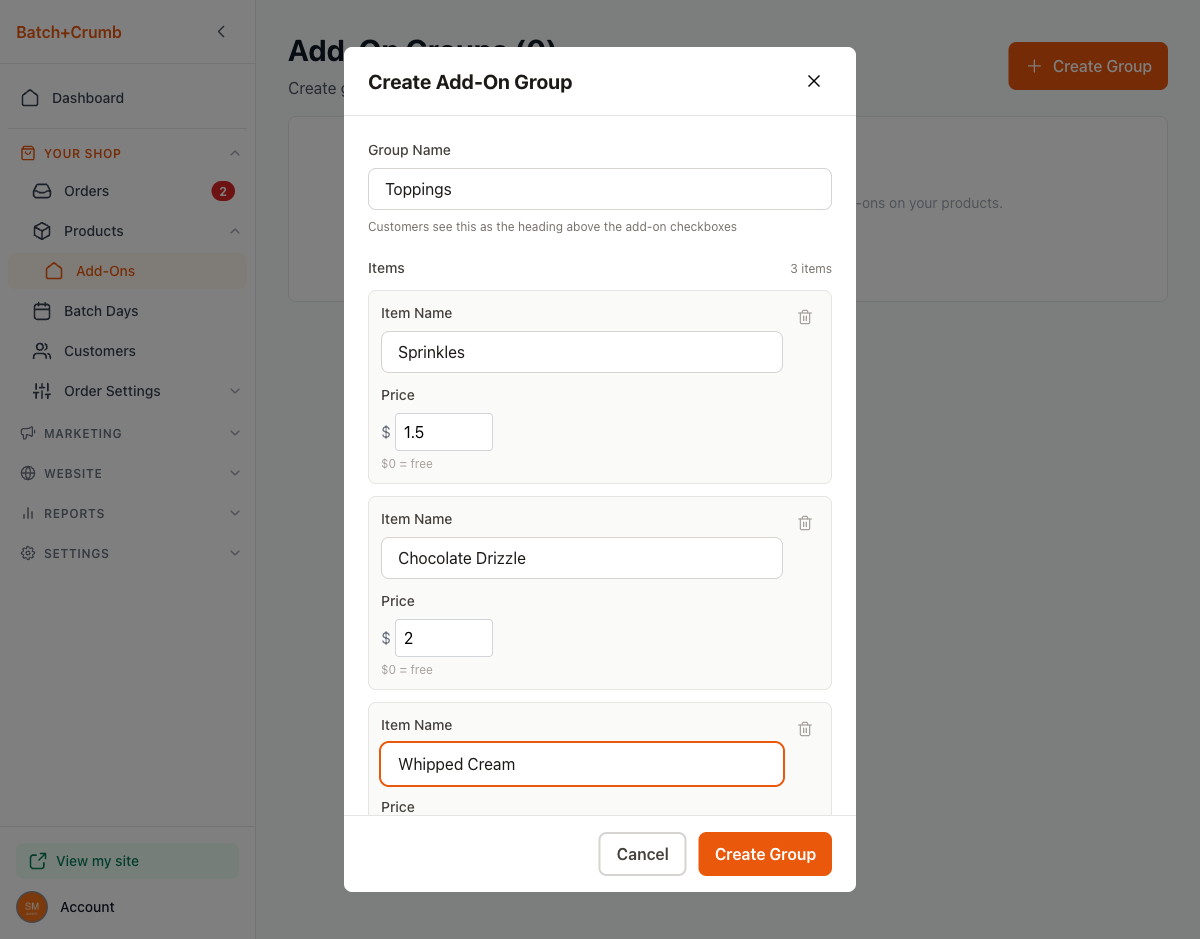
Click the + Create Group button in the top-right corner (or the "Create your first add-on group" link if you have no groups yet). A dialog will open with these fields:
- Group Name — This is the heading your customers will see above the checkboxes (e.g., "Toppings," "Extras," "Gift Options").
- Items — Each item has a name and a price. Set the price to $0 for free add-ons.
To add items to your group:
- Type the item name (e.g., "Sprinkles")
- Enter a price (e.g., "1.50") — or leave it at $0 for a free option
- Click Add Item to add another row
- Repeat for each add-on you want in the group
When you're happy with your group, click Create Group.
3. Manage your add-on groups
After creating a group, you'll see it listed in a table showing the Group Name, number of Items, and how many Products it's attached to.
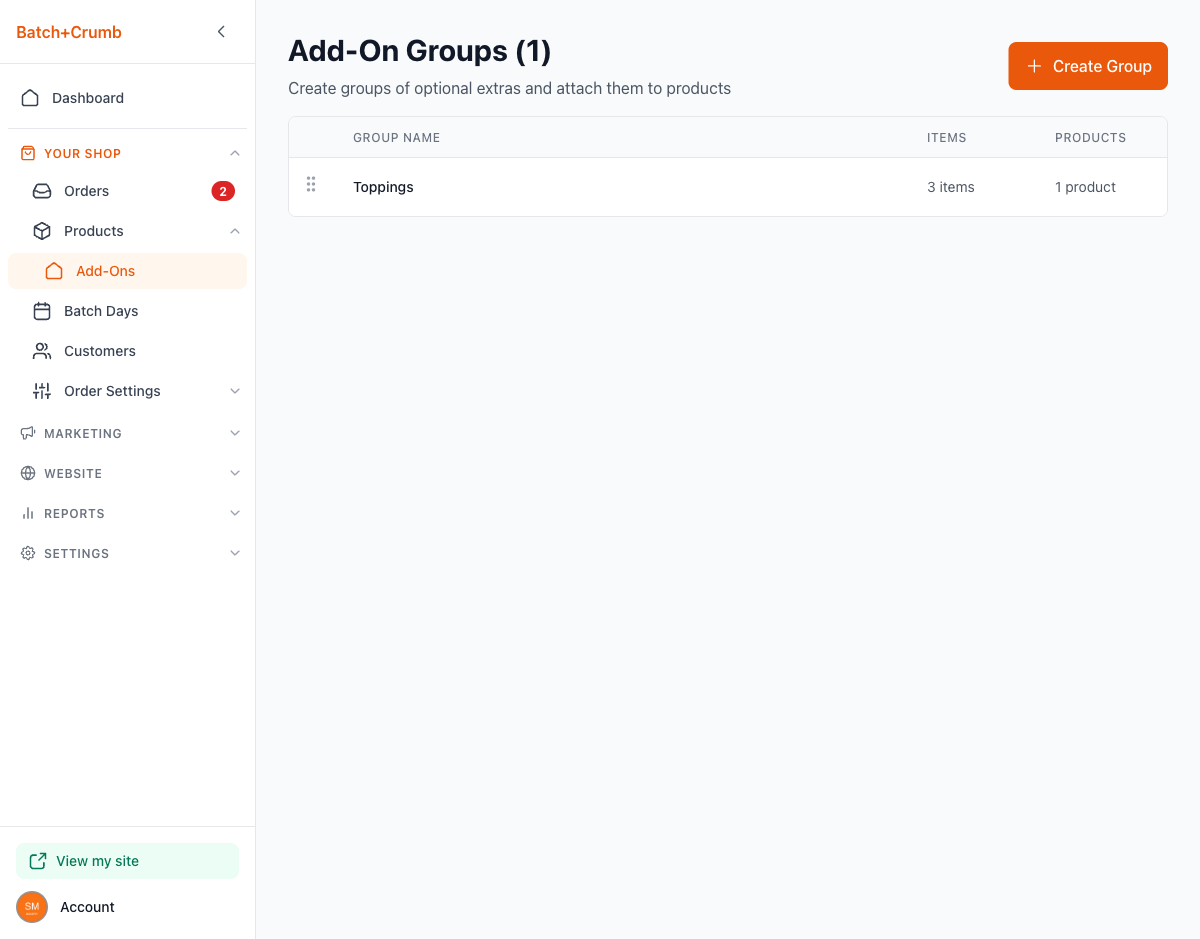
Click on any group to open the Edit Add-On Group dialog, where you can:
- Rename the group
- Add, edit, or remove items
- Adjust prices
- Delete the entire group with the Delete Group button

If you have multiple groups, you can drag them to reorder using the grip handle on the left side of each row.
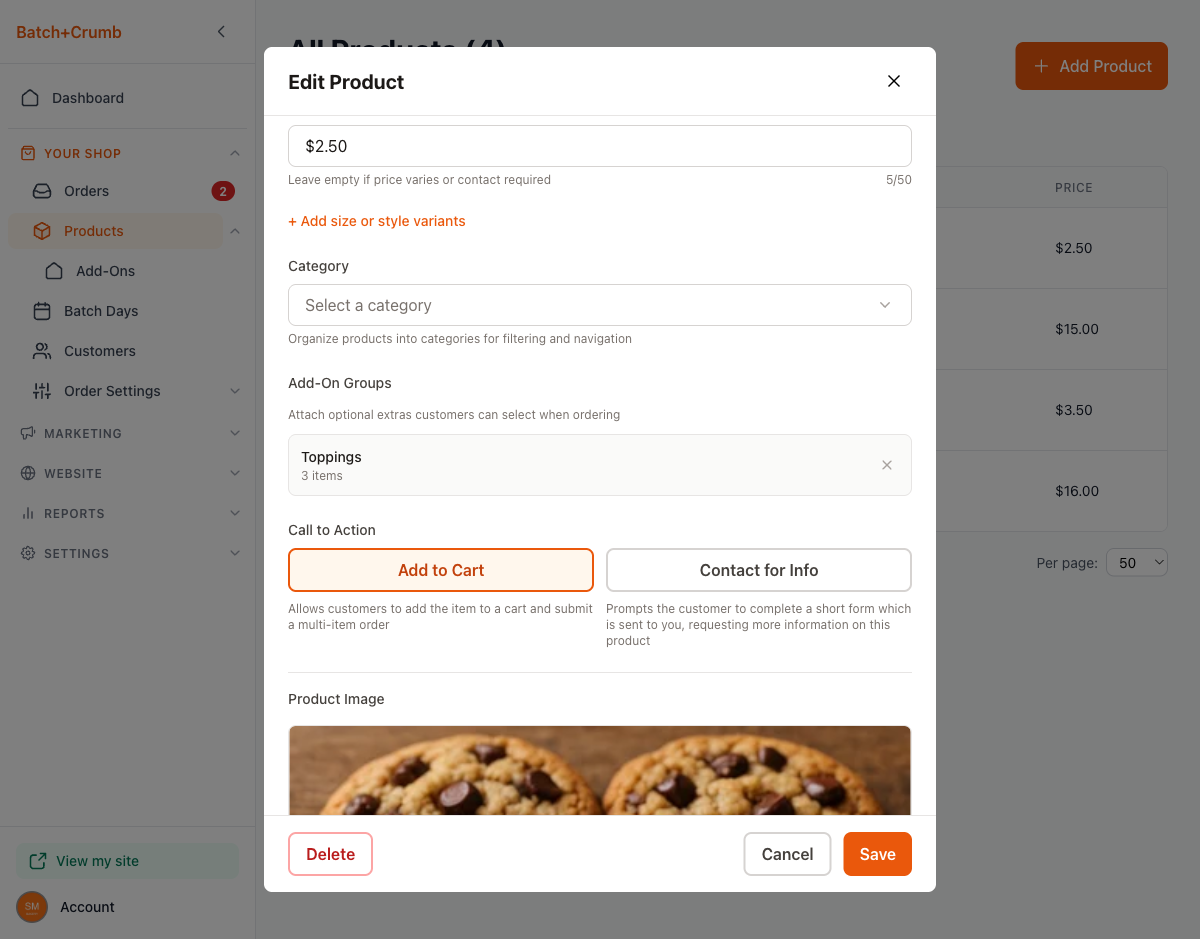
4. Attach an add-on group to a product
Now that your group is ready, you need to attach it to the products where you want it to appear.
- Go to Products in the sidebar
- Click on the product you want to edit
- In the Edit Product dialog, scroll down to the Add-On Groups section
- Use the dropdown to select a group (e.g., "Toppings (3 items)")
- Click Save
You can also click + Create New Group right from the product editor if you need a new group on the spot.
To remove a group from a product, click the ✕ button next to the group name, then save.
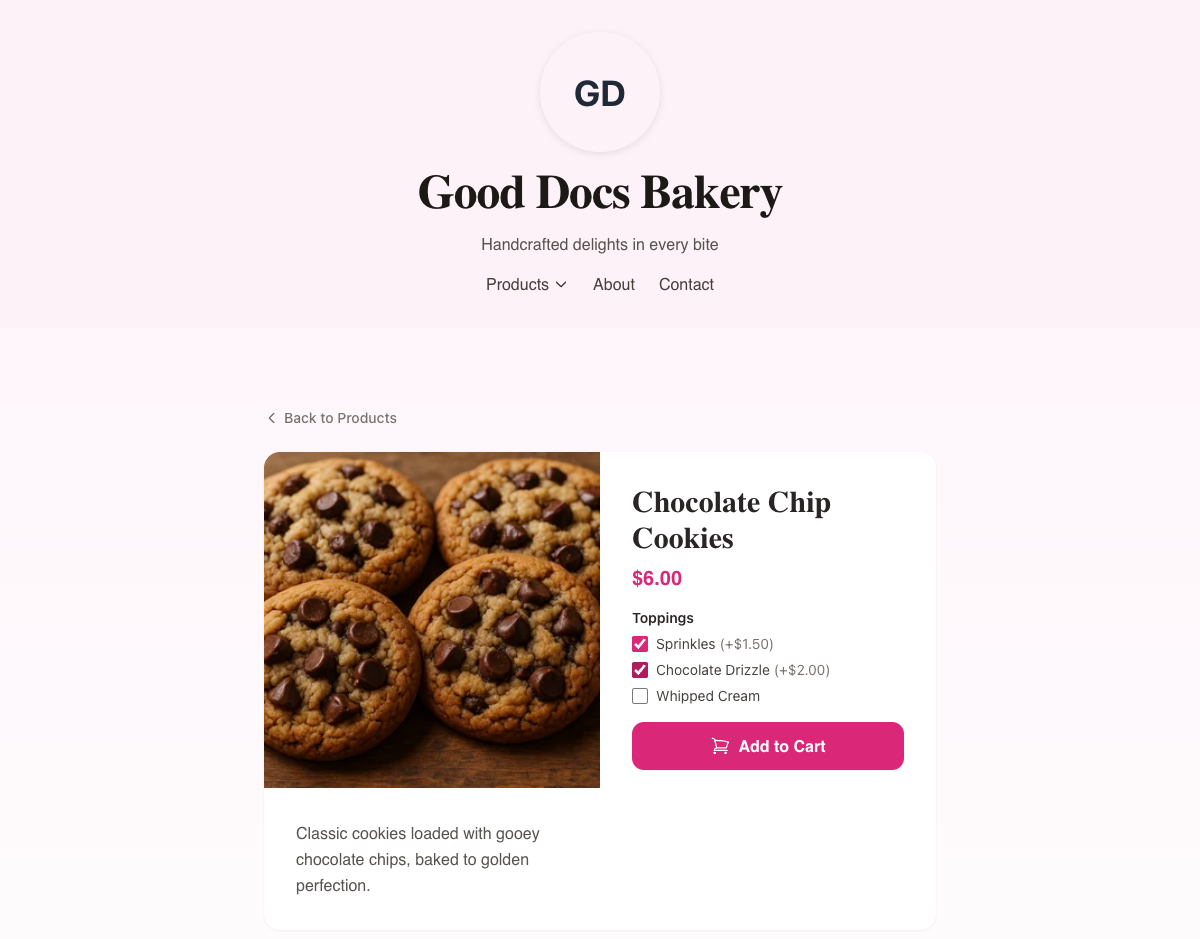
5. How add-ons look for your customers
When a customer visits a product with add-ons, they'll see checkboxes below the price with each add-on option. Paid add-ons show the extra cost in parentheses (e.g., "+$1.50"), while free add-ons just show the name.

As customers check add-ons, the price updates in real time so they always know the total before adding to cart.
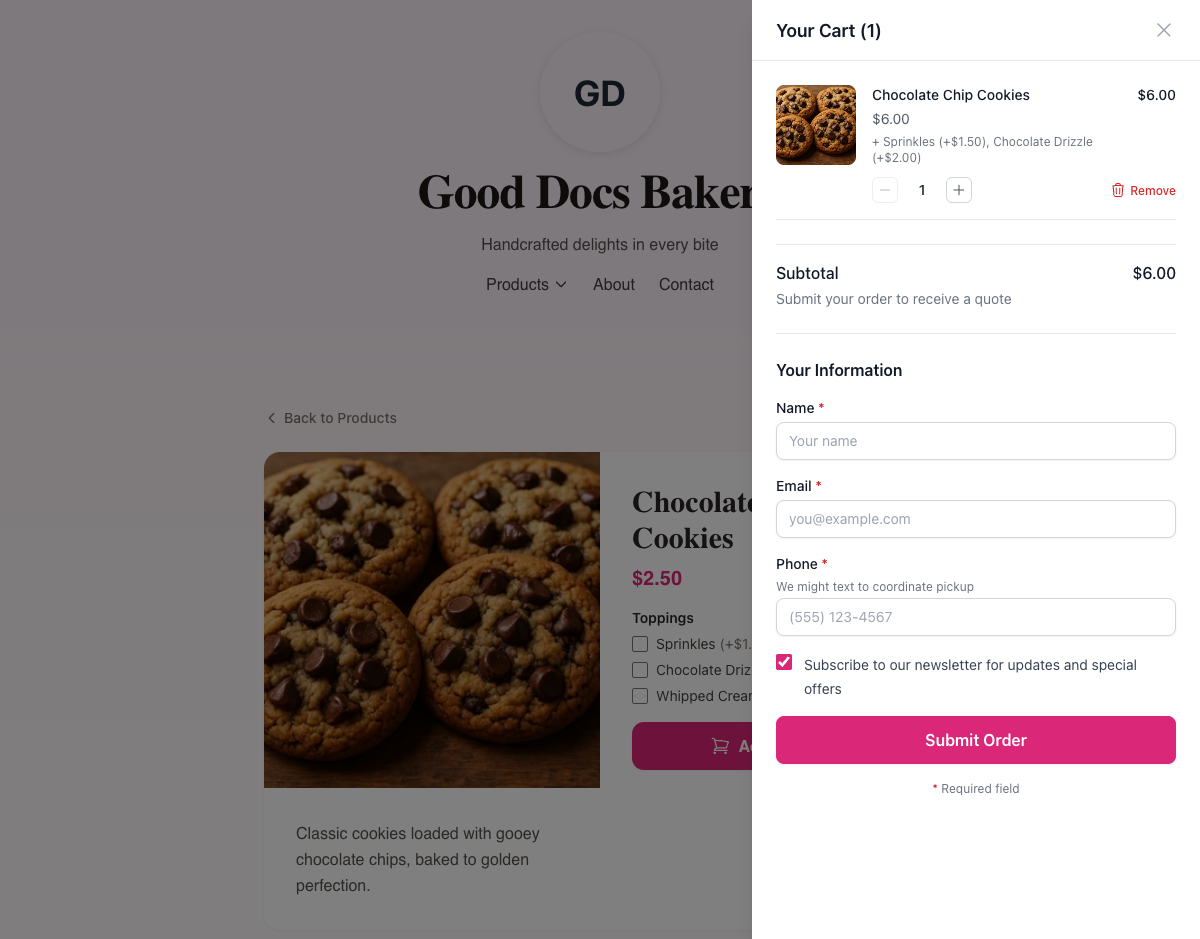
6. Add-ons in the cart and order
When a customer adds a product with add-ons to their cart, the selected extras appear listed beneath the product name along with their individual prices. The cart subtotal reflects the total including all add-ons.
Tips
- Reuse groups across products. Create a "Toppings" group once and attach it to every cookie, cupcake, or cake that offers toppings — no need to recreate the same items for each product.
- Free add-ons work great for customization. Set the price to $0 for options like "No nuts" or "Extra napkins" that don't cost extra but help you know what the customer wants.
- Keep group names short and clear. Your customers see the group name as a heading on the product page, so "Toppings" works better than "Optional Topping Selections Available."
- You can attach multiple groups to one product. For example, a cake could have both a "Frosting" group and a "Toppings" group.