Email Capture
Grow your subscriber list by showing an email signup on your public storefront, so you can reach customers with restock alerts, specials, and events.
Pro plan feature — Upgrade to Pro to access this feature.
Direct link: /site/admin/web-settings/email-capture
Grow your subscriber list by showing an email signup on your public storefront, so you can reach customers with restock alerts, specials, and events.
Overview
Your best customers want to know when the next batch drops. Email Capture adds a friendly signup prompt to your shop — either a slim banner along the bottom of the page or a centered popup — so visitors can join your list in one tap. You control the wording, the look, and when it shows up, all from one page.
Steps
1. Go to Email Capture
From your admin dashboard, click Website in the left sidebar, then expand Website Settings and click Email Capture.
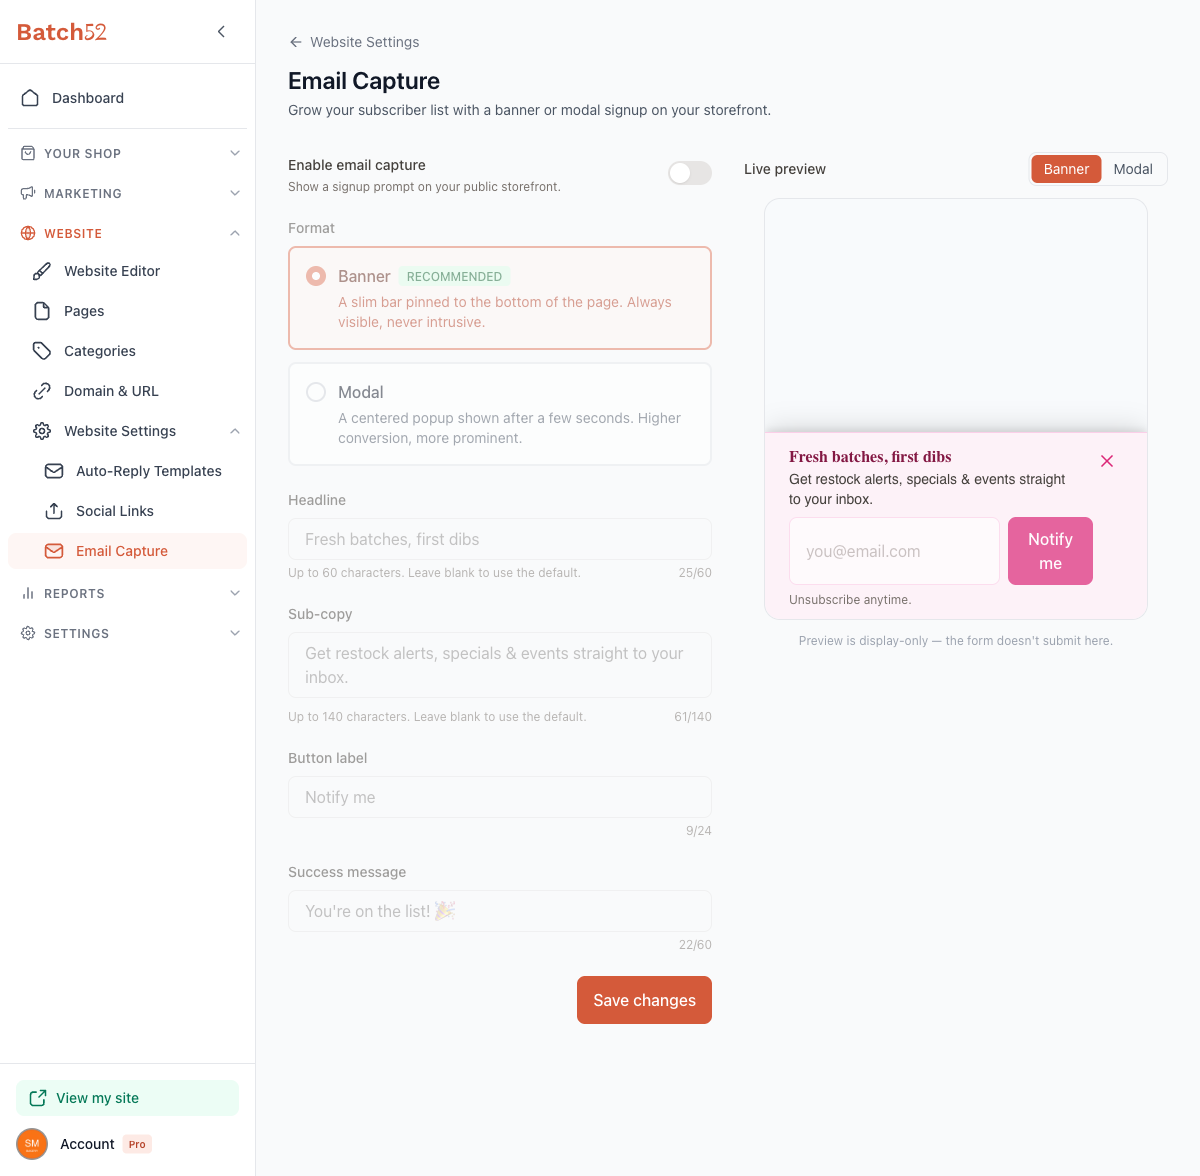
When email capture is turned off, the settings below are dimmed and can't be edited yet — the page is ready and waiting for you to switch it on.
2. Turn on email capture
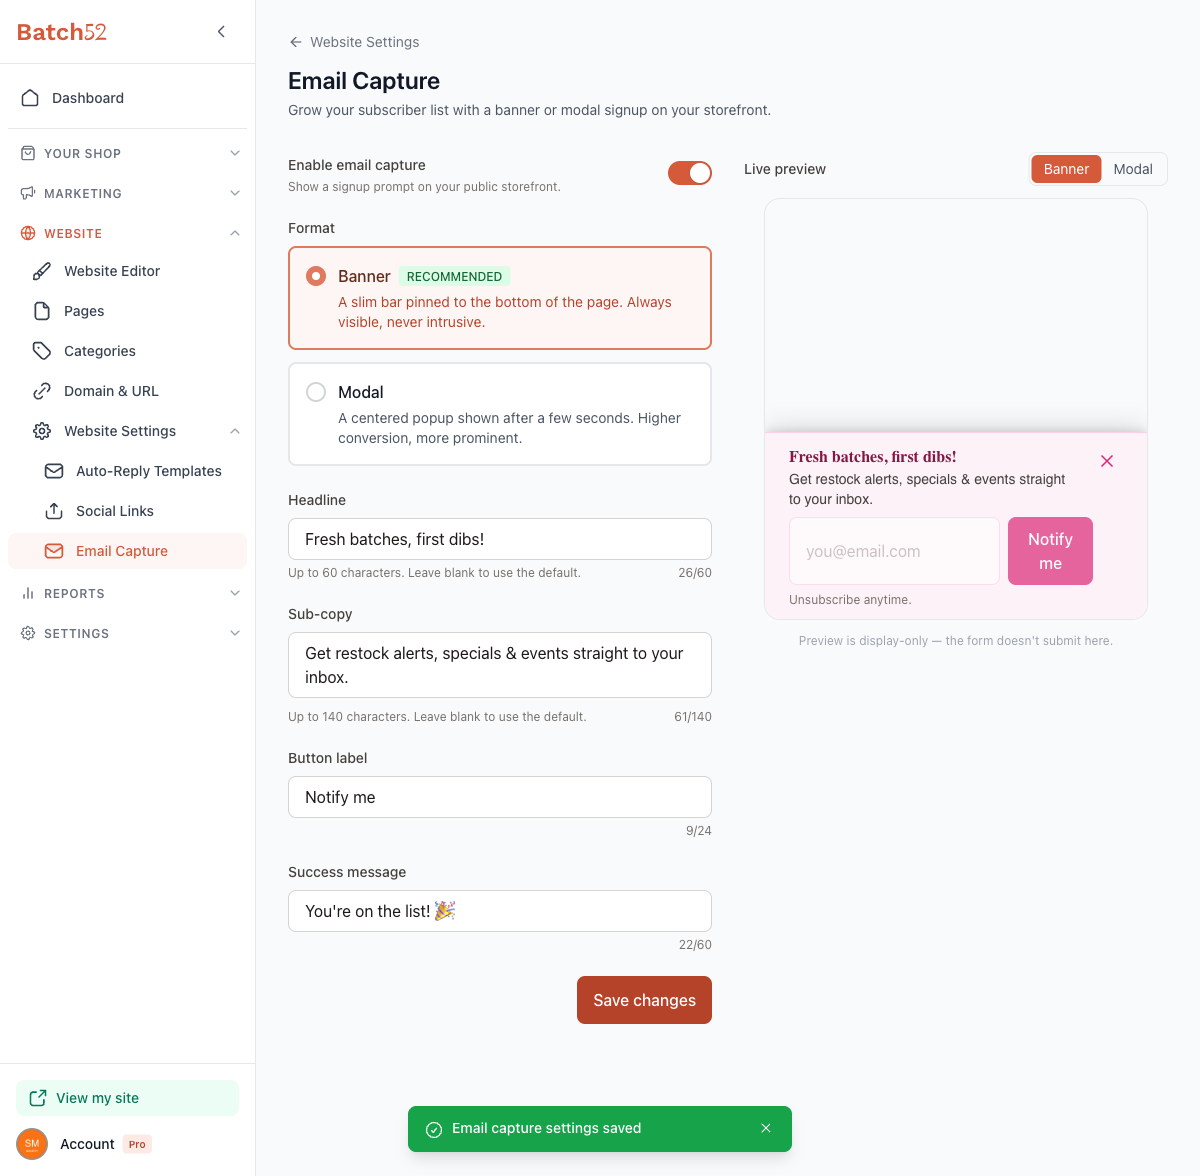
Flip the Enable email capture toggle at the top of the page. This is what actually shows the signup prompt on your public storefront. Once it's on, all the settings below become editable and the Live preview on the right comes to life.
3. Choose a format
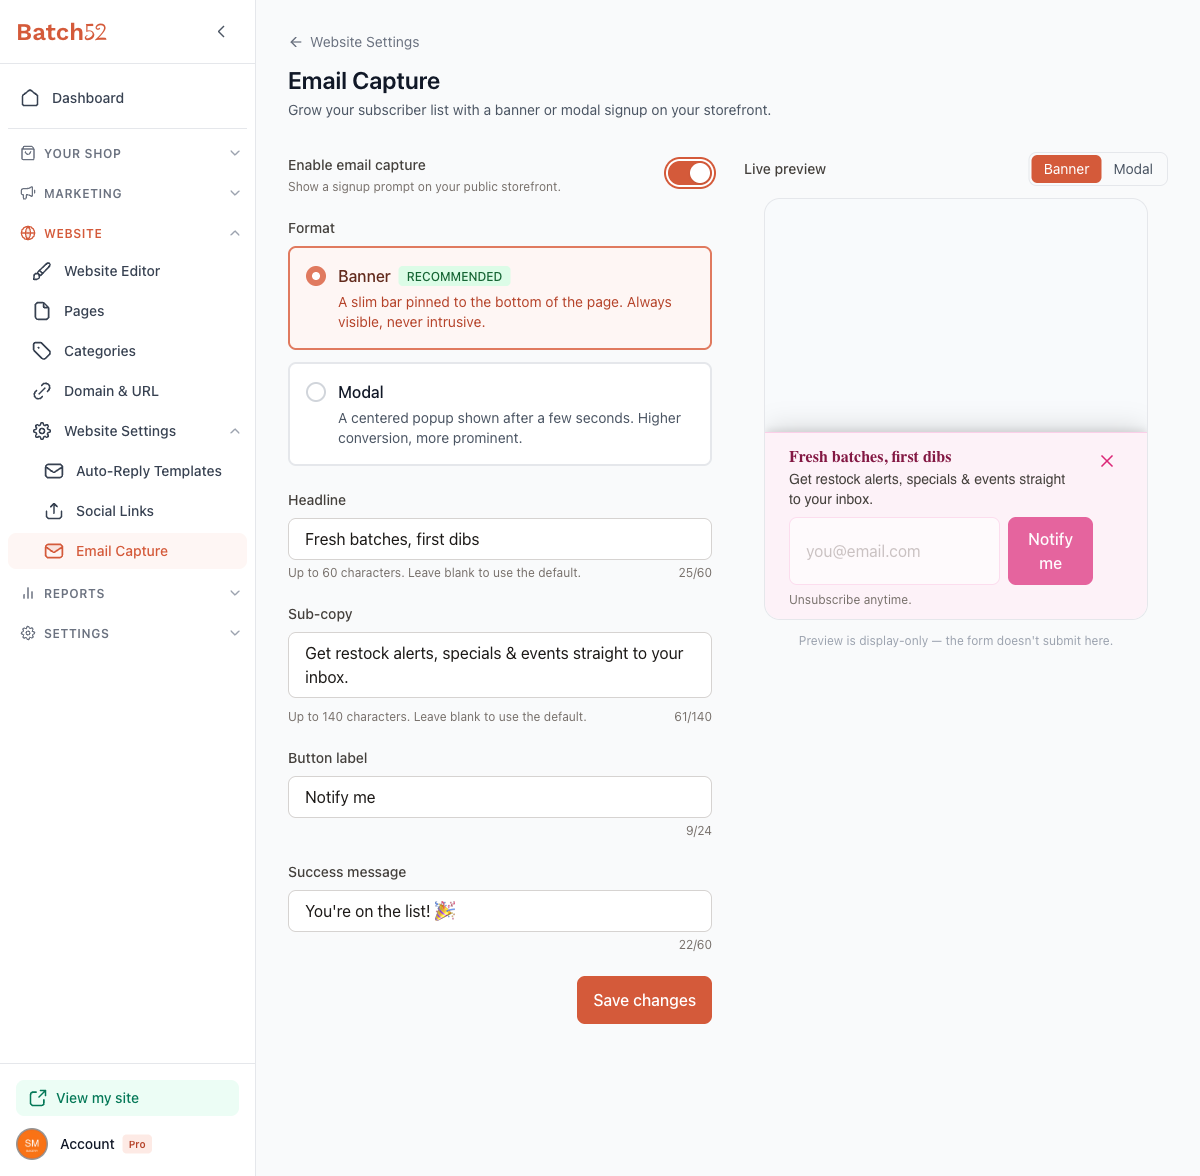
Under Format, pick how your signup prompt appears:
- Banner (Recommended) — A slim bar pinned to the bottom of the page. Always visible, never intrusive.
- Modal — A centered popup shown after a few seconds. Higher conversion, more prominent.
Banner is the recommended choice for most bakers because it stays out of the way while customers browse your products. Modal grabs more attention if you'd rather your signup take center stage.
4. Customize the wording
You can tailor every piece of text in the signup prompt. Each field has a character limit and a sensible default — leave a field blank to use its default.
- Headline — the bold, attention-grabbing line (up to 60 characters). Default: Fresh batches, first dibs
- Sub-copy — the supporting sentence beneath the headline (up to 140 characters). Default: Get restock alerts, specials & events straight to your inbox.
- Button label — the text on the signup button (up to 24 characters). Default: Notify me
- Success message — what customers see after they sign up (up to 60 characters). Default: You're on the list! 🎉
A live character counter under each field (for example, 25/60) helps you stay within the limit as you type.
5. Check the Live preview
On the right side of the page, the Live preview shows exactly how your signup will look, updating as you type. Use the Banner / Modal switch above the preview to see both styles without changing your saved settings.
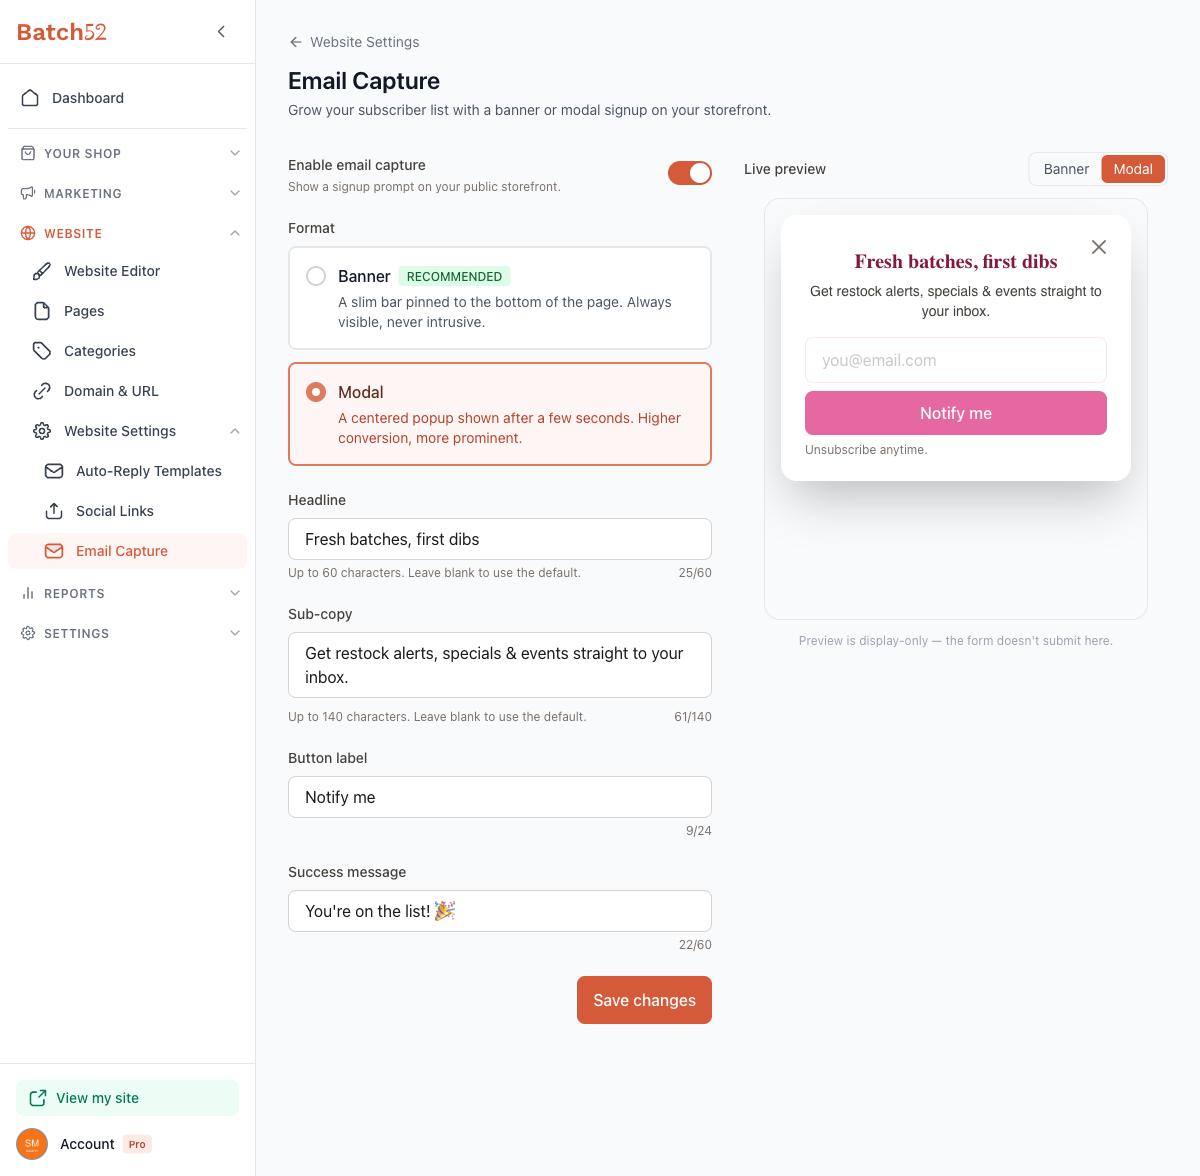
The preview is display-only — the form doesn't actually submit here, so feel free to experiment.
6. Save your changes
When everything looks right, click Save changes. A green Email capture settings saved confirmation appears at the bottom of the screen, and your signup prompt goes live on your storefront right away.
Tips
- Stick with the Banner format to start — it's the least disruptive and keeps customers focused on your products while still inviting them to subscribe.
- Not sure what to write? Leave any field blank and Batch52 fills in a friendly default for you.
- Keep your headline short and punchy — the character counter turns this into a quick gut-check as you type.
- Use the Banner / Modal switch in the Live preview to compare both looks before you decide, then set the actual format in the Format section.
- Customers who sign up can unsubscribe anytime, so there's no pressure — the prompt even says so.