Placing an Order
A step-by-step walkthrough of what your customers experience when they place an order through your Batch52 site.
A step-by-step walkthrough of what your customers experience when they place an order through your Batch52 site.
Overview
When customers find something they love on your site, placing an order is quick and easy. They add items to their cart, fill in their contact details, and submit — no account creation needed. Here's exactly what the process looks like from their side.
Steps
1. Browse and add items to the cart
Customers can add products to their cart from the homepage product grid, the All Products page, or individual product detail pages. Each product with an Add to Cart button can be added with a single tap.
A floating cart icon appears in the bottom-right corner of the page. The number on the icon updates each time they add something.
2. Review the cart
Tapping the cart icon opens the cart drawer from the right side of the screen. Here customers can:
- See their items — Each item shows the product photo, name, unit price, and line total.
- Adjust quantities — Use the + and - buttons to change how many of each item they want.
- Remove items — Tap the red Remove button to take something out.
- Check the subtotal — The total updates automatically as quantities change.
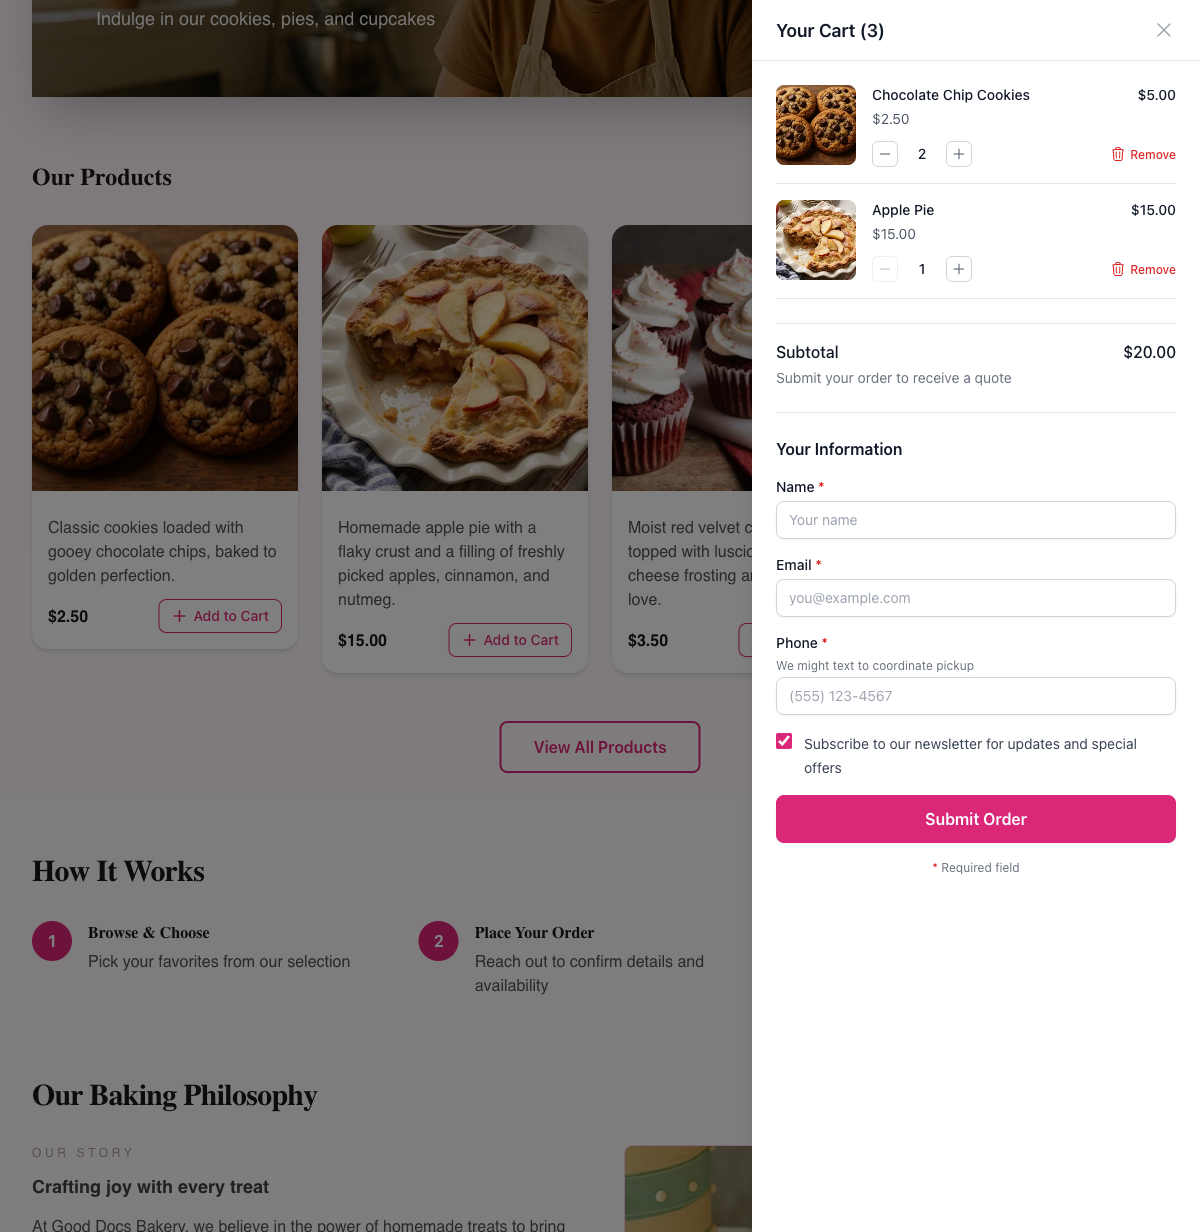
A note below the subtotal says "Submit your order to receive a quote" — letting customers know the baker will follow up with final pricing and payment details.
3. Fill in contact details
Below the cart items, there's a Your Information section with the following fields:
- Name (required)
- Email (required)
- Phone (required) — with a note: "We might text to coordinate pickup"
- Subscribe to our newsletter — A checkbox (checked by default) that lets customers opt in to email updates
All three fields are required. The phone number must be a 10-digit US number with a valid area code (for example, 2125551234).

4. Submit the order
Once everything looks good, the customer taps Submit Order. The cart drawer updates to show a confirmation screen with:
- A green checkmark and "Order Submitted Successfully!" message
- The order number (for example, #O-260215-0001)
- An itemized summary with quantities and prices
- A "Thank you for your order!" message explaining that a confirmation email is on its way and someone from the bakery will reach out to coordinate payment and pickup
- A What's Next? checklist with three steps: check email, coordinate payment, and arrange pickup
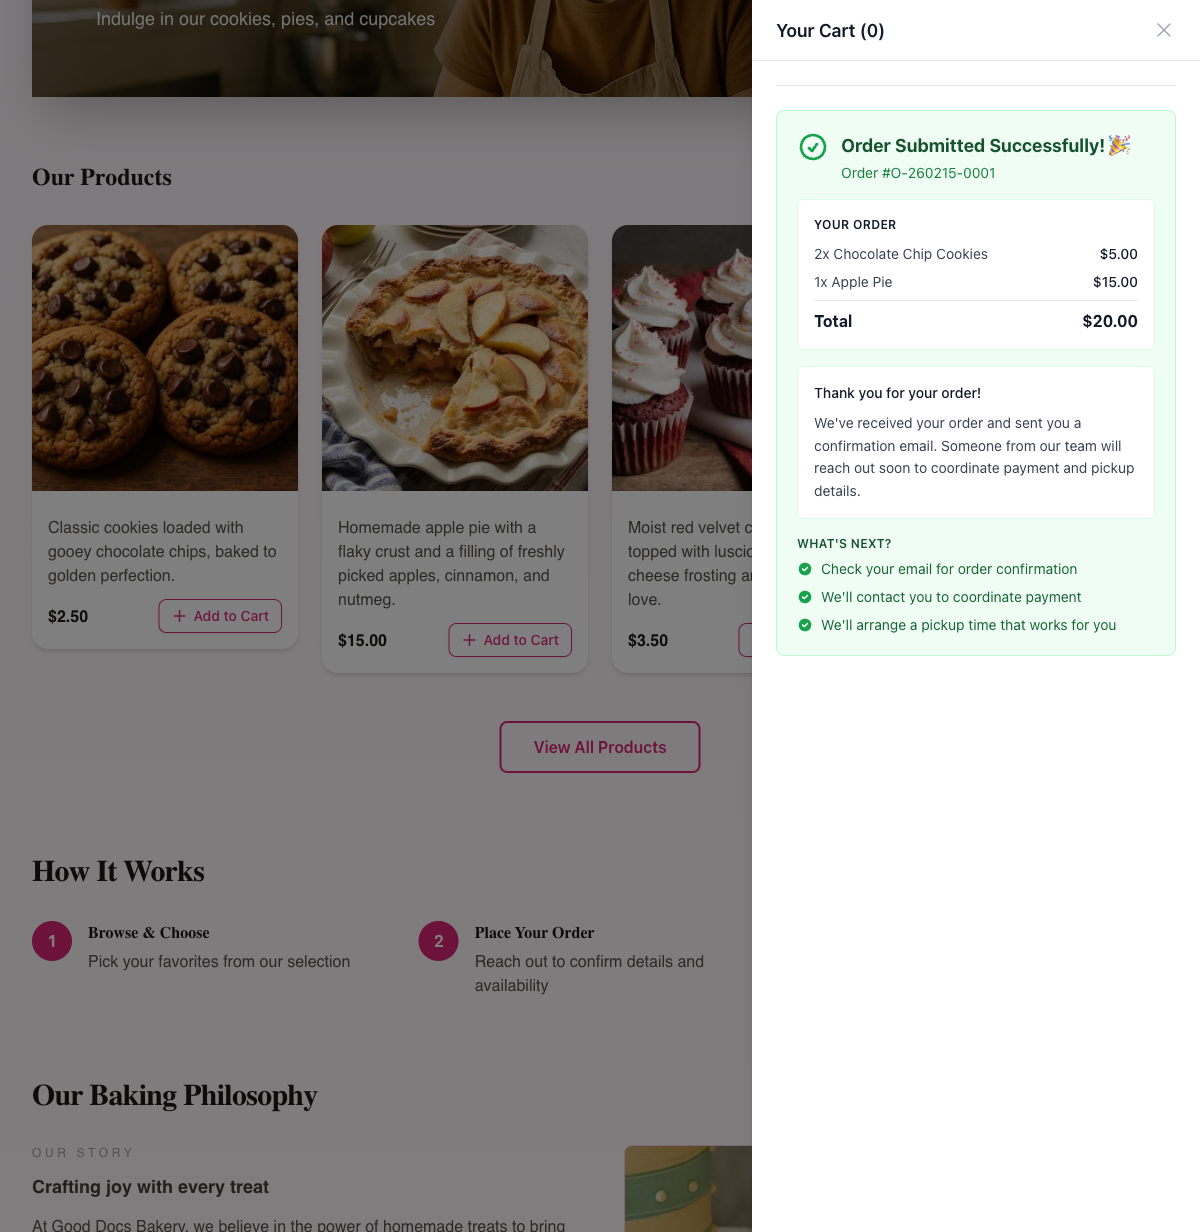
The cart empties automatically after a successful order.
5. Check for the confirmation email
Right after submitting, the customer receives an Order Confirmation email from your bakery. The email includes:
- A personal greeting using their name
- A note that you'll reach out to arrange payment and pickup
- A table listing each item with quantity, unit price, and line total
- The order total
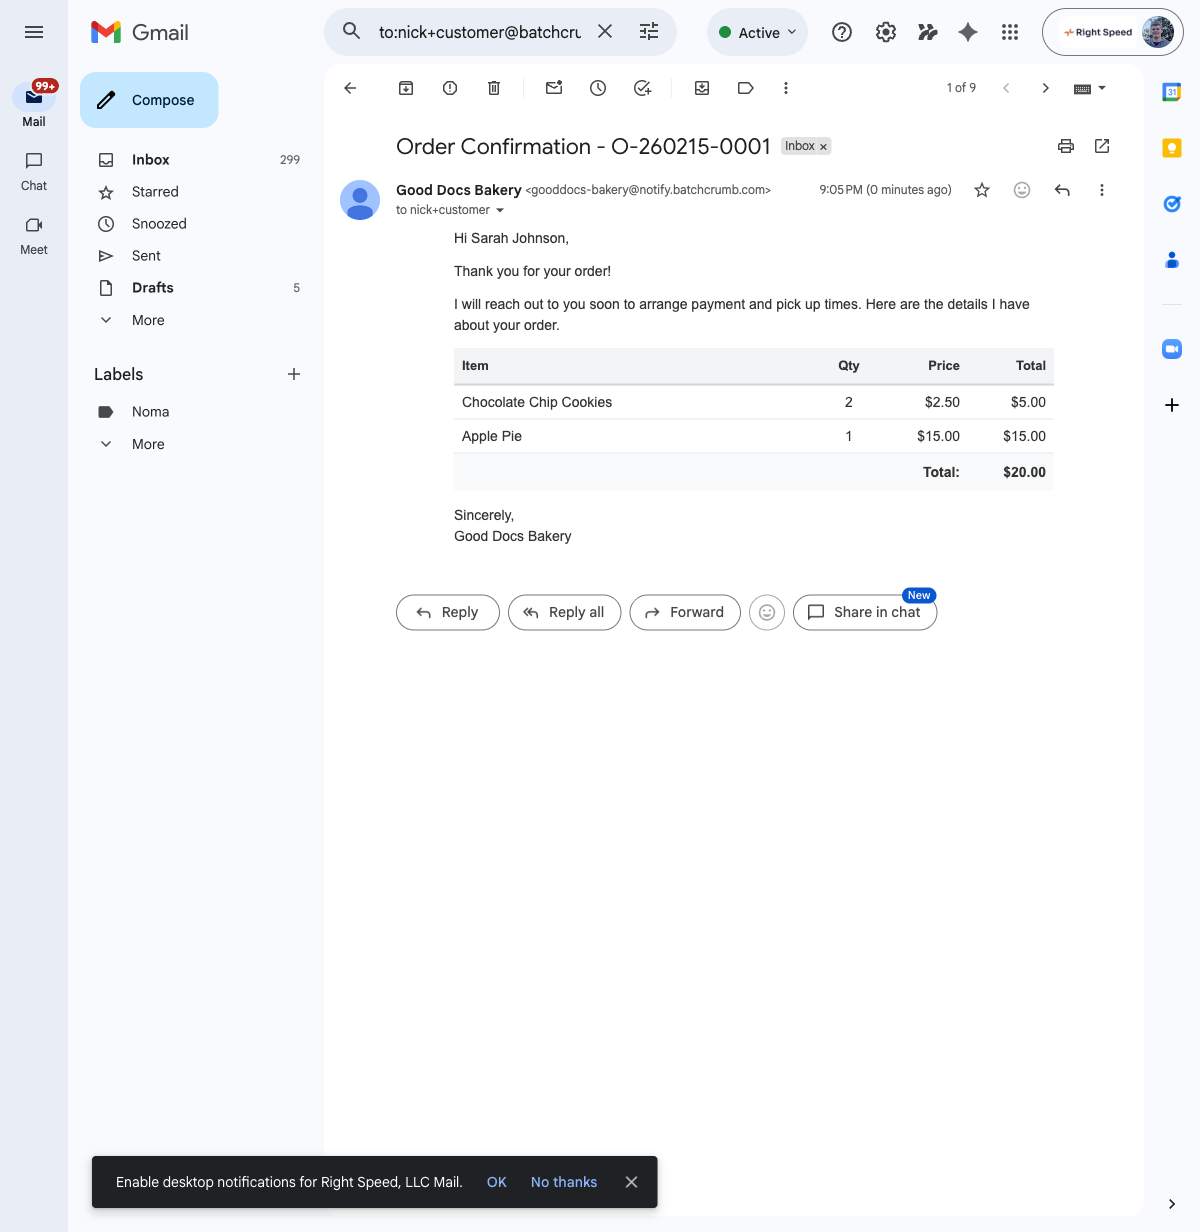
You (the baker) also receive a notification email with the customer's contact info and order details so you can follow up.
Tips
- Customers don't need to create an account to place an order — it's designed to be as quick as possible.
- The confirmation email is sent automatically. You can customize what it says from Order Settings > Order Messages.
- If a product has a Contact for Info button instead of Add to Cart, it can't be added to the cart. Those products use the inquiry flow instead.
- The newsletter checkbox is checked by default, so customers who don't uncheck it will be added to your subscriber list for announcements.
- Your checkout settings (like whether to collect a preferred pickup date) can be configured from Order Settings > Checkout Settings. The fields customers see may vary depending on your setup.