Create QR Codes
Print a QR code once, and change where it sends people whenever you like — even after it's on a hundred flyers.
Included in all plans
Direct link: /site/admin/qr-codes
Print a QR code once, and change where it sends people whenever you like — even after it's on a hundred flyers.
Overview
A QR code is the little square that people point their phone camera at to open a link. Batch52 makes you one automatically, and the clever part is that it's never "stuck" pointing anywhere. Put a code on your farmers market table tent in March pointing at your homepage, then in November repoint the same printed card at your holiday cookie menu. Nothing to reprint.
On Pro, you can also make up to 50 extra codes, send each one somewhere different (a product, a category, your Instagram), and see how many times each one has been scanned — so you know whether the sign at the coffee shop or the card in your order boxes is the one actually bringing people in.
Steps
1. Open the QR Codes page
In your admin sidebar, go to Marketing → QR Codes. Your default code is already waiting for you — it's named My website, points at your Homepage, and is tagged Default. You never have to create it.
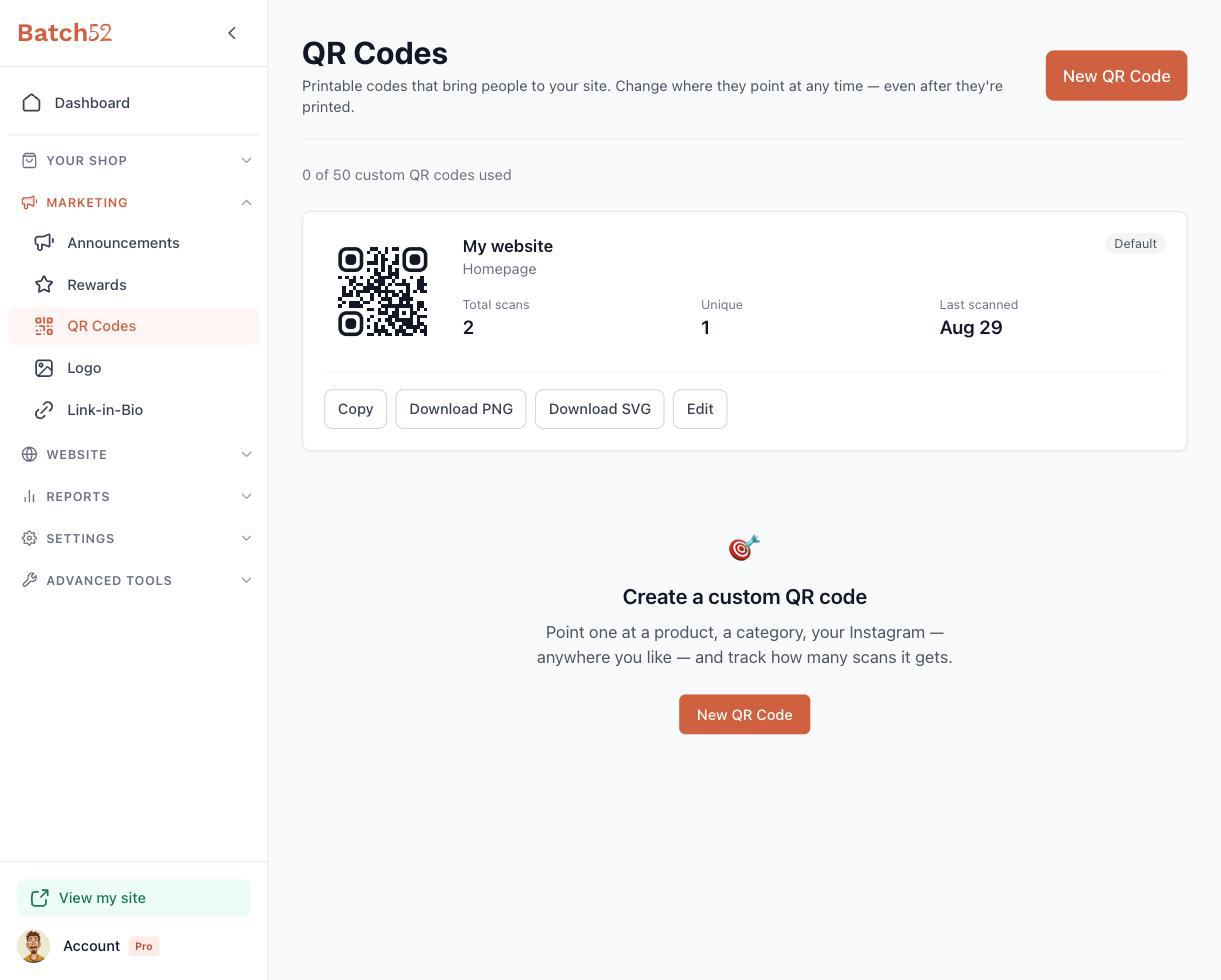
Every code card has the same row of buttons:
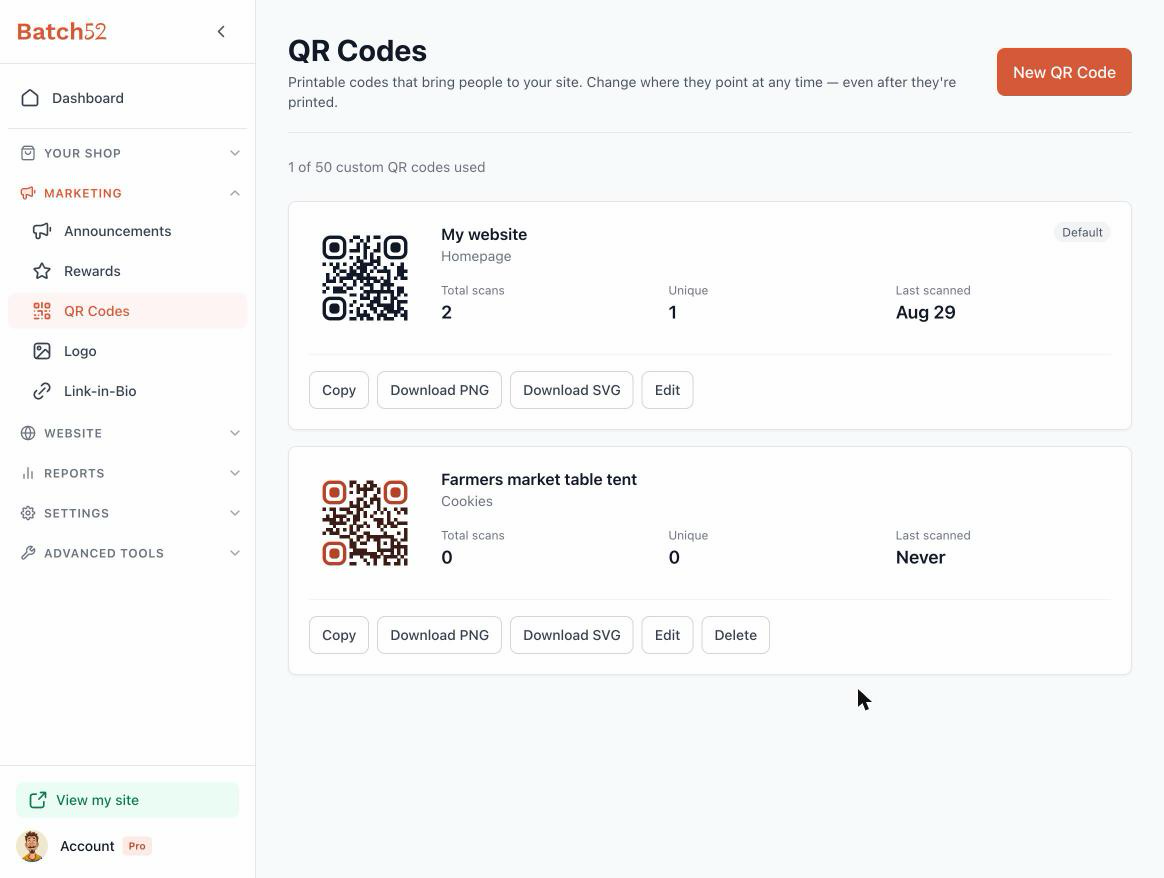
- Copy — copies the QR code as an image so you can paste it straight into Canva, a text message, or an Instagram story. (If your browser can't copy images, it copies the link instead.) You'll see a "QR code copied" confirmation.
- Download PNG — the file to use for almost everything: flyers you print at home, social posts, Canva designs.
- Download SVG — the file to hand a print shop. A PNG is made of pixels, so it gets fuzzy if you blow it up big; an SVG is made of shapes, so it stays crisp on a banner or a window decal at any size.
- Edit — change the name, destination, or color (see below).
- Delete — custom codes only. The default code can't be deleted.
2. Pick a color
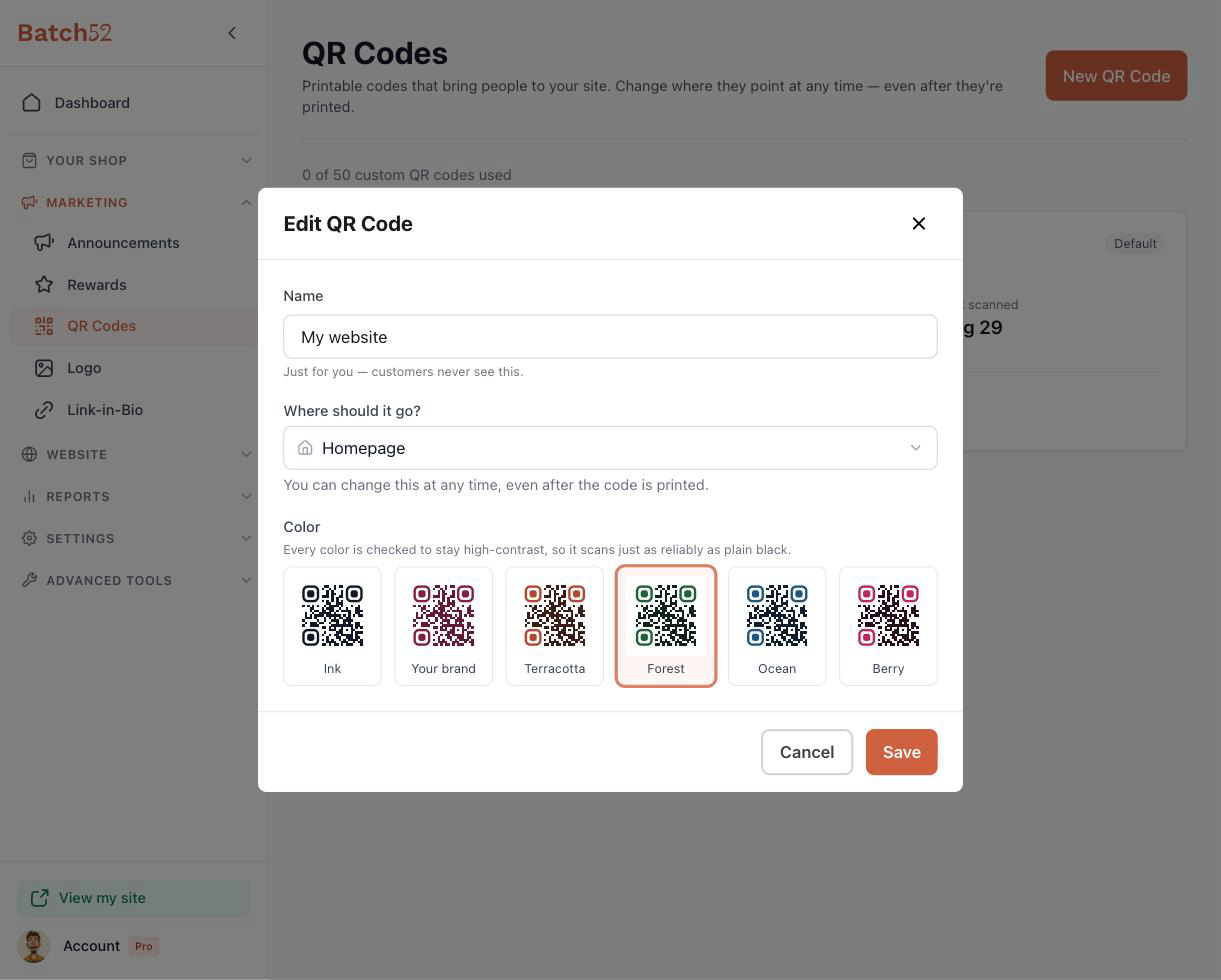
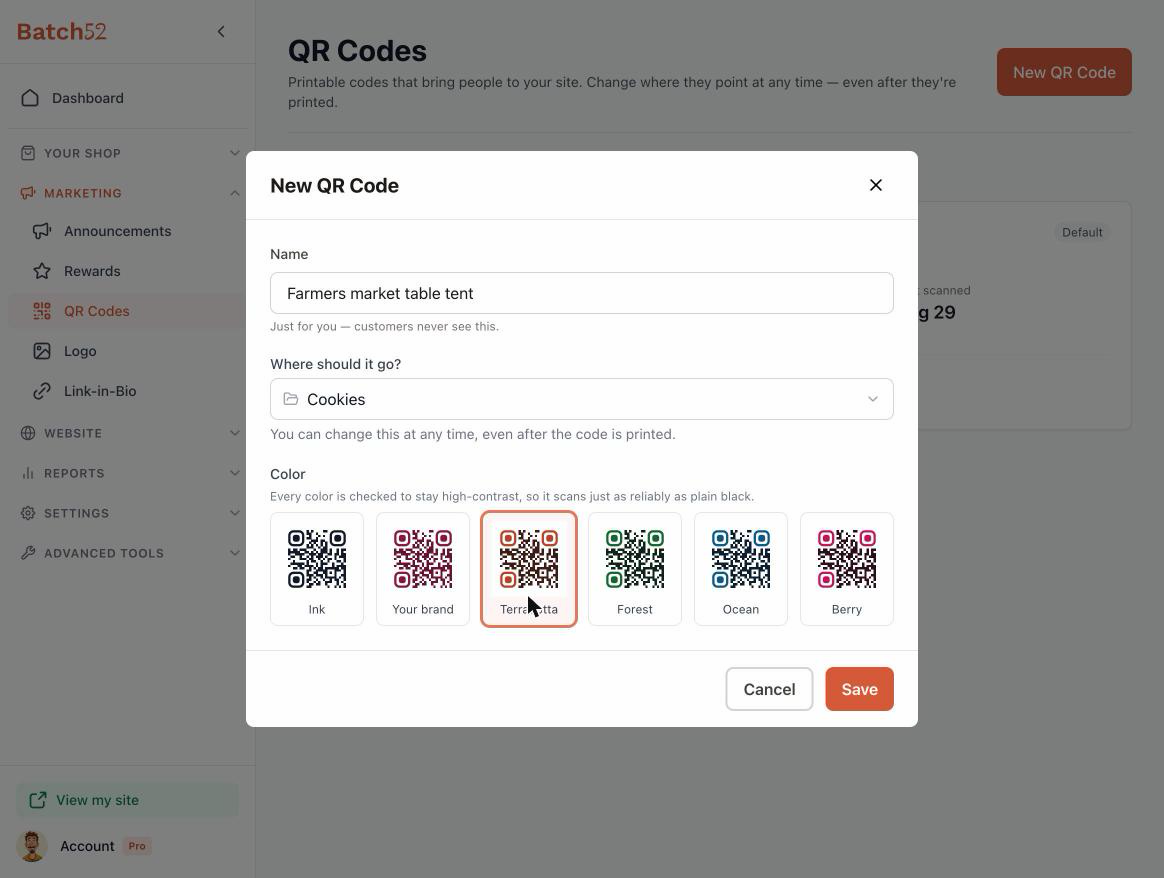
Click Edit on a card. The Edit QR Code window has a Color section with six tiles. Each tile is a live preview of your actual code, so what you see is exactly what you'll download.
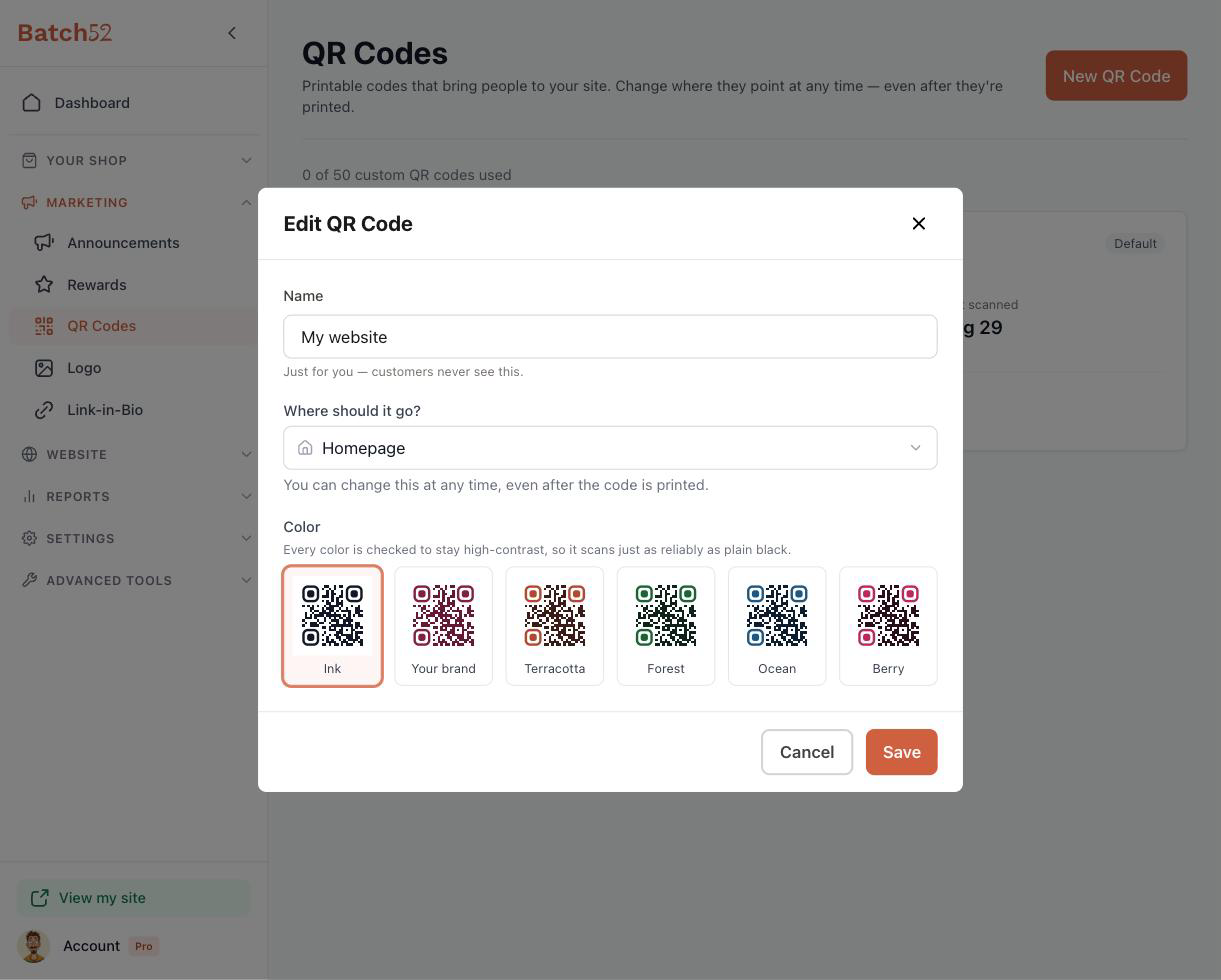
The six options are Ink (classic near-black), Your brand (tinted with your site's own color), Terracotta, Forest, Ocean, and Berry. The fine dots stay dark and the three big corner squares — the "eyes" — carry the color.
Two things worth knowing:
- You can't pick a color that breaks scanning. As the page says, "Every color is checked to stay high-contrast, so it scans just as reliably as plain black." That's why there's no free-form color picker — every choice here is a safe one.
- "Your brand" only shows up if your site has a color palette. If you've never customized your site's look, that tile won't be there. Set one up in Edit Site Appearance and it appears.
Click Save when you're happy.
3. Create a custom code (Pro)
Click New QR Code (top right, or in the "Create a custom QR code" box below your cards). The counter under the page title tells you how many you've used — "0 of 50 custom QR codes used" to start.
- Name — this is just for you; customers never see it. Name it after where it will live: "Farmers market table tent," "Order box insert," "Coffee shop counter."
- Where should it go? — the destination. The list is grouped into Quick Links (Homepage, All Products), your Categories and Pages (when your site has any), and a Custom URL box for anything else, like your Instagram profile.
- Color — same six tiles as above.
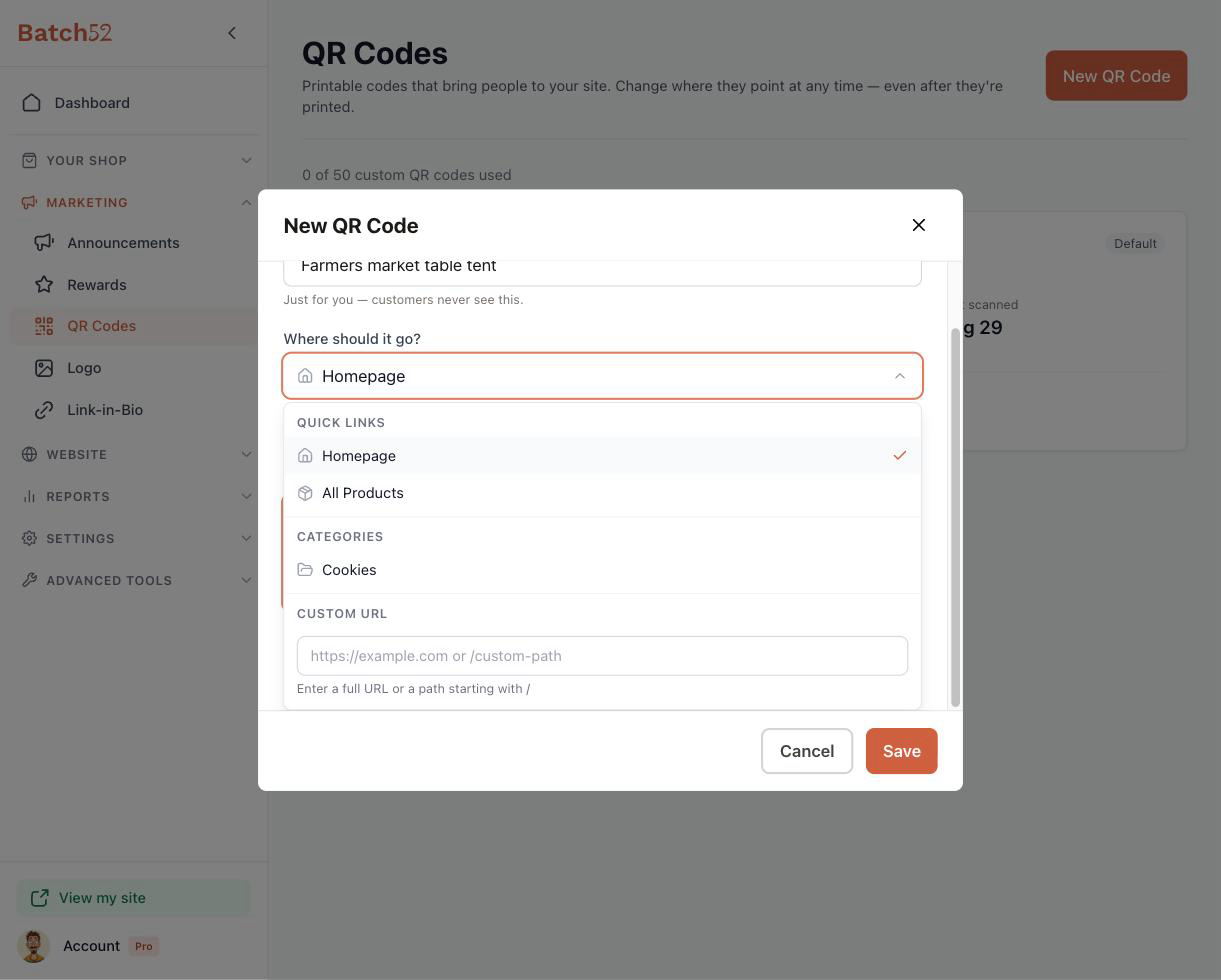
Here's one named "Farmers market table tent," pointed at the Cookies category, in Terracotta:
Click Save and the new card appears under your default one.
4. Change where a code points (Pro)
Click Edit on any card, pick a new destination under Where should it go?, and Save. Everything already printed with that code now sends people to the new spot — the note under the picker says it plainly: "You can change this at any time, even after the code is printed."
5. Watch your scan stats (Pro)
Each card shows Total scans, Unique (how many different people, roughly), and Last scanned. A brand-new code shows 0, 0, and Never until someone scans it.
6. Delete a code you no longer need (Pro)
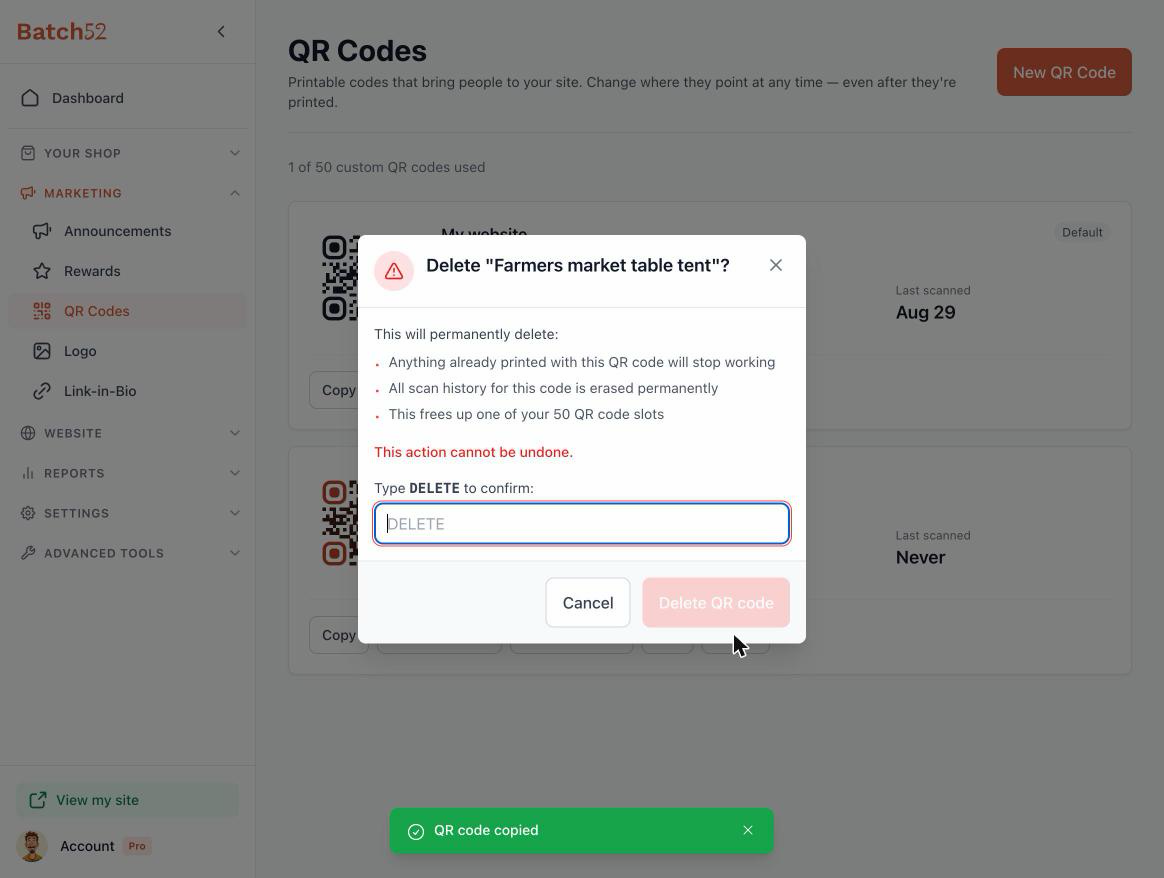
Click Delete on a custom code. Batch52 makes very sure you mean it: the dialog warns that anything already printed with the code will stop working and that all of its scan history is erased permanently. You have to type DELETE to enable the Delete QR code button.
If a code is on something still out in the world, don't delete it — just Edit it and point it somewhere useful instead.
On the Standard plan
You still get the default homepage code with Copy, Download PNG, and Download SVG — downloading your own code is never locked. The differences:
- The card's button reads Change color instead of Edit — you can pick any of the six colors, but the name and destination stay put.
- Scan stats are blurred behind a lock, with a "Pro Plan Feature" card offering "Get 50 custom QR codes with full tracking."
- There's no New QR Code button.
Tips for printing
- Print it big enough. About an inch across is the practical minimum for a phone to catch it from arm's length. Bigger is always fine.
- Leave breathing room. The code needs a clear margin all the way around. Don't crop it tight or run text right up against the edge.
- Don't recolor it or put it on a busy background. The file you download is already set up to scan. Dark backgrounds, patterns, and re-tinting it in Canva are the usual reasons codes stop working.
- Test with your own phone before you print 100. Point your camera at the printed proof and make sure it opens the right page.
- One code per place (Pro). A separate code for the table tent, the order-box card, and the coffee shop counter means the scan counts tell you which spot is actually working.
- PNG for you, SVG for the print shop. If someone asks for a "vector" file, that's the SVG.